k8s-kubernetes-configmap
本文深入探讨Kubernetes ConfigMap的创建与使用,包括四种创建方式:字符串、env文件、目录和定义文件。并详细讲解了ConfigMap在Pod中的三种应用方式:作为环境变量、command参数和volume挂载。
k8s-kubernetes-configmap
文章信息
- 原文链接:https://jiayq.blog.csdn.net/article/details/102786860
- 发布时间:2019-10-28 19:17:29
- 阅读量:573
- 分类:kubenetes专栏收录该内容, 订阅专栏
- 标签:#k8s, #kubernetes, #configMap, #统一配置, #pod内如何使用configMap
摘要
文章浏览阅读573次。本文深入探讨Kubernetes ConfigMap的创建与使用,包括四种创建方式:字符串、env文件、目录和定义文件。并详细讲解了ConfigMap在Pod中的三种应用方式:作为环境变量、command参数和volume挂载。
k8s-kubernetes-configmap
- 1.configmap
- 2.configmap创建
- 2.1 key-value字符串创建
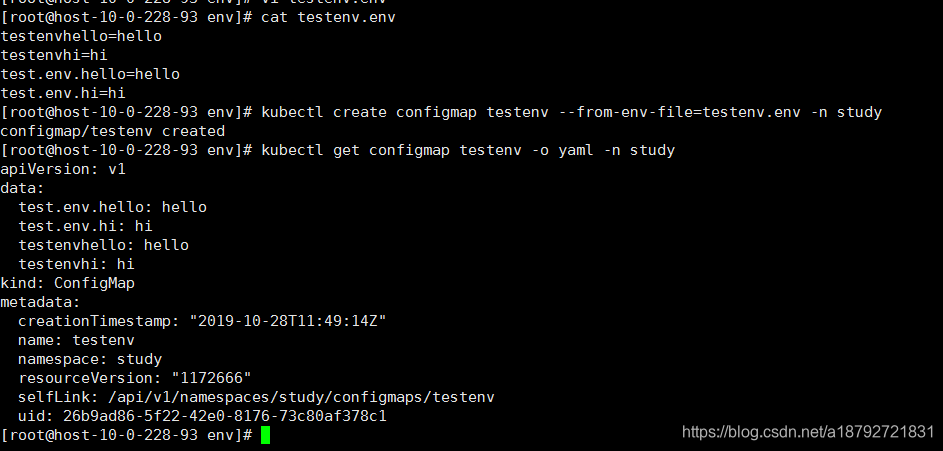
- 2.2 env文件创建
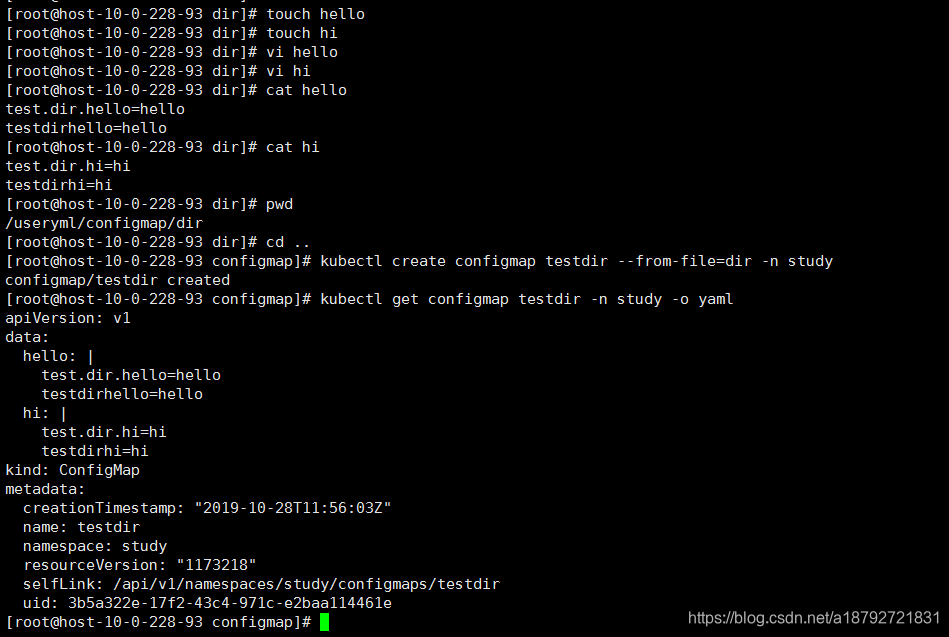
- 2.3 从目录创建
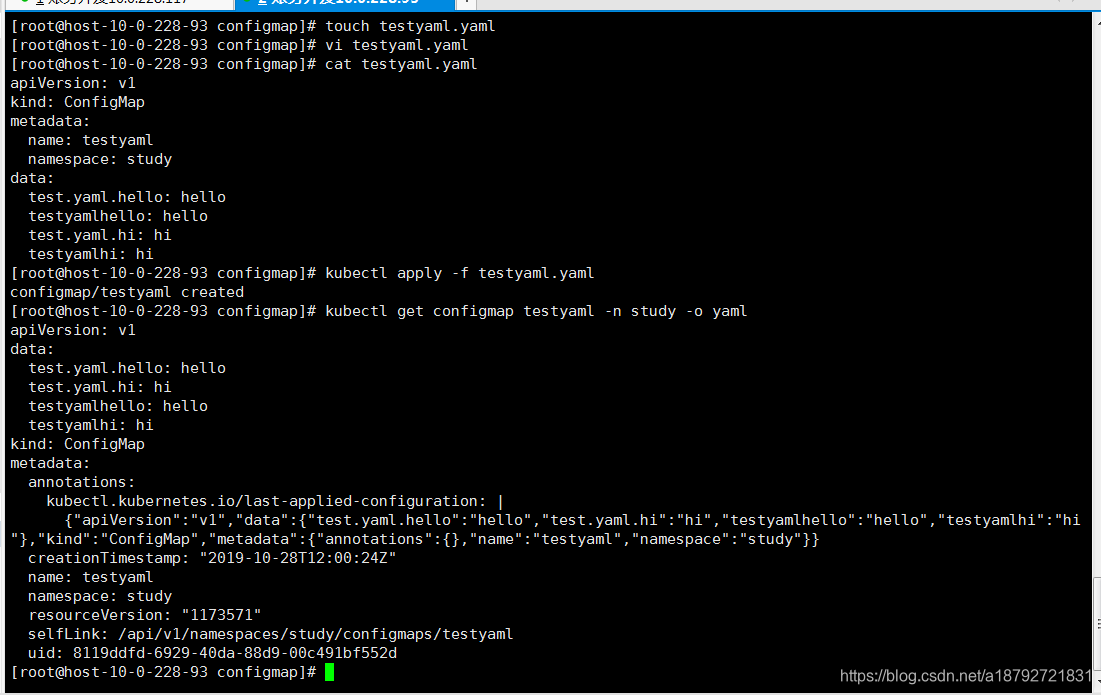
- 2.4 yaml/json创建
- 2.1 key-value字符串创建
- 3.使用
- 3.1 pod内env
- 3.2 command
- 3.3 volume挂载
- 3.1 pod内env
- 4.总结
1.configmap
configmap用于保存配置数据的键值对,可以用来保存单个属性,也可以用来保存配置文件。configmap和secret很类似,但他可以更方便的处理不包含敏感信息的字符串。
2.configmap创建
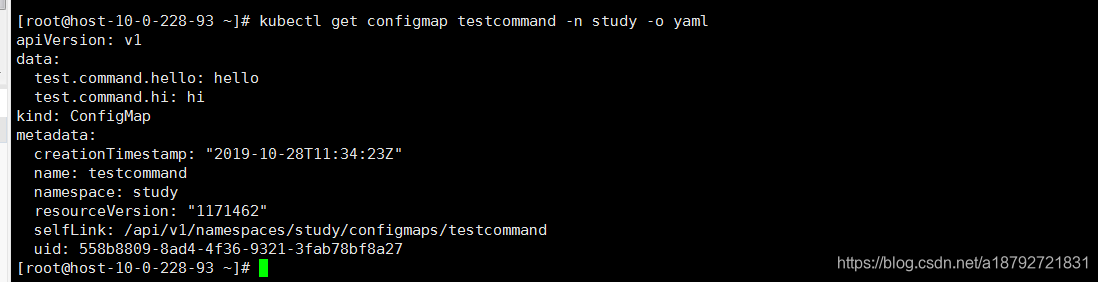
2.1 key-value字符串创建
1
kubectl create configmap test -n study --from-literal=test.hello=hello --from-literal=testhello.hi=hi
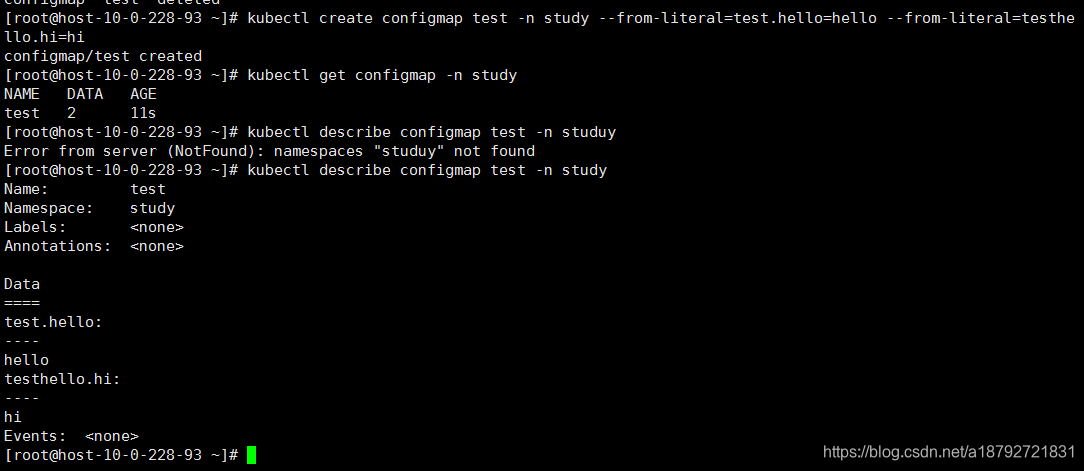
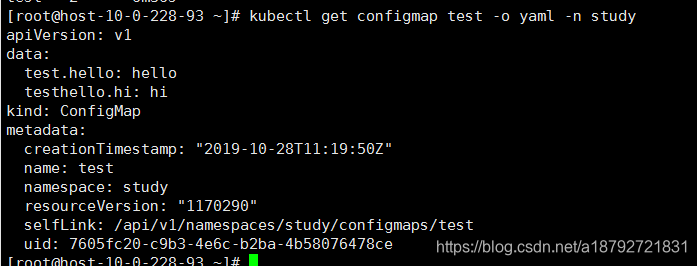
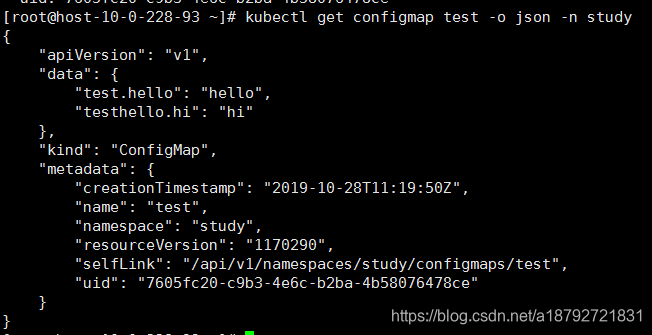
当然也可以使用格式化输出形式查看

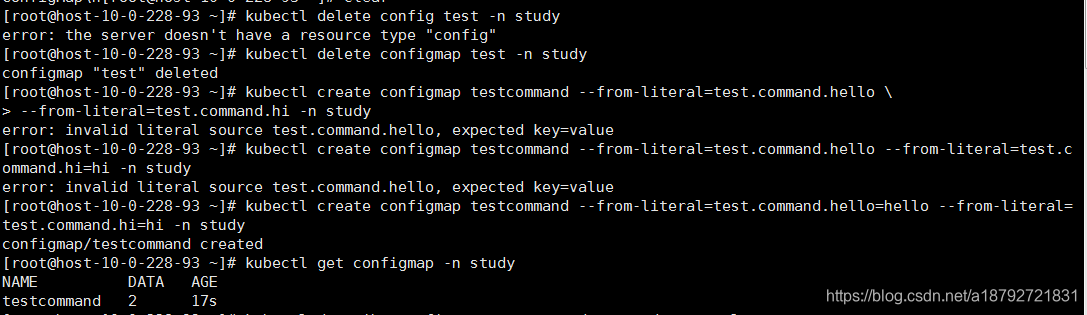
为了后面例子能够串起来,我们删除这个configmap,然后重新创建一个:
2.2 env文件创建
2.3 从目录创建
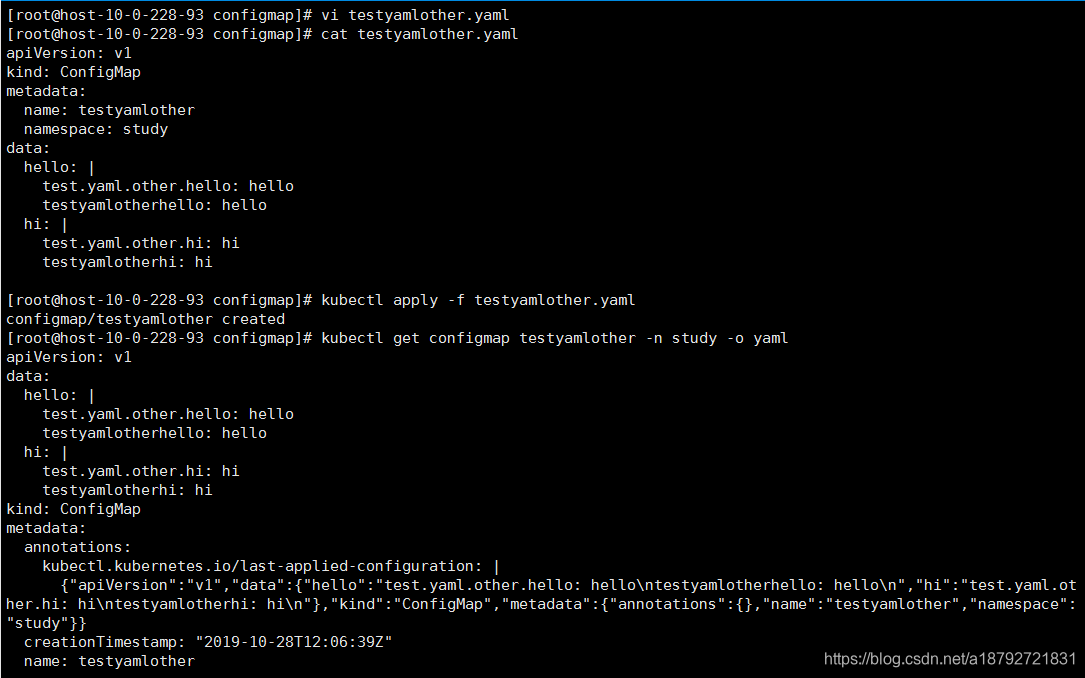
2.4 yaml/json创建
3.使用
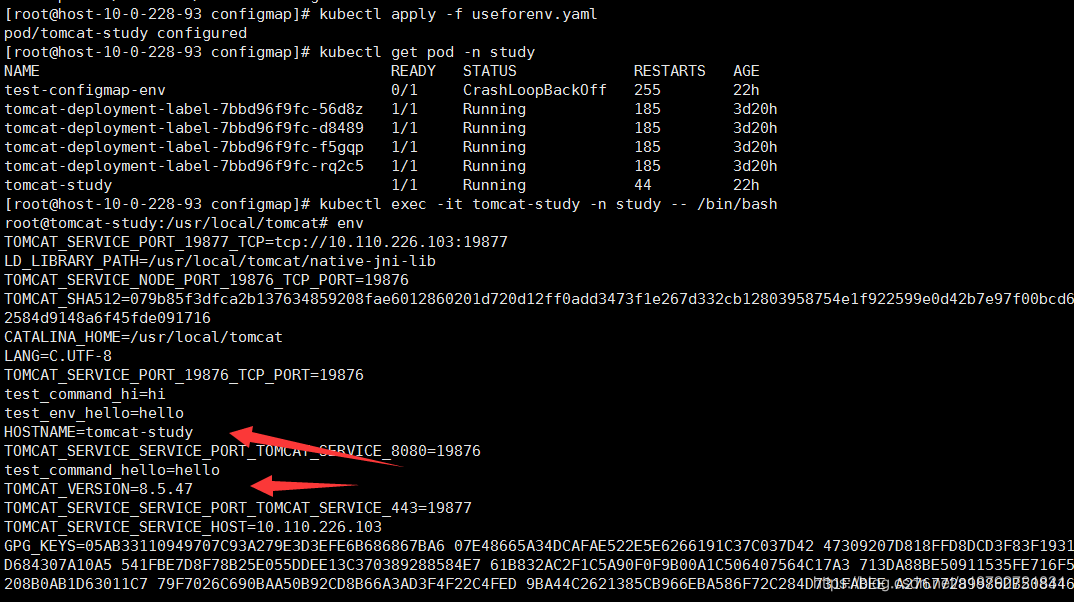
3.1 pod内env
创建一个pod:
useforenv.yaml
1
2
3
4
5
6
7
8
9
10
11
12
13
14
15
16
17
18
19
20
21
22
23
24
25
26
27
28
29
30
31
32
33
34
35
36
37
38
39
40
41
42
43
44
45
46
47
48
49
50
51
52
53
54
55
56
57
58
59
60
61
62
63
64
65
66
67
68
69
70
71
72
73
74
75
apiVersion: v1
kind: Pod
metadata:
  name: tomcat-study
  namespace: study
  labels:
    mytomcat: study
spec:
  containers:
  - name: tomcat
    env:
    - name: test_command_hello
      valueFrom:
        configMapKeyRef:
          name: testcommand
          key: test.command.hello
    - name: test_command_hi
      valueFrom:
        configMapKeyRef:
          name: testcommand
          key: test.command.hi
    - name: test_env_hello
      valueFrom:
        configMapKeyRef:
          name: testenv
          key: test.env.hello
    - name: testenvhello
      valueFrom:
        configMapKeyRef:
          name: testenv
          key: testenvhello
    - name: test_env_hi
      valueFrom:
        configMapKeyRef:
          name: testenv
          key: test.env.hi
    image: tomcat
    imagePullPolicy: IfNotPresent
    command: ["/usr/local/tomcat/bin/catalina.sh","run"]
    workingDir: /usr/local/tomcat/
    volumeMounts:
    - name: tomcat-log
      mountPath: /usr/local/tomcat/logs/
      readOnly: false
    ports:
    - name: tomcat-80
      containerPort: 80
      hostPort: 10080
      protocol: TCP
    - name: tomcat-8080
      containerPort: 8080
      hostPort: 18080
      protocol: TCP
    - name: tomcat-443
      containerPort: 443
      hostPort: 10443
      protocol: TCP
    resources:
      limits:
        cpu: 500m
        memory: 500Mi
      requests:
        cpu: 200m
        memory: 50Mi
    livenessProbe:
      tcpSocket:
        port: 80
      initialDelaySeconds: 180
      timeoutSeconds: 30
      periodSeconds: 600
  volumes:
  - name: tomcat-log
    nfs:
      server: 10.0.228.93
      path: /userdata/testtomcatlog
3.2 command
先创建一个configmap
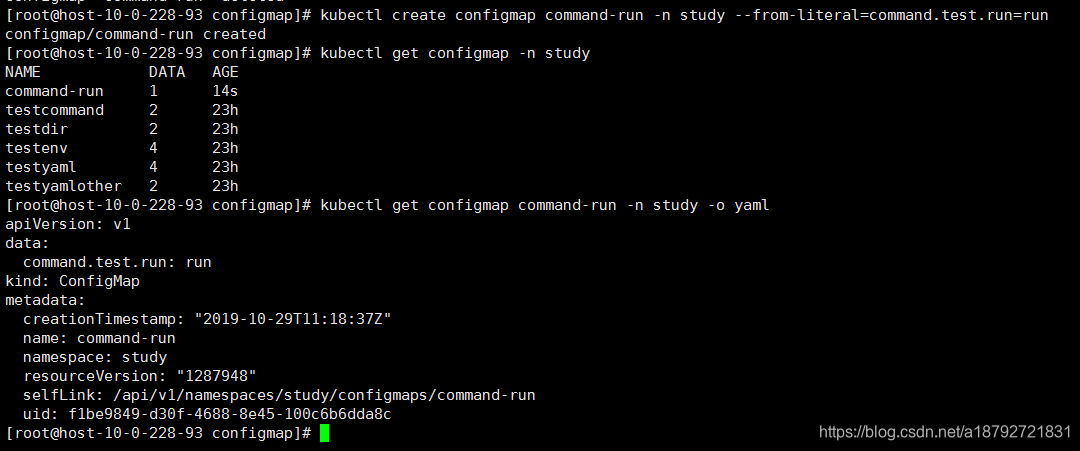
在command中使用configmp需要将configmap先用3.1的方式设置为环境变量,然后在command中用$(envName)的方式使用。
useforcommand.yaml
1
2
3
4
5
6
7
8
9
10
11
12
13
14
15
16
17
18
19
20
21
22
23
24
25
26
27
28
29
30
31
32
33
34
35
36
37
38
39
40
41
42
43
44
45
46
47
48
49
50
51
52
53
54
55
apiVersion: v1
kind: Pod
metadata:
  name: tomcat-study
  namespace: study
  labels:
    mytomcat: study
spec:
  containers:
  - name: tomcat
    image: tomcat
    imagePullPolicy: IfNotPresent
    command: ["/usr/local/tomcat/bin/catalina.sh","$(command_test_run)"]
    workingDir: /usr/local/tomcat/
    env:
    - name: command_test_run
      valueFrom:
        configMapKeyRef:
          name: command-run
          key: command.test.run
    volumeMounts:
    - name: tomcat-log
      mountPath: /usr/local/tomcat/logs/
      readOnly: false
    ports:
    - name: tomcat-80
      containerPort: 80
      hostPort: 10080
      protocol: TCP
    - name: tomcat-8080
      containerPort: 8080
      hostPort: 18080
      protocol: TCP
    - name: tomcat-443
      containerPort: 443
      hostPort: 10443
      protocol: TCP
    resources:
      limits:
        cpu: 500m
        memory: 500Mi
      requests:
        cpu: 200m
        memory: 50Mi
    livenessProbe:
      tcpSocket:
        port: 80
      initialDelaySeconds: 180
      timeoutSeconds: 30
      periodSeconds: 600
  volumes:
  - name: tomcat-log
    nfs:
      server: 10.0.228.93
      path: /userdata/testtomcatlog

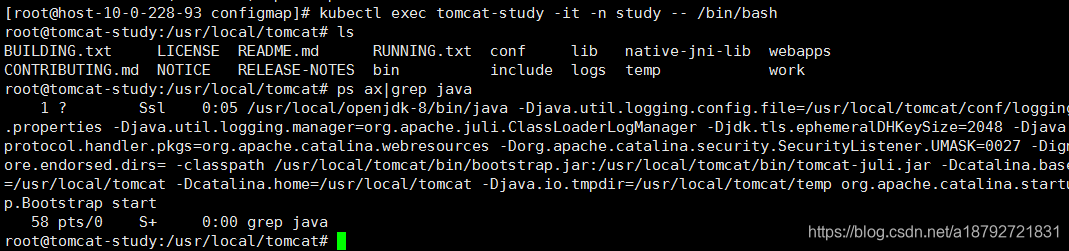
已经启动了。。
3.3 volume挂载
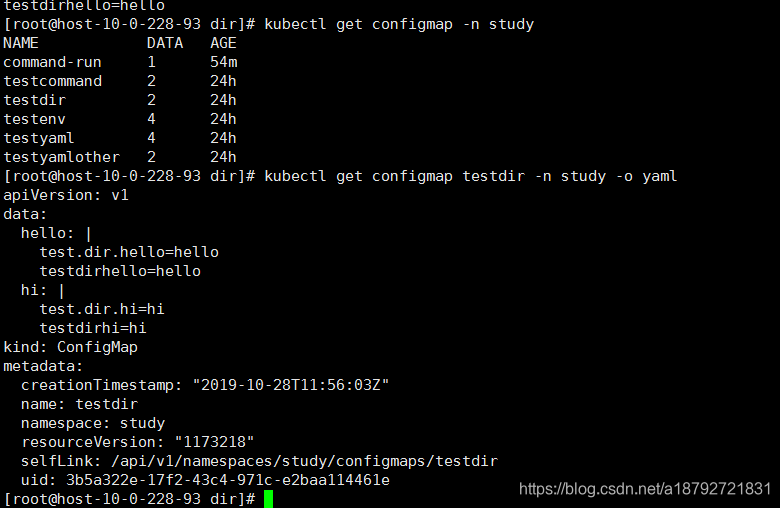
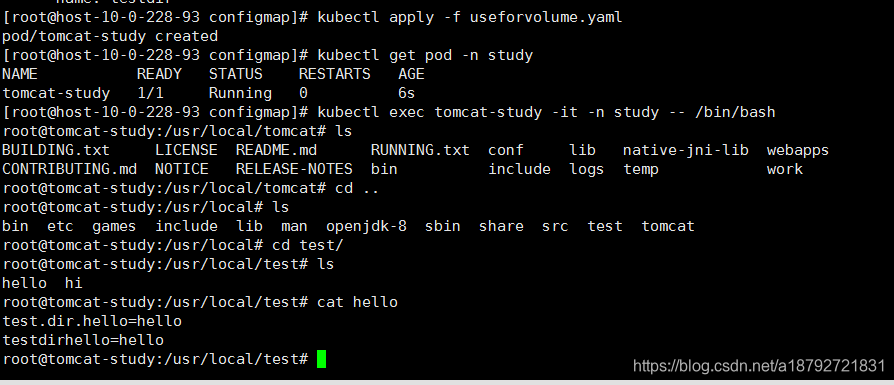
创建configmap可以根据文件及目录进行创建,同样的,在使用的时候,可以根据configmap恢复成文件目录
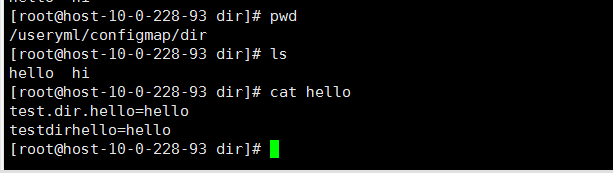
根据这个目录创建configmap
在pod中使用
useforvolume.yaml
1
2
3
4
5
6
7
8
9
10
11
12
13
14
15
16
17
18
19
20
21
22
23
24
25
26
27
28
29
30
31
32
33
34
35
36
37
38
39
40
41
42
43
44
45
46
47
48
49
50
51
52
53
54
55
56
57
58
59
60
61
62
63
64
65
66
67
68
69
70
71
72
73
74
75
76
77
78
79
80
81
apiVersion: v1
kind: Pod
metadata:
  name: tomcat-study
  namespace: study
  labels:
    mytomcat: study
spec:
  containers:
  - name: tomcat
    env:
    - name: test_command_hello
      valueFrom:
        configMapKeyRef:
          name: testcommand
          key: test.command.hello
    - name: test_command_hi
      valueFrom:
        configMapKeyRef:
          name: testcommand
          key: test.command.hi
    - name: test_env_hello
      valueFrom:
        configMapKeyRef:
          name: testenv
          key: test.env.hello
    - name: testenvhello
      valueFrom:
        configMapKeyRef:
          name: testenv
          key: testenvhello
    - name: test_env_hi
      valueFrom:
        configMapKeyRef:
          name: testenv
          key: test.env.hi
    image: tomcat
    imagePullPolicy: IfNotPresent
    command: ["/usr/local/tomcat/bin/catalina.sh","run"]
    workingDir: /usr/local/tomcat/
    volumeMounts:
    - name: tomcat-log
      mountPath: /usr/local/tomcat/logs/
      readOnly: false
    - name: testdir
      mountPath: /usr/local/test/
      readOnly: false
    ports:
    - name: tomcat-80
      containerPort: 80
      hostPort: 10080
      protocol: TCP
    - name: tomcat-8080
      containerPort: 8080
      hostPort: 18080
      protocol: TCP
    - name: tomcat-443
      containerPort: 443
      hostPort: 10443
      protocol: TCP
    resources:
      limits:
        cpu: 500m
        memory: 500Mi
      requests:
        cpu: 200m
        memory: 50Mi
    livenessProbe:
      tcpSocket:
        port: 80
      initialDelaySeconds: 180
      timeoutSeconds: 30
      periodSeconds: 600
  volumes:
  - name: tomcat-log
    nfs:
      server: 10.0.228.93
      path: /userdata/testtomcatlog
  - name: testdir
    configMap:
      name: testdir
4.总结
- configmap就是k8s集群中公共的key-value集合,所有的pod都可以使用。
- configmap也是k8s中一类资源
- configmap有4种基本的创建方式:字符串、env、文件目录、定义文件
- configmap在pod中有3种使用方式:env、command、volume挂载
本文由作者按照 CC BY 4.0 进行授权