SSM集成:spring+mybatis+springmvc集成
本文介绍了SSM(Spring+SpringMVC+MyBatis)集成的详细步骤,包括准备jar包、配置多个文件、导入js类库、编写Java文件等,还提到了发布测试。同时强调集成时要心细,配置文件出错会导致异常,出现问题可能是旧文件未刷新或配置未生效。
文章信息
- 原文链接:https://jiayq.blog.csdn.net/article/details/88700315
- 发布时间:2019-03-20 21:24:53
- 阅读量:559
- 分类:java同时被 3 个专栏收录, 订阅专栏, spring
- 标签:#spring+springmvc+mybatis, #ssm集成, #ssm集成需要哪些操作, #ssm集成需要注意的问题, #spring+mybatis+springmvc集成
摘要
文章浏览阅读559次。本文介绍了SSM(Spring+SpringMVC+MyBatis)集成的详细步骤,包括准备jar包、配置多个文件、导入js类库、编写Java文件等,还提到了发布测试。同时强调集成时要心细,配置文件出错会导致异常,出现问题可能是旧文件未刷新或配置未生效。
SSM集成:spring+mybatis+springmvc集成
- 1.准备的jar包
- 2.配置web.xml文件
- 3.配置log4j.properties
- 4.配置ojdbc.properties
- 5.配置spring相关
- 6.配置mybatis.xml
- 7.配置springmvc.xml
- 8.导入js类库
- 9.编写Java文件
- 10.发布测试(暂时只测试springmvc)
- 11.总结
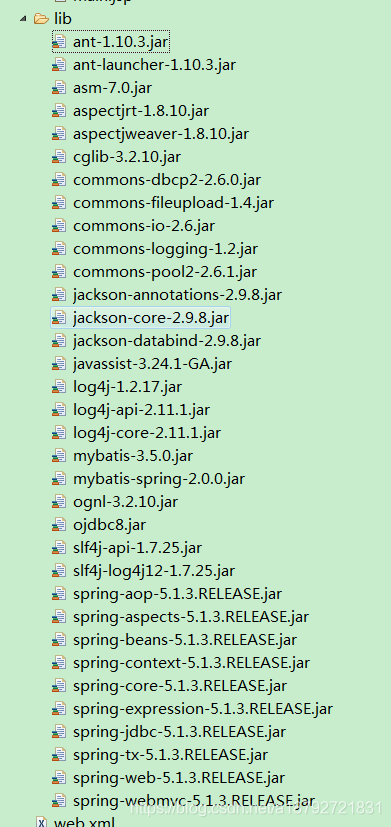
1.准备的jar包
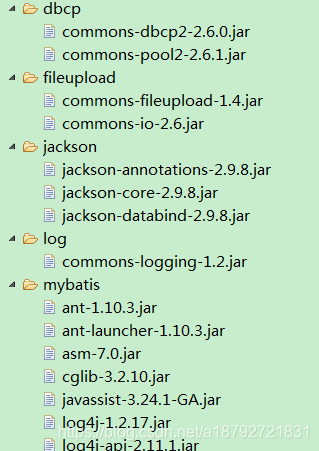
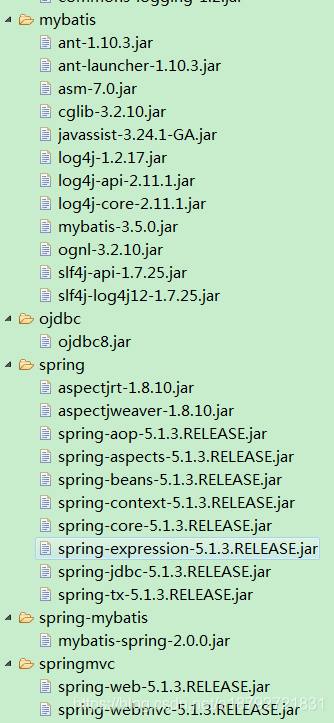
注意:实际使用时,必须放在WEB-INF/llib文件夹下,不能用其他文件夹包起来,否则不会自动加载jar
2.配置web.xml文件
web.xml
1
2
3
4
5
6
7
8
9
10
11
12
13
14
15
16
17
18
19
20
21
22
23
24
25
26
27
28
29
30
31
32
33
34
35
36
<?xml version="1.0" encoding="UTF-8"?>
<web-app xmlns="http://java.sun.com/xml/ns/javaee"
	xmlns:xsi="http://www.w3.org/2001/XMLSchema-instance"
	xmlns:context="http://www.springframework.org/schema/context"
	xsi:schemaLocation="http://java.sun.com/xml/ns/javaee
	http://java.sun.com/xml/ns/javaee/web-app.xsd
	http://www.springframework.org/schema/context
	http://www.springframework.org/schema/context/spring-context.xsd
	">
	<!-- 配置加载spring 文件 -->
 	<context-param>
		<param-name>contextConfigLocation</param-name>
		<param-value>WEB-INF/classes/resource/spring-*.xml</param-value>
	</context-param>
	<listener>
		<listener-class>
			org.springframework.web.context.ContextLoaderListener
		</listener-class>
	</listener>
	<servlet>
		<!-- 配置前端过滤器 -->
		<servlet-name>springmvc</servlet-name>
		<servlet-class>org.springframework.web.servlet.DispatcherServlet</servlet-class>
		<!-- 初始化时加载配置文件 -->
		<init-param>
			<param-name>contextConfigLocation</param-name>
			<param-value>WEB-INF/classes/resource/springmvc.xml</param-value>
		</init-param>
		<!-- 容器启动时加载servlet -->
		<load-on-startup>1</load-on-startup>
	</servlet>
	<servlet-mapping>
		<servlet-name>springmvc</servlet-name>
		<url-pattern>/</url-pattern>
	</servlet-mapping>
</web-app>
注意:
之前在springMVC中配置的拦截器必须放在web,xml中,同时上述一般都需要配置
3.配置log4j.properties
log4j.properties
1
2
3
4
5
6
7
8
# Global logging configuration
log4j.rootLogger=INFO, stdout
# MyBatis logging configuration...
log4j.logger=INFO
# Console output...
log4j.appender.stdout=org.apache.log4j.ConsoleAppender
log4j.appender.stdout.layout=org.apache.log4j.PatternLayout
log4j.appender.stdout.layout.ConversionPattern=%5p [%t] - %m%n
4.配置ojdbc.properties
ojdbc,properties
1
2
3
4
5
6
7
8
9
10
ojdbc.driver=oracle.jdbc.driver.OracleDriver
ojdbc.url=jdbc:oracle:thin:@127.0.0.1:1521:oracle
ojdbc.username=study
ojdbc.password=study
#最大连接数
ojdbc.maxTotal=30
#最大空闲连接数
ojdbc.maxIdle=10
#初始化连接数
ojdbc.initialSize=5
5.配置spring相关
spring-aop.xml
1
2
3
4
5
6
7
8
9
10
11
12
13
14
15
16
17
<?xml version="1.0" encoding="UTF-8"?>
<beans xmlns="http://www.springframework.org/schema/beans"
	xmlns:xsi="http://www.w3.org/2001/XMLSchema-instance"
	xmlns:aop="http://www.springframework.org/schema/aop"
	xmlns:context="http://www.springframework.org/schema/context"
	xsi:schemaLocation="http://www.springframework.org/schema/beans
	http://www.springframework.org/schema/beans/spring-beans.xsd
	http://www.springframework.org/schema/aop
	http://www.springframework.org/schema/aop/spring-aop.xsd
	http://www.springframework.org/schema/context
	http://www.springframework.org/schema/context/spring-context.xsd">
	<!-- 指定需要扫描的包 -->
	<context:component-scan base-package="domain,daoImpl,serviceImpl,controller">
	</context:component-scan>
	<!-- 启动基于注解的声明式AspectJ支持 -->
	<aop:aspectj-autoproxy></aop:aspectj-autoproxy>
</beans>
spring-beanx.xml
1
2
3
4
5
6
7
8
9
10
11
12
13
14
<?xml version="1.0" encoding="UTF-8"?>
<beans xmlns="http://www.springframework.org/schema/beans"
	xmlns:xsi="http://www.w3.org/2001/XMLSchema-instance"
	xmlns:aop="http://www.springframework.org/schema/aop"
	xmlns:context="http://www.springframework.org/schema/context"
	xsi:schemaLocation="http://www.springframework.org/schema/beans
	http://www.springframework.org/schema/beans/spring-beans.xsd
	http://www.springframework.org/schema/aop
	http://www.springframework.org/schema/aop/spring-aop.xsd
	http://www.springframework.org/schema/context
	http://www.springframework.org/schema/context/spring-context.xsd">
	<!-- 开启注解注入的装配方式 -->
	<context:annotation-config></context:annotation-config>
</beans>
spring-dataBase.xml
1
2
3
4
5
6
7
8
9
10
11
12
13
14
15
16
17
18
19
20
21
22
23
24
25
26
27
28
29
30
31
32
33
34
35
36
37
38
39
40
41
42
43
44
45
46
47
48
49
50
51
52
53
<?xml version="1.0" encoding="UTF-8"?>
<beans xmlns="http://www.springframework.org/schema/beans"
	xmlns:xsi="http://www.w3.org/2001/XMLSchema-instance"
	xmlns:context="http://www.springframework.org/schema/context"
	xsi:schemaLocation="http://www.springframework.org/schema/beans
	http://www.springframework.org/schema/beans/spring-beans.xsd
	http://www.springframework.org/schema/context
	http://www.springframework.org/schema/context/spring-context.xsd">
	<!--  加载配置文件 -->
	<context:property-placeholder location="classpath:properties/ojdbc.properties"/>
	<!-- 配置数据源 -->
	<bean id="dataSource"
		class="org.apache.commons.dbcp2.BasicDataSource">
		<!-- 数据库驱动 -->
		<property name="driverClassName">
			<value>${ojdbc.driver}</value>
		</property>
		<!-- 连接数据库的url -->
		<property name="url">
			<value>${ojdbc.url}</value>
		</property>
		<property name="username">
			<value>${ojdbc.username}</value>
		</property>
		<property name="password">
			<value>${ojdbc.password}</value>
		</property>
		<property name="maxTotal">
			<value>${ojdbc.maxTotal}</value>
		</property>
		<property name="maxIdle">
			<value>${ojdbc.maxIdle}</value>
		</property>
		<property name="initialSize">
			<value>${ojdbc.initialSize}</value>
		</property>
	</bean>
	<!-- 配置MyBatis工厂 -->
	<bean id="sqlSessionFactory" class="org.mybatis.spring.SqlSessionFactoryBean">
		<property name="dataSource" ref="dataSource"></property>
		<property name="configLocation">
			<value>classpath:resource/mybatis.xml</value>
		</property>
	</bean>
	<!-- 配置mapper扫描器 -->
	<bean class="org.mybatis.spring.mapper.MapperScannerConfigurer">
		<property name="basePackage">
			<value>dao</value>
		</property>
	</bean>
	<!-- 扫描service -->
	<context:component-scan base-package="service"></context:component-scan>
</beans>
spring-transaction.xml
1
2
3
4
5
6
7
8
9
10
11
12
13
14
15
16
17
18
19
20
21
22
23
24
25
26
27
28
29
<?xml version="1.0" encoding="UTF-8"?>
<beans xmlns="http://www.springframework.org/schema/beans"
	xmlns:xsi="http://www.w3.org/2001/XMLSchema-instance"
	xmlns:aop="http://www.springframework.org/schema/aop"
	xmlns:context="http://www.springframework.org/schema/context"
	xmlns:tx="http://www.springframework.org/schema/tx"
	xsi:schemaLocation="http://www.springframework.org/schema/beans
	http://www.springframework.org/schema/beans/spring-beans.xsd
	http://www.springframework.org/schema/aop
	http://www.springframework.org/schema/aop/spring-aop.xsd
	http://www.springframework.org/schema/context
	http://www.springframework.org/schema/context/spring-context.xsd
	http://www.springframework.org/schema/tx
	http://www.springframework.org/schema/tx/spring-tx.xsd
	">
	<!-- 注册事物管理器,依赖于数据源的一个bean -->
	<bean id="transactionManager"
		class="org.springframework.jdbc.datasource.DataSourceTransactionManager">
		<property name="dataSource" ref="dataSource"></property>
	</bean>
	<!-- 开启注解扫描 -->
	<tx:annotation-driven transaction-manager="transactionManager" />
	<!-- 编写通知 -->
	<tx:advice id="txAdvice" transaction-manager="transactionManager">
		<tx:attributes >
			<tx:method name="*" propagation="REQUIRED" isolation="DEFAULT" read-only="false"/>
		</tx:attributes>
	</tx:advice>
</beans>
注意:spring配置与mybatis以及springmvc的配置文件需要能区别开
6.配置mybatis.xml
mybatis.xml
1
2
3
4
5
6
7
8
9
10
11
12
13
14
15
16
17
<?xml version="1.0" encoding="UTF-8" ?>
<!DOCTYPE configuration
  PUBLIC "-//mybatis.org//DTD Config 3.0//EN"
  "http://mybatis.org/dtd/mybatis-3-config.dtd">
<configuration>
  <settings>
   	<!-- 延迟加载全局 -->
  	<setting name="lazyLoadingEnabled" value="true"/>
  	<!-- 关联对象属性的延迟加载 -->
  	<setting name="aggressiveLazyLoading" value="false"/>
  </settings>
  <!-- 改变运行时行为 -->
  <typeAliases>
	  <!-- 配置别名 -->
	  <package name="domain"/>
  </typeAliases>
</configuration>
7.配置springmvc.xml
springmvc.xml
1
2
3
4
5
6
7
8
9
10
11
12
13
14
15
16
17
18
19
20
21
22
23
24
25
26
27
28
29
30
31
32
33
<?xml version="1.0" encoding="UTF-8"?>
<beans xmlns="http://www.springframework.org/schema/beans"
	xmlns:xsi="http://www.w3.org/2001/XMLSchema-instance"
	xmlns:context="http://www.springframework.org/schema/context"
	xmlns:mvc="http://www.springframework.org/schema/mvc"
	xsi:schemaLocation="http://www.springframework.org/schema/beans
	http://www.springframework.org/schema/beans/spring-beans.xsd
	http://www.springframework.org/schema/context
	http://www.springframework.org/schema/context/spring-context.xsd
	http://www.springframework.org/schema/mvc
	http://www.springframework.org/schema/mvc/spring-mvc.xsd
	">
	<!-- 指定需要扫描的包 -->
	<context:component-scan base-package="controller"></context:component-scan>
	<!-- 定义视图解析器 -->
	<bean id="viewResolver"
		class="org.springframework.web.servlet.view.InternalResourceViewResolver">
		<!-- 设定前缀 -->
		<property name="prefix" value="/WEB-INF/jsp/"></property>
		<!-- 设定后缀 -->
		<property name="suffix" value=".jsp"></property>
	</bean>
	<!-- json的转换器注解模式 -->
	<mvc:annotation-driven></mvc:annotation-driven>
 	<!-- 静态资源访问映射 -->
	<mvc:resources location="/WEB-INF/js/" mapping="/js/**"></mvc:resources>
	<!-- 文件上传解析器 -->
	<bean id="multipartResolver"
		class="org.springframework.web.multipart.commons.CommonsMultipartResolver">
		<!-- 设置请求编码格式 -->
		<property name="defaultEncoding" value="utf-8"></property>
	</bean>
</beans>
8.导入js类库
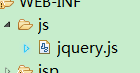
9.编写Java文件
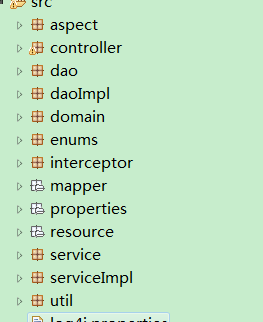
注意: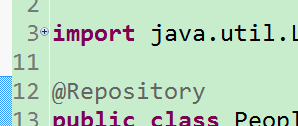
dao实现用注解注册bean时,不能指定bean的id,注解扫描会自动生成小写第一个字母的dao实现类名的bean
service同样不可指定。
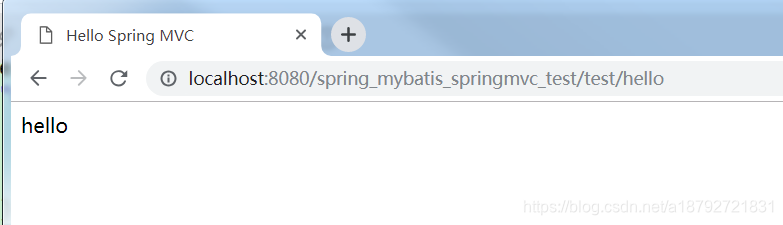
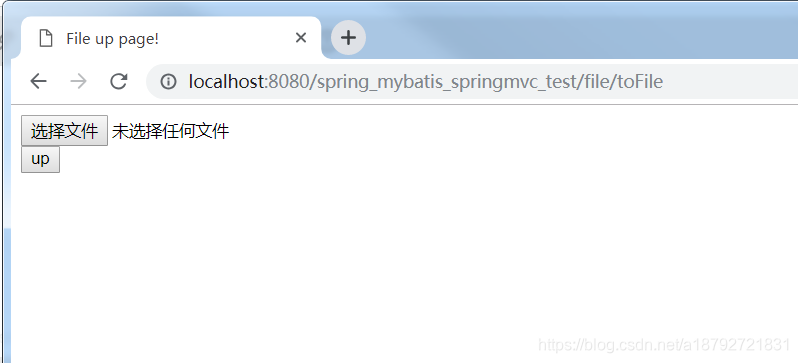
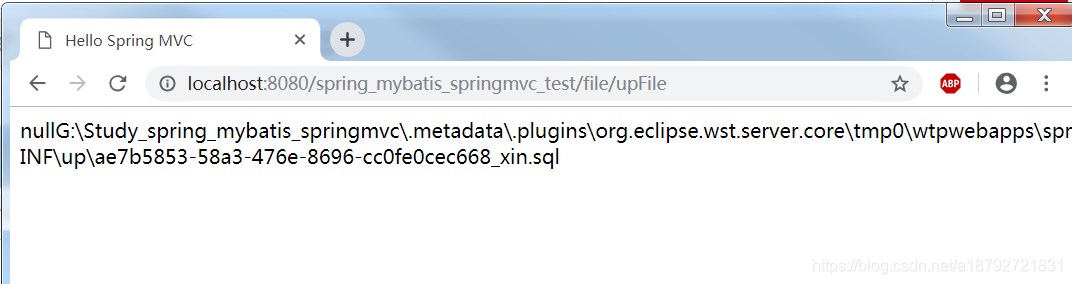
10.发布测试(暂时只测试springmvc)
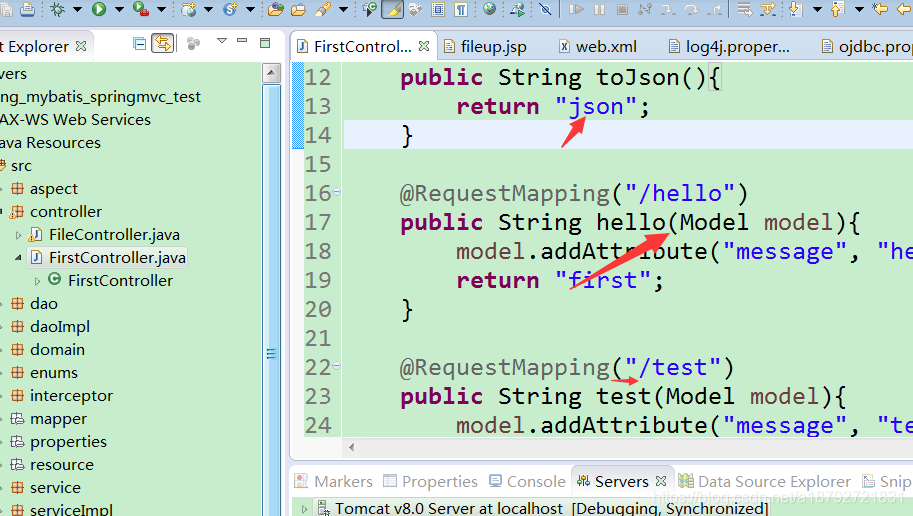
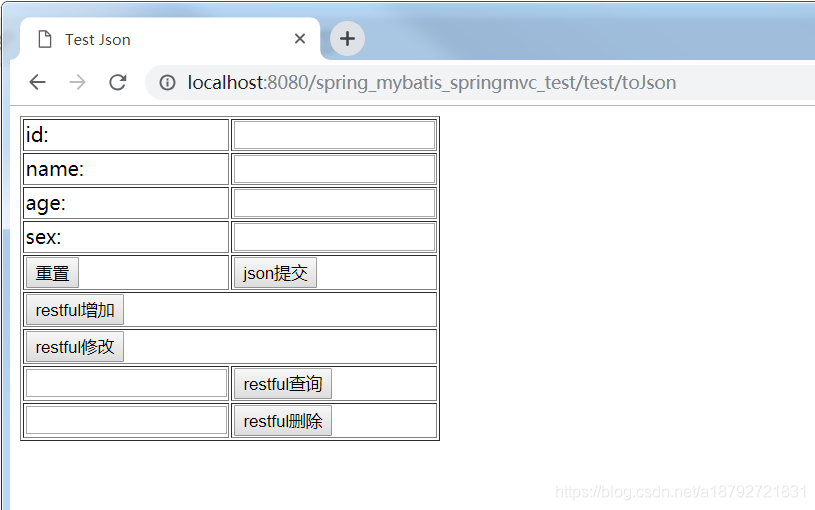
一般springmvc能通过浏览器访问,那么剩下的就很少会出现问题。
11.总结
ssm集成需要心细,配置文件出错会造成启动或者运行异常。
同时因为大量使用框架的类,造成出现问题后不易查找解决。
有时候出现异常并不是配置的问题,可能是旧的文件没有及时的刷新:clean工程,cleanTomcat,重新发布等等。
配置未生效:配置是否被覆盖?多个文件配置是否有先后顺序的关系?