hadoop安装
hadoop安装1.下载2.配置2.1 Java2.2 site配置2.3 hdfs工作模式2.4 yarn配置2.5 hdfs副本数3. 设置免密登录4. 启动4.1 格式化hdfs4.2 启动hdfs4.3 启动yarn5. 验证6. 各节点免密登录7. 子节点加入集群7.1 hdfs7.2 yarn8.简单使用8.1 hdfs1.下载https://www.apache.org/dyn/closer.cgi/hadoop/common/hadoop-2.10.0/hadoop-2.10.0.ta_紅帽子 hadoop最小集群安裝
文章信息
- 原文链接:https://jiayq.blog.csdn.net/article/details/106279926
- 发布时间:2020-05-22 19:38:18
- 阅读量:584
- 分类:大数据同时被 3 个专栏收录, 订阅专栏, spark, hadoop
- 标签:#hadoop安装, #hadoop集群化安装, #hadoop单机安装, #hdfs安装与使用, #如何安装hadoop
摘要
文章浏览阅读584次。hadoop安装1.下载2.配置2.1 Java2.2 site配置2.3 hdfs工作模式2.4 yarn配置2.5 hdfs副本数3. 设置免密登录4. 启动4.1 格式化hdfs4.2 启动hdfs4.3 启动yarn5. 验证6. 各节点免密登录7. 子节点加入集群7.1 hdfs7.2 yarn8.简单使用8.1 hdfs1.下载https://www.apache.org/dyn/closer.cgi/hadoop/common/hadoop-2.10.0/hadoop-2.10.0.ta_紅帽子 hadoop最小集群安裝
hadoop安装
- 1.下载
- 2.配置
- 2.1 Java
- 2.2 site配置
- 2.3 hdfs工作模式
- 2.4 yarn配置
- 2.5 hdfs副本数
- 2.1 Java
- 3. 设置免密登录
- 4. 启动
- 4.1 格式化hdfs
- 4.2 启动hdfs
- 4.3 启动yarn
- 4.1 格式化hdfs
- 5. 验证
- 6. 各节点免密登录
- 7. 子节点加入集群
- 7.1 hdfs
- 7.2 yarn
- 7.1 hdfs
- 8.简单使用
- 8.1 hdfs
1.下载
| 服务器ip | 服务器目录 | 内存大小 |
|---|---|---|
| 10.0.228.117 | /study/hadoop | 8G |
| 10.0.251.180 | /spark/hadoop-2.10.0 | 4G |
| 10.0.228.153 | /spark/hadoop-2.10.0 | 32G |
2.配置
2.1 Java
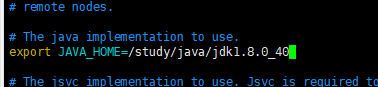
在/study/hadoop/hadoop-2.10.0/etc/hadoop目录下找到hadoop-env.sh文件,在hadoop-env.sh文件中配置JAVA_HOME.
2.2 site配置
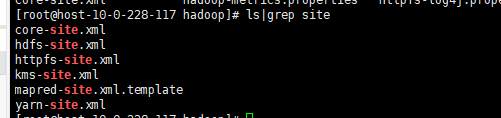
我们修改的主要是core-site.xml,hdfs-site.xml,mapred-site.xml,yarn-site.xml文件
增加
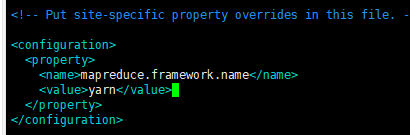
属性。
其中mapreduce-site.xml文件需要重命名或者拷贝mapreduce-site.xml.template
2.3 hdfs工作模式
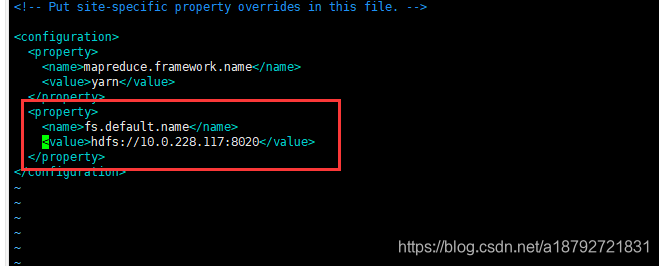
修改core-site.xml,在其中增加:
2.4 yarn配置
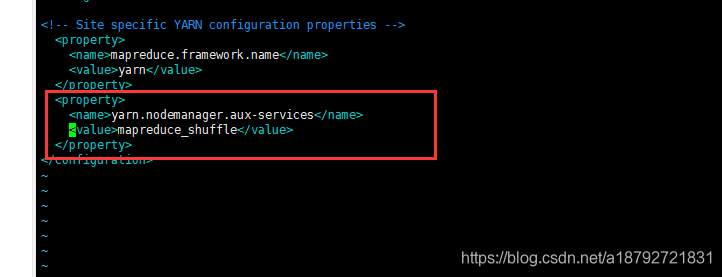
在yarn-site.xml中增加:
2.5 hdfs副本数
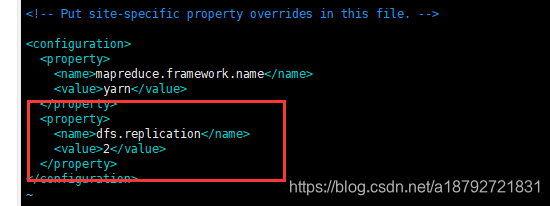
我们有3台机器,设置hdfs的副本数为2.
在hdfs-site.xml中,增加:
3. 设置免密登录
ssh-keygen -t rsa什么都不写,直接回车。
然后进入~/.ssh/目录
然后执行cat id_rsa.pub >> authorized_keys
4. 启动
4.1 格式化hdfs
hadoop namenode -format

4.2 启动hdfs
./hadoop-daemon.sh start namenode

然后看下日志:

./hadoop-daemon.sh start datanode

4.3 启动yarn
./yarn-daemon.sh start resourcemanager

./yarn-daemon.sh start nodemanager

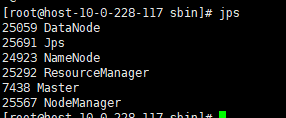
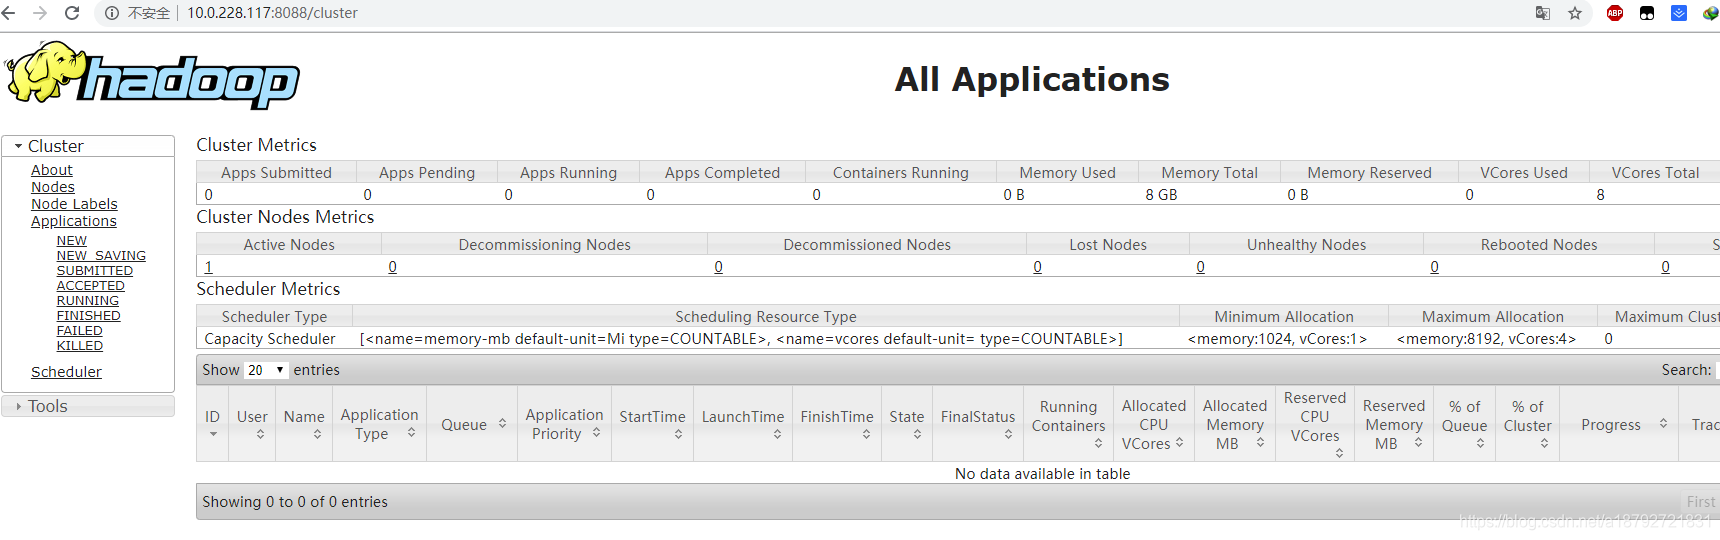
5. 验证
不过,上面启动的是一个节点。那么,其他节点如何加入呢?
6. 各节点免密登录
ssh-keygen -t rsa什么都不写,直接回车。
然后进入~/.ssh/目录
然后执行cat id_rsa.pub >> authorized_keys
首先我们在10.0.228.117上执行,生成了10.0.228.117的公钥
然后在10.0.251.180上执行,生成10.0.251.180的公钥
最后在10.0.228.153上执行,生成10.0.228.153的公钥。
然后使得每一个的authorized_keys中含有全部节点的公钥。

验证:

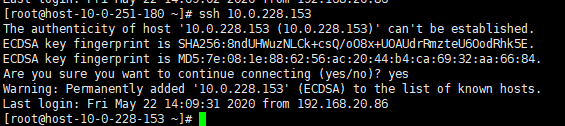
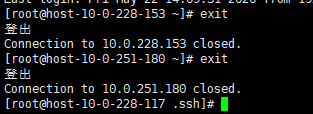
7. 子节点加入集群
我们目前配置好了10.0.228.117,其他两个也需要加入。
首先停止10.0.228.117上面的服务。
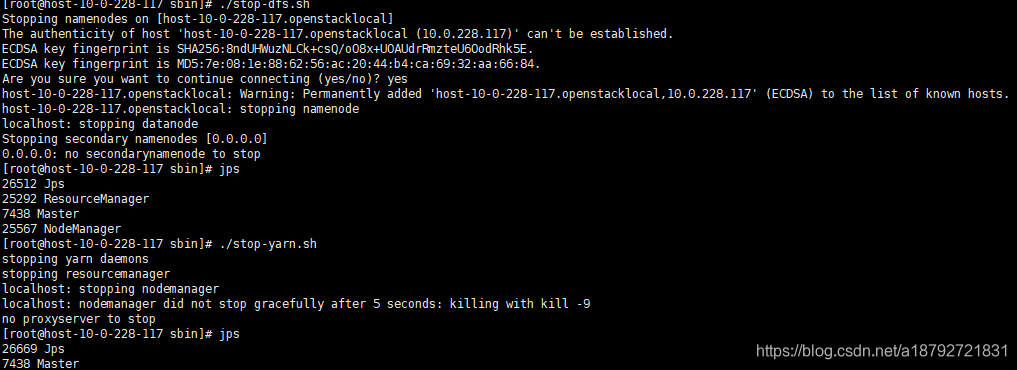
这个master是spark的,不是hadoop的。
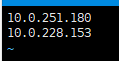
接着在配置目录的slaves中加入子节点的ip
然后将配置目录中的文件拷贝到子节点的配置目录下:
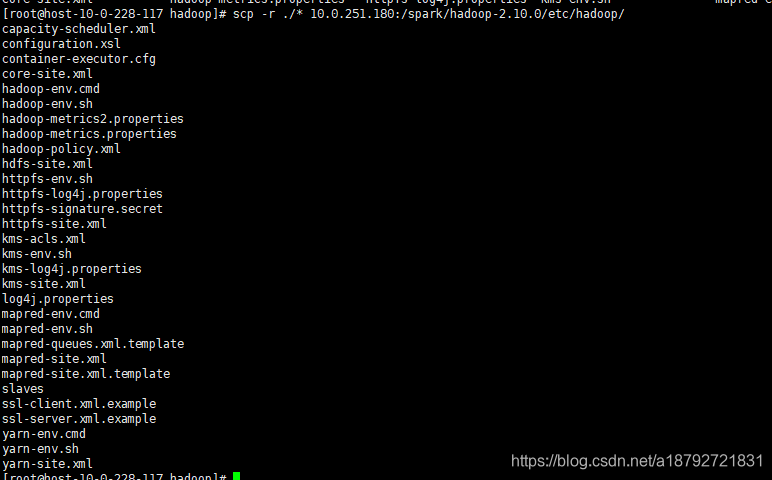
我提前将子节点中的配置目录清空了。
因为我主节点和子节点的hadoop存放路径不同,所以,需要在环境变量中增加一些配置
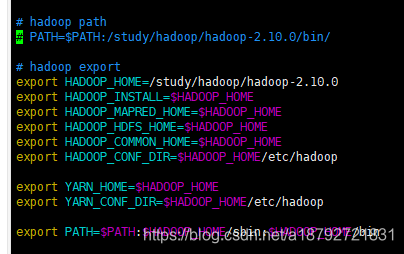
所有目录都需要配置
(注意,需要三个节点互通)
7.1 hdfs
然后启动hdfs(sbin目录)
./start-dfs.sh

结果这里有个坑,在启动子节点的时候,使用主节点的环境变量拼接的目录,作为子节点的目录。如果子节点与主节点目录不一致,就会异常。
为了解决这个问题,我们将子节点的目录与主节点保持一致。
接着启动:

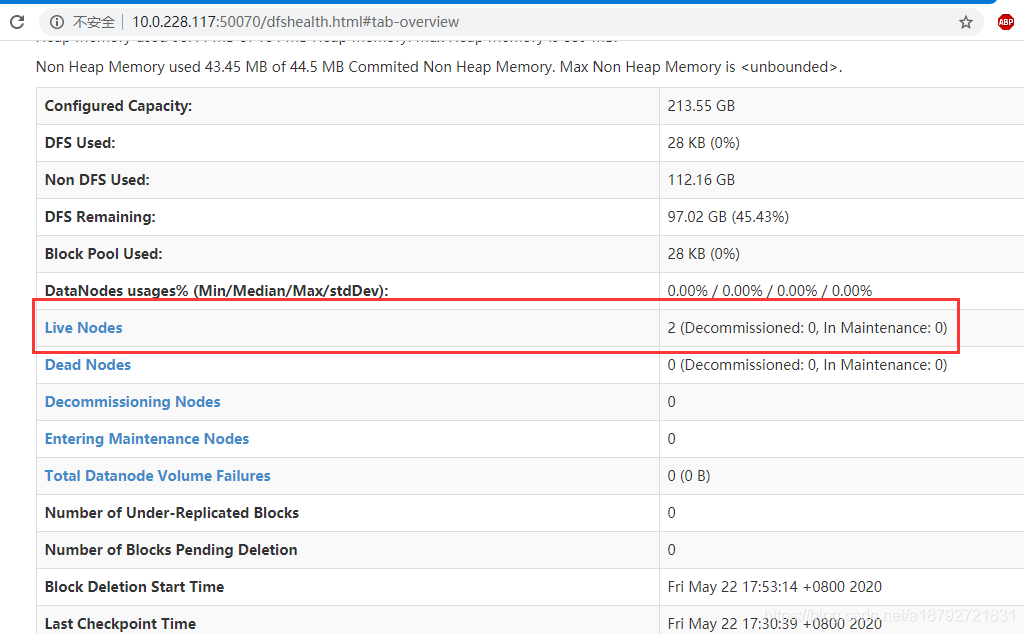
访问10.0.228.117:50070
7.2 yarn
start-yarn.sh
启动之后会发现报异常:
1
Retrying connect to server: 0.0.0.0/0.0.0.0:8031. Already tried 8 time(s)
这种异常可以这样处理:
在yare-site.xml里添加如下信息之后问题得到解决
1
2
3
4
5
6
7
8
9
10
11
12
<property>
    <name>yarn.resourcemanager.address</name>
    <value>master:8032</value>
  </property>
  <property>
    <name>yarn.resourcemanager.scheduler.address</name>
    <value>master:8030</value>
  </property>
  <property>
    <name>yarn.resourcemanager.resource-tracker.address</name>
    <value>master:8031</value>
  </property>
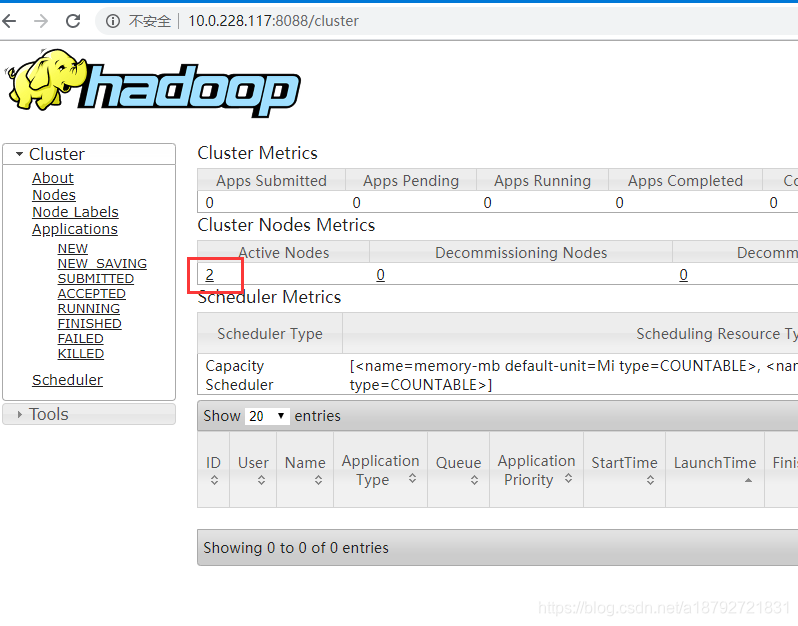
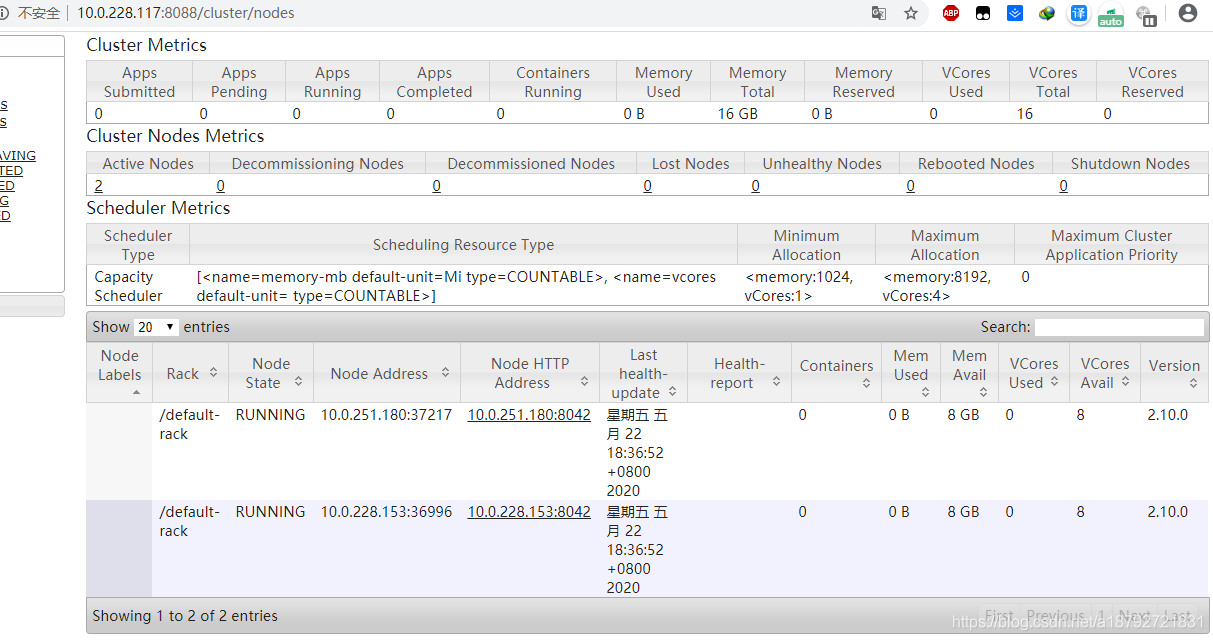
验证:
访问10.0.228.117:8088
8.简单使用
8.1 hdfs
hadoop fs -ls
列出hdfs的目录

hadoop fs -mkdir /test
创建目录

hadoop fs -put /a.out /test
上传文件或目录: source-dir hdfs-dir

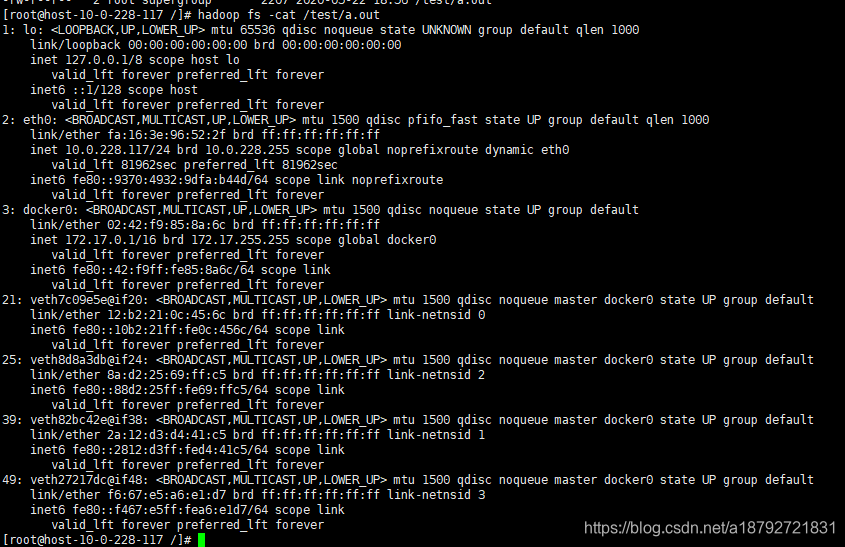
hadoop fs -cat /test/a.out
查看文件
hadoop fs -get /test/a.out /a.out
下载文件或目录

这是从官网找到的所有的hdfs的操作
| Sr.No | Command & Description |
|---|---|
| 1 | **-ls |
| 2 | **-lsr |
| 3 | **-du |
| 4 | **-dus |
| 5 | **-mv |
| 6 | **-cp |
| 7 | **-rm |
| 8 | **-rmr |
| 9 | **-put |
| 10 | **-copyFromLocal |
| 11 | **-moveFromLocal |
| 12 | **-get [-crc] |
| 13 | **-getmerge |
| 14 | **-cat |
| 15 | **-copyToLocal |
| 16 | **-moveToLocal |
| 17 | **-mkdir |
| 18 | **-setrep [-R] [-w] rep |
| 19 | **-touchz |
| 20 | **-test -[ezd] |
| 21 | **-stat [format] |
| 22 | **-tail [-f] |
| 23 | **-chmod [-R] mode,mode,… |
| 24 | **-chown [-R] [owner][:[group]] |
| 25 | **-chgrp [-R] group |
| 26 | **-help |