JQuery实现添加到选框
本文介绍如何利用jQuery实现选项从一个列表拖拽到另一个列表的功能,包括界面布局、jQuery库引入及具体代码实现。
JQuery实现添加到选框
文章信息
- 原文链接:https://jiayq.blog.csdn.net/article/details/75729824
- 发布时间:2017-07-22 13:17:29
- 阅读量:1
- 分类:java专栏收录该内容, 订阅专栏
- 标签:#javascript, #css, #html, #java
摘要
文章浏览阅读1.8k次。本文介绍如何利用jQuery实现选项从一个列表拖拽到另一个列表的功能,包括界面布局、jQuery库引入及具体代码实现。
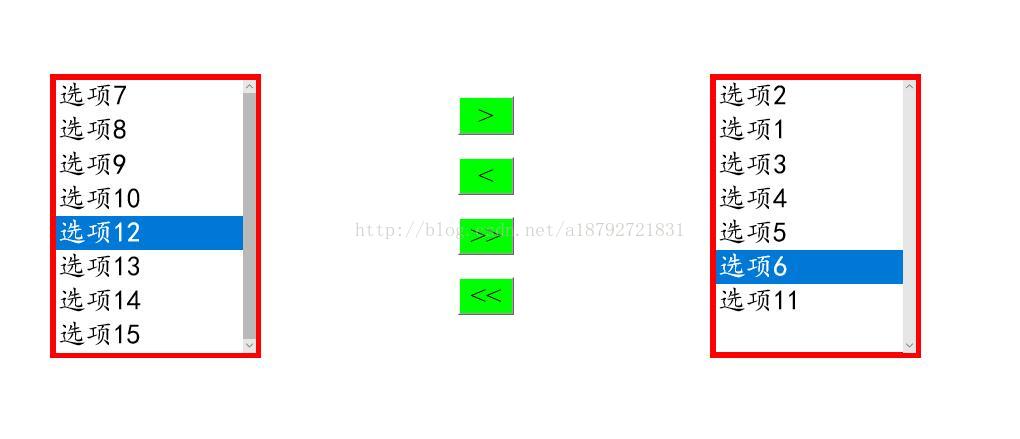
先上一张效果图:
开始我们的小项目:
1.先布局好界面:
1
2
3
4
5
<div>
    	<div id = "leftdiv" align="center" style="width: 200px;height: 400px;position: absolute;margin-left: 200px;margin-top: 75px;">
        <div id = "middlediv" align="center" style="width: 200px;height: 400px;margin-left: 500px;position: absolute;margin-top: 75px;">
        <div id = "rightdiv" align="center" style="width: 200px;height: 400px;margin-left: 800px;position: absolute;margin-top: 75px;">
</div>
这时候在界面上什么都看不到,添加如下代码:
在第一个内层div中添加:
1
<select id = "leftselect"></select>
在第二个内层div中添加:
1
2
3
4
<button id = "button1"></button><br>
<button id = "button2"></button><br>
<button id = "button3"></button><br>
<button id = "button4"></button>
在第三个内层div中添加:
1
<select id = "rightselect"></select>
2.我们既然是JQuery,那么,这些select和button的样式,事件什么的就都在JQuery中写了:
先添加JQuery的库:
1
 <script type="text/javascript" src = "../js/jquery.js"></script>
注意一点,src的字符串写法:../表示退出当前文件夹,因为我的html文件在HTML文件夹中,而JQuer库在js文件夹中,所以需要使用../来退出HTML文件夹
使用js/进入js文件夹
使用jquery.js找到我们的名字为jquery.js的JQuery库
切记在导入外部库的
3.写JQuery:
1
2
3
$(document).ready(function() {

});
固定写法,表示当document文档流在网页上显示完毕后,进入准备状态时,编译,执行这里的代码
继续写其他的JQuery代码:
1
2
3
4
5
6
7
8
9
10
11
12
13
14
15
16
17
18
19
20
21
22
var $select = $("#leftselect");
//通过JQuery的id选择器得到左面的select的JQuery对象
var $select1 = $("#rightselect");
//得到右面的select的JQuery对象
 $select.attr("multiple","multiple");
 //使用attr();函数设置select的风格,multiple表示不是下拉风格,是选择列表风格
 $select.width("190px");
 //通过width()函数设置select的宽度
 $select.attr("size","8");
 //设置select的界面中最大可以同时显示8个项
 $select.css("border","5px solid red");
 //设置select的css样式:边框线:5px 粗,实线 红色
 $select.css("backgroundColor","#FFFFFF");
 //设置select的背景色为白色:RGB格式,#FFFFFF为2+2+2看,红色+绿色+蓝色
 $select.css("color","#000000");
 //设置select的颜色为黑色
 $select.css("font-size","25px");
 //设置select中的字体大小为25px
 $select.css("font-family","楷体");
 //设置select中的字体为楷体
 $select.height("248px");
 //设置select的高度为248px
在select中添加项:
1
2
3
4
5
6
7
8
9
10
11
12
13
14
15
16
17
18
for(var i = 0;i<15;i++){
	var $option = $("<option></option>");
	//创建option标签
	$option.attr("id","option"+(i+1));
	//设置id为option(i+1)
	$option.css("backgroundColor","#FFFFFF");
	//设置背景色为白色
	$option.css("color","#000000");
	//设置字体颜色为黑色
	$option.css("font-size","25px");
	//设置字体大小为25px
	$option.css("font-family","楷体");
	//设置字体为楷体
	$option.text("选项"+(i+1));
	//设置文本为选项(i+1)
	$option.appendTo($select);
	//将option挂到select下
}
设置右面的select:
1
2
3
4
5
6
7
8
9
$select1.attr("multiple","multiple");
$select1.width("190px");
$select1.attr("size","8");
$select1.css("border","5px solid red");
$select1.css("backgroundColor","#FFFFFF");
$select1.css("color","#000000");
$select1.css("font-size","25px");
$select1.css("font-family","楷体");
$select1.height($select.height());
效果如下:

设置中间的button:
1
2
3
4
5
6
7
8
9
10
11
12
13
14
15
16
17
18
19
20
21
22
23
24
25
26
27
28
29
30
31
32
33
34
for(var i = 0;i<4;i++){
	var $temp = $("#button"+(i+1));
	$temp.css("backgroundColor","#00FF00");
	$temp.css("font-family","Times New Roman");
	$temp.css("font-size","25px");
	$temp.css("marginTop",height+"px");
	$temp.width("35px");
	switch(i){
		case 0:
			$temp.text(">");
			$temp.click(function() {
				$("#leftselect :selected").appendTo($select1);//使用id选择器和属性选择器联合找到选中的选项,并加入到右面的select中
			});
			break;
		case 1:
			$temp.text("<");
			$temp.click(function() {
				$("#rightselect :selected").appendTo($select);
			});
			break;
		case 2:
			$temp.text(">>");
			$temp.click(function() {
				$("#leftselect > option").appendTo($select1); //使用id选择器和子项选择器找到左面select中的所有项,并加入到右面的select中
			});
			break;
		case 3:
			$temp.text("<<");
			$temp.click(function() {
				$("#rightselect > option").appendTo($select);
			});
			break;
		}
}
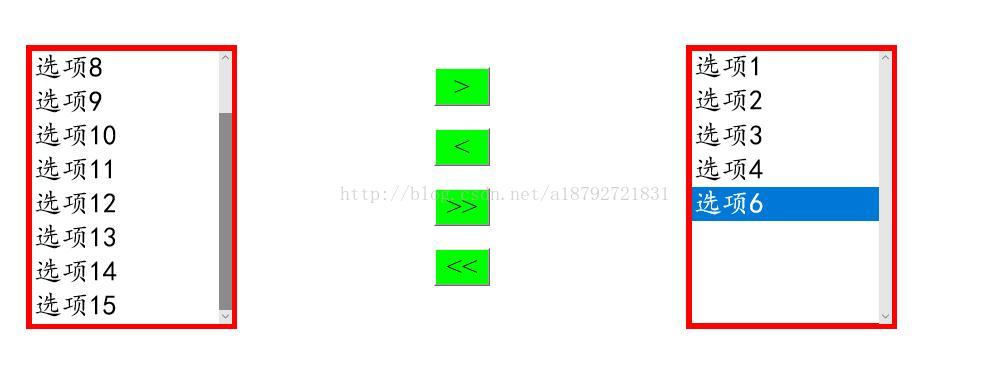
效果如下:

至此,这个小项目就完成了!

本文由作者按照 CC BY 4.0 进行授权