从0开始学java IO
从0开始学java IOIO 发展BIO设计思想核心类SocketIO 流BIO实例 -- 多人聊天室客户端服务端双阻塞客户端阻塞服务端并发客户端阻塞服务端复用线程并发客户端并发服务端复用线程并发NIOBIO VS NIO设计思想核心类BufferChannelSelectorNIO 实例 -- 本地文件拷贝 -- 编程步骤NIO 改写 BIO 项目 -- 多人聊天室改写前 VS 改写后AIOBIO VS NIO VS AIO设计思想核心类AIO 实例 -- 回音壁 -- 编程步骤AIO 改写 NIO 项目_从零学java io
文章信息
- 原文链接:https://jiayq.blog.csdn.net/article/details/115027890
- 发布时间:2021-03-20 14:58:44
- 阅读量:343
- 分类:java同时被 3 个专栏收录, 订阅专栏, java核心, 多线程
- 标签:#java IO, #多线程, #BIO, #NIO, #AIO
摘要
文章浏览阅读343次。从0开始学java IOIO 发展BIO设计思想核心类SocketIO 流BIO实例 – 多人聊天室客户端服务端双阻塞客户端阻塞服务端并发客户端阻塞服务端复用线程并发客户端并发服务端复用线程并发NIOBIO VS NIO设计思想核心类BufferChannelSelectorNIO 实例 – 本地文件拷贝 – 编程步骤NIO 改写 BIO 项目 – 多人聊天室改写前 VS 改写后AIOBIO VS NIO VS AIO设计思想核心类AIO 实例 – 回音壁 – 编程步骤AIO 改写 NIO 项目_从零学java io
从0开始学java IO
- IO 发展
- BIO
- 设计思想
- 核心类
- Socket
- IO 流
- Socket
- BIO实例 – 多人聊天室
- 客户端服务端双阻塞
- 客户端阻塞服务端并发
- 客户端阻塞服务端复用线程并发
- 客户端并发服务端复用线程并发
- 客户端服务端双阻塞
- 设计思想
- NIO
- BIO VS NIO
- 设计思想
- 核心类
- Buffer
- Channel
- Selector
- Buffer
- NIO 实例 – 本地文件拷贝 – 编程步骤
- NIO 改写 BIO 项目 – 多人聊天室
- 改写前 VS 改写后
- BIO VS NIO
- AIO
- BIO VS NIO VS AIO
- 设计思想
- 核心类
- AIO 实例 – 回音壁 – 编程步骤
- AIO 改写 NIO 项目 – 多人聊天室
- 改写前 VS 改写后
- 扩展
- BIO VS NIO VS AIO
- 总结
github地址:
https://github.com/a18792721831/studyio.git
IO 发展
- BIO
Blocked IO.阻塞IO.
jdk 1.4之前
- NIO
No-Blocked IO.非阻塞IO.
jdk 1.4之后
- AIO
Asynchronizated IO.异步IO.
jdk 1.7之后
NIO 和AIO 有什么区别?
非阻塞不就是异步吗?
首先阻塞和非阻塞是站在调用者的角度描述的。
同步和异步是描述调用方式的。
阻塞和同步是同一个事情的不同角度的描述。
同步阻塞
假设A调用B,在B返回之前什么事情都不干。在B返回后,A在接着干活。
这种调用机制是同步机制。对于A来说是阻塞的。即同步阻塞。
在单线程中一般同步必然阻塞。而阻塞也基本上是同步导致的。
同步非阻塞
假设A调用B,在B返回之前还能干其他的事情。在B返回后,A可以接着调用的地方继续干活。
这种调用机制是同步机制。对于A来说是阻塞的。即同步非阻塞。
在多线程中一般同步不一定阻塞。而阻塞也不一定是同步导致。(也可能线程调度导致)
对于同步,被调用者只会返回结果,在返回结果前,什么都不会告诉调用者。
异步阻塞
假设A调用B,B收到请求后,即可向A确定,我已收到请求,正在处理。而A在收到B的结果之前,什么都不干。
这种调用机制是异步机制。对于A来说是阻塞的。异步阻塞。
比如在多线程中进行耗时计算。假设有两个线程,A线程将一个表达式传给B线程进行计算,而B线程在收到调用后,立刻给了A线程一个对象,告诉A线程我计算完成后会放在这个对象中,你在我计算完成后从对象中取计算结果。
但是A线程在没有得到计算结果之前,什么都干不了,只能隔一段时间看看B是否计算完成。
异步非阻塞
假设A调用B,B收到请求后,立刻向A确定,我已收到请求,正在处理。而A在收到B的结果之前,还可以做其他的事情。
这种调用机制是异步机制。对于A来说是非阻塞的。异步非阻塞。
比如A线程需要计算两个表达式的和,而这两个表达式计算都比较耗费时间。于是A线程将第一个等式交给了B线程,然后将第二个等式交给了C线程。
在A调用B线程计算第一个表达式的值的时候,A线程得到了未来存储结果的对象。然后A线程现将对象保存起来,接着将第二个表达式交给C线程,C线程也交给A一个对象,这个对象未来存储计算结果。
然后A线程将第一个表达式的结果对象第二个表达式的结果对象统一交给D线程,D线程遍历查看是否计算完成,如果计算完成,那么进行表达式结果的汇总。
而A线程在完成调用后,就去调用第二组数据了。
这就是异步非阻塞。
BIO
设计思想
客户端发起一个请求,服务端接受这个请求,然后创建一个线程用于处理这个请求。当客户端断开连接后,服务端销毁线程。
因为创建和销毁线程耗费的资源比较高,因此,使用线程池可以节省资源。
核心类
Socket
目前计算机网络分为5层结构(有些资料上分为7层)
分别是物理层,链路层,网络层,传输层,应用层
- 物理层:就是网线,光纤,交换机等等物理设备。
- 链路层:二进制数据帧,不同网卡数据进行发送与接收
- 网络层:IP,不同主机进行区分,选择传输路径。
- 传输层:TCP/UDP,选择连接模式
- 应用层:HTTP/FTP/STMP/POP3,具体的应用
基于计算机网络,物理层没有身份识别问题,就是物理空间上的关系。
链路层身份识别使用mac地址。网络层身份识别是IP地址。
传输层识别TCP/UDP表头。
应用层则是通过端口来识别应用程序进程。
换句话说,当我们知道一个主机的IP,端口和协议,我们就能确定唯一的一个应用程序。
比如:http://www.baidu.com
我们就可以确定这是位于www.baidu主机的80端口对应的程序,这个程序使用的是http协议。
而IP和端口是这些较为底层的基础组件。
就是Socket,翻译是套接字。
用套接字有些抽象。但是也没啥好的翻译。但是我们应该理解,当我们得到了一个套接字,我们就能确定一个应用程序。
IO 流
javaIO
字符流
字节流
Reader
Writer
InputStream
OutputStream
CharArrayReader
StringReader
BufferedReader
FilterReader
InputStreamReader
FileReader
CharArrayWriter
StringWriter
BufferedWriter
FilterWriter
OutputStreamWriter
FileWriter
非常多,不计其数

BIO实例 – 多人聊天室
客户端:
Socket
服务端:
ServerSocket.
写一个小小的实例:客户端与服务端通信的实例
客户端服务端双阻塞
1
2
3
4
5
6
7
8
9
10
11
12
13
14
15
16
17
18
19
20
21
22
23
24
25
26
27
28
29
30
31
32
33
34
35
36
37
38
39
40
41
42
43
44
45
46
47
48
49
50
51
52
53
54
55
56
57
58
59
public class Server {

    private static final int PORT = 8989;

    public static void main(String[] args) {
        try (ServerSocket serverSocket = new ServerSocket(PORT)) {
            System.out.println("start up , port : " + PORT);
            while (true) {
                Socket socket = serverSocket.accept();
                String clientLog = "client [ " + socket.getInetAddress().getHostAddress() + ":" + socket.getPort() + "] ";
                System.out.println(clientLog);
                try (BufferedReader bufferedReader = new BufferedReader(new InputStreamReader(socket.getInputStream()));
                     BufferedWriter bufferedWriter = new BufferedWriter(new OutputStreamWriter(socket.getOutputStream()))) {
                    String msg;
                    while (!"quit".equals(msg = bufferedReader.readLine())) {
                        System.out.println(clientLog + " , msg : " + msg);
                        bufferedWriter.write(msg + " by server !\n");
                        bufferedWriter.flush();
                    }
                }
                System.out.println(clientLog + " quit !");
            }
        } catch (IOException e) {
            e.printStackTrace();
        }
    }

}


public class Server {

    private static final int PORT = 8989;

    public static void main(String[] args) {
        try (ServerSocket serverSocket = new ServerSocket(PORT)) {
            System.out.println("start up , port : " + PORT);
            while (true) {
                Socket socket = serverSocket.accept();
                String clientLog = "client [ " + socket.getInetAddress().getHostAddress() + ":" + socket.getPort() + "] ";
                System.out.println(clientLog);
                try (BufferedReader bufferedReader = new BufferedReader(new InputStreamReader(socket.getInputStream()));
                     BufferedWriter bufferedWriter = new BufferedWriter(new OutputStreamWriter(socket.getOutputStream()))) {
                    String msg;
                    while (!"quit".equals(msg = bufferedReader.readLine())) {
                        System.out.println(clientLog + " , msg : " + msg);
                        bufferedWriter.write(msg + " by server !\n");
                        bufferedWriter.flush();
                    }
                }
                System.out.println(clientLog + " quit !");
            }
        } catch (IOException e) {
            e.printStackTrace();
        }
    }

}
启动之后,客户端从键盘接收输入,然后发送给服务端,服务端收到信息后,增加一个服务端确认,然后在将确认消息返回客户端展示。
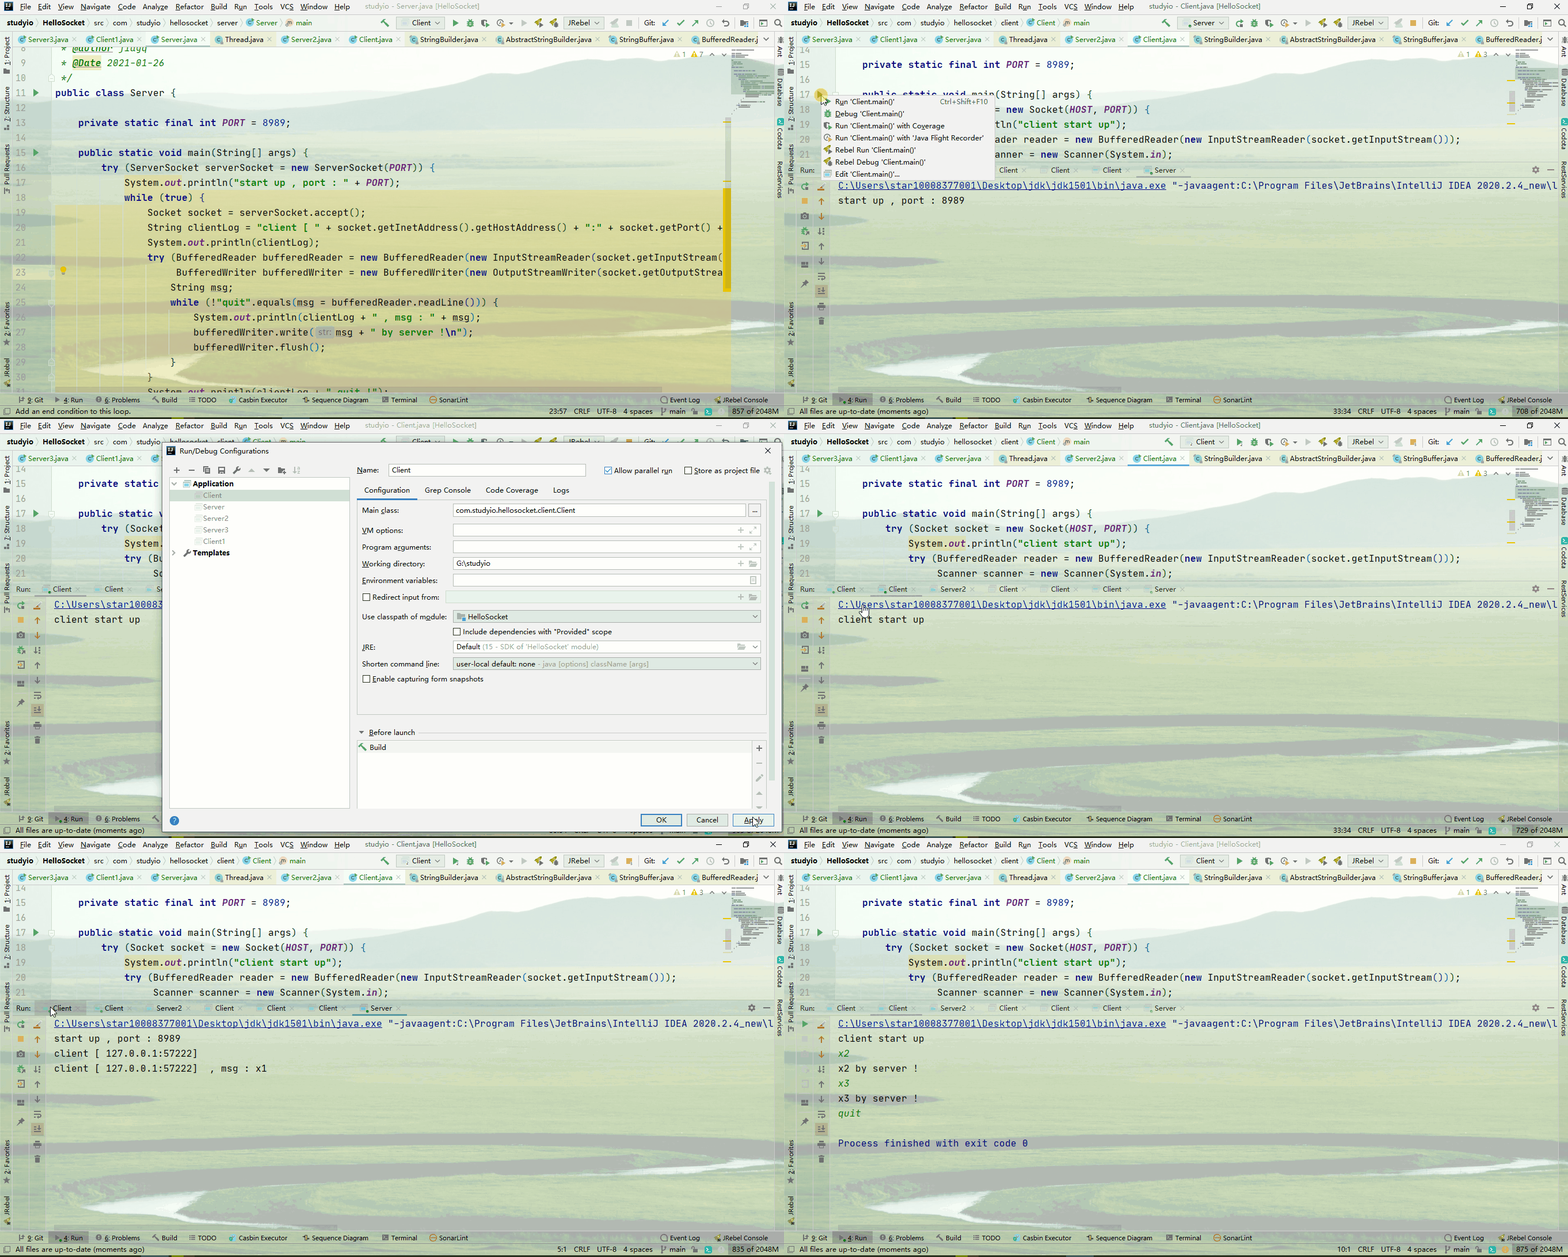
但是我们需要的是多人聊天室,虽然上面的例子实现了客户端和服务端通信。但是多人聊天可不止一个客户端。
在上面的例子中,我们如果启动两个客户端,此时第二个客户端会阻塞。
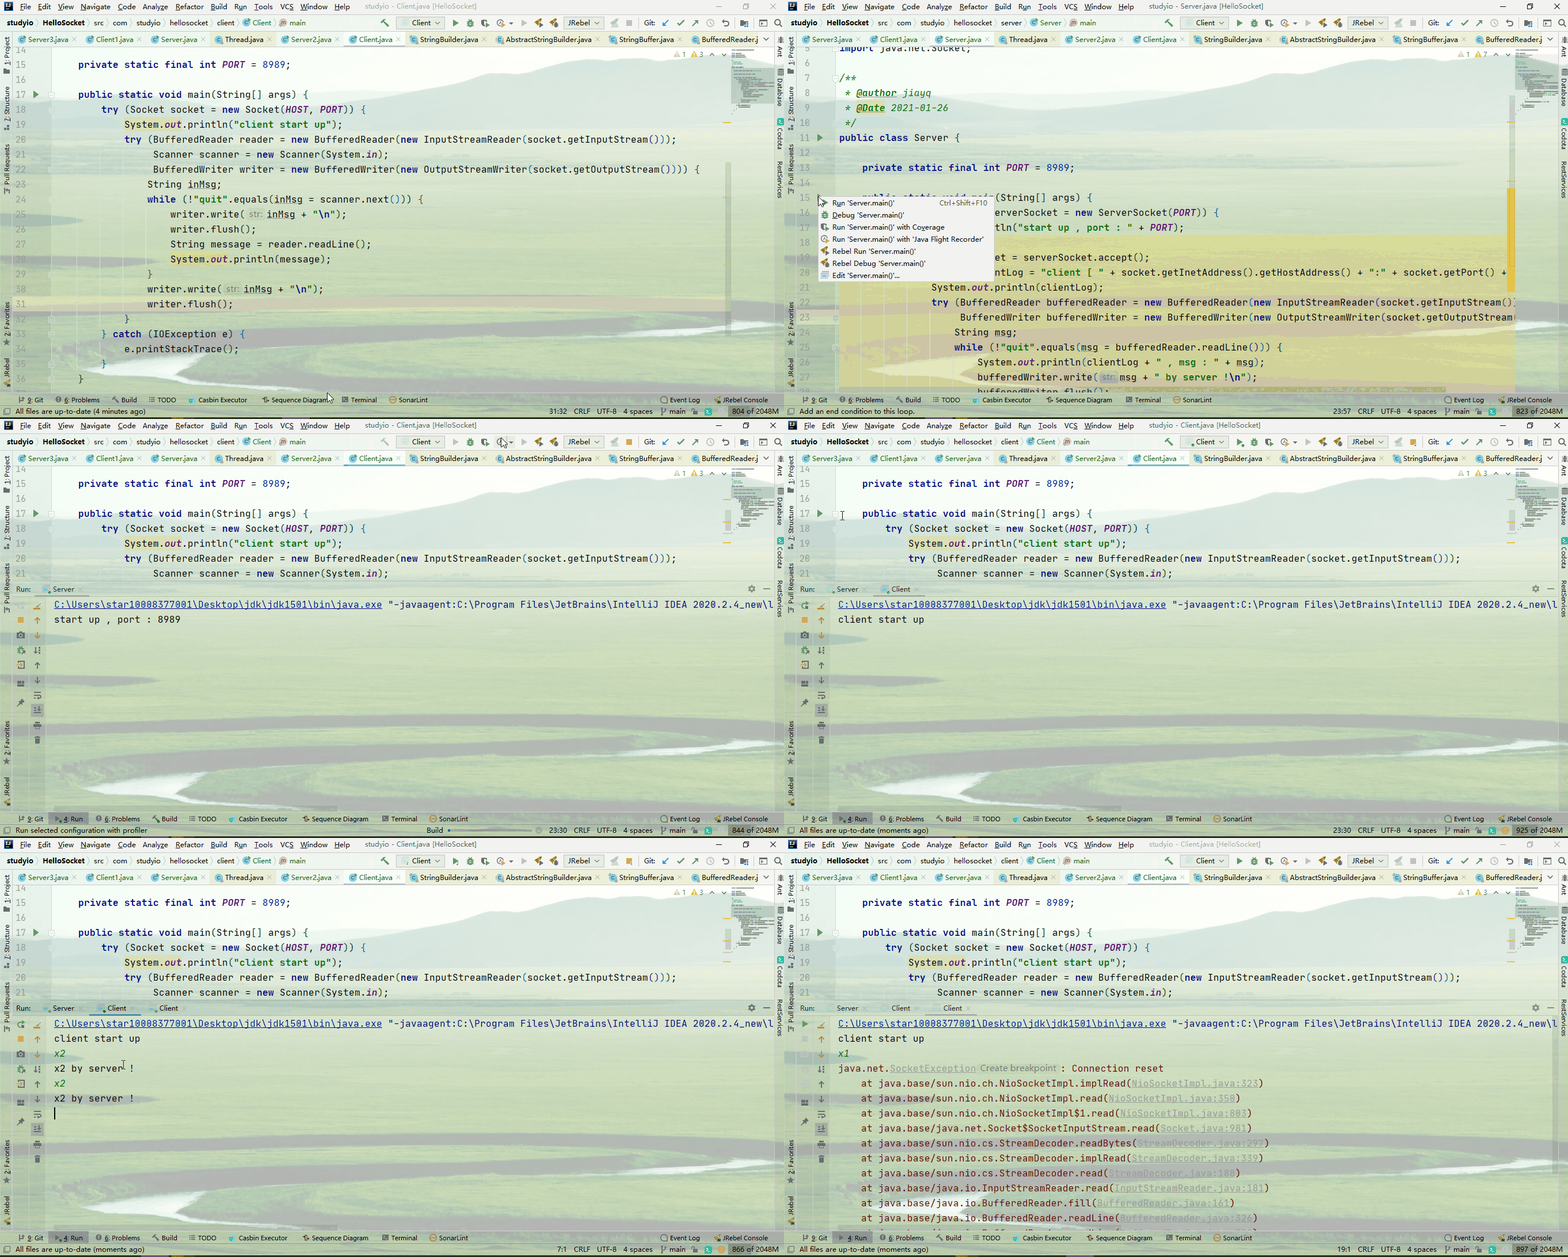
看到这里,因为我们第一个客户端采用非正常的手段进行停止,因此导致服务器异常,竟然影响到了第二个客户端。
我们采用正常情况的退出,那么第二个客户端会继续处理的。
这种方式对于客户端来说就是阻塞的。
在客户端收到服务端的响应之前,客户端什么都干不了。
客户端阻塞服务端并发
我们首先使用多线程的方式,让服务端能接受多个客户端的请求。
1
2
3
4
5
6
7
8
9
10
11
12
13
14
15
16
17
18
19
20
21
22
23
24
25
26
27
28
29
30
31
32
33
34
35
36
37
38
39
40
public class Server2 {

    private static final int PORT = 8989;

    public static void main(String[] args) {
        try (ServerSocket serverSocket = new ServerSocket(PORT)) {
            System.out.println("start up , port : " + PORT);
            ExecutorService service = new ThreadPoolExecutor(5, 10, 0, TimeUnit.SECONDS, new LinkedBlockingQueue<>(20));
            Consumer<Socket> backer = socket -> {
                String clientLog = "client [ " + socket.getInetAddress().getHostAddress() + ":" + socket.getPort() + " ] ";
                System.out.println(Thread.currentThread().getName() + clientLog);
                try (BufferedReader bufferedReader = new BufferedReader(new InputStreamReader(socket.getInputStream()));
                     BufferedWriter bufferedWriter = new BufferedWriter(new OutputStreamWriter(socket.getOutputStream()))) {
                    String msg;
                    while (!"quit".equals(msg = bufferedReader.readLine())) {
                        System.out.println(Thread.currentThread().getName() + clientLog + " , msg : " + msg);
                        bufferedWriter.write(msg + " by server !\n");
                        bufferedWriter.flush();
                    }
                } catch (IOException e) {
                    e.printStackTrace();
                }
                System.out.println(Thread.currentThread().getName() + clientLog + " quit !");
            };
            Consumer<Socket> tasker = socket -> {
                Runnable runnable = () -> {
                    backer.accept(socket);
                };
                service.execute(runnable);
            };
            while (true) {
                Socket socket = serverSocket.accept();
                tasker.accept(socket);
            }
        } catch (IOException e) {
            e.printStackTrace();
        }
    }

}
更新后的服务端使用了线程池,线程池中的每一个线程处理一个客户端的请求。
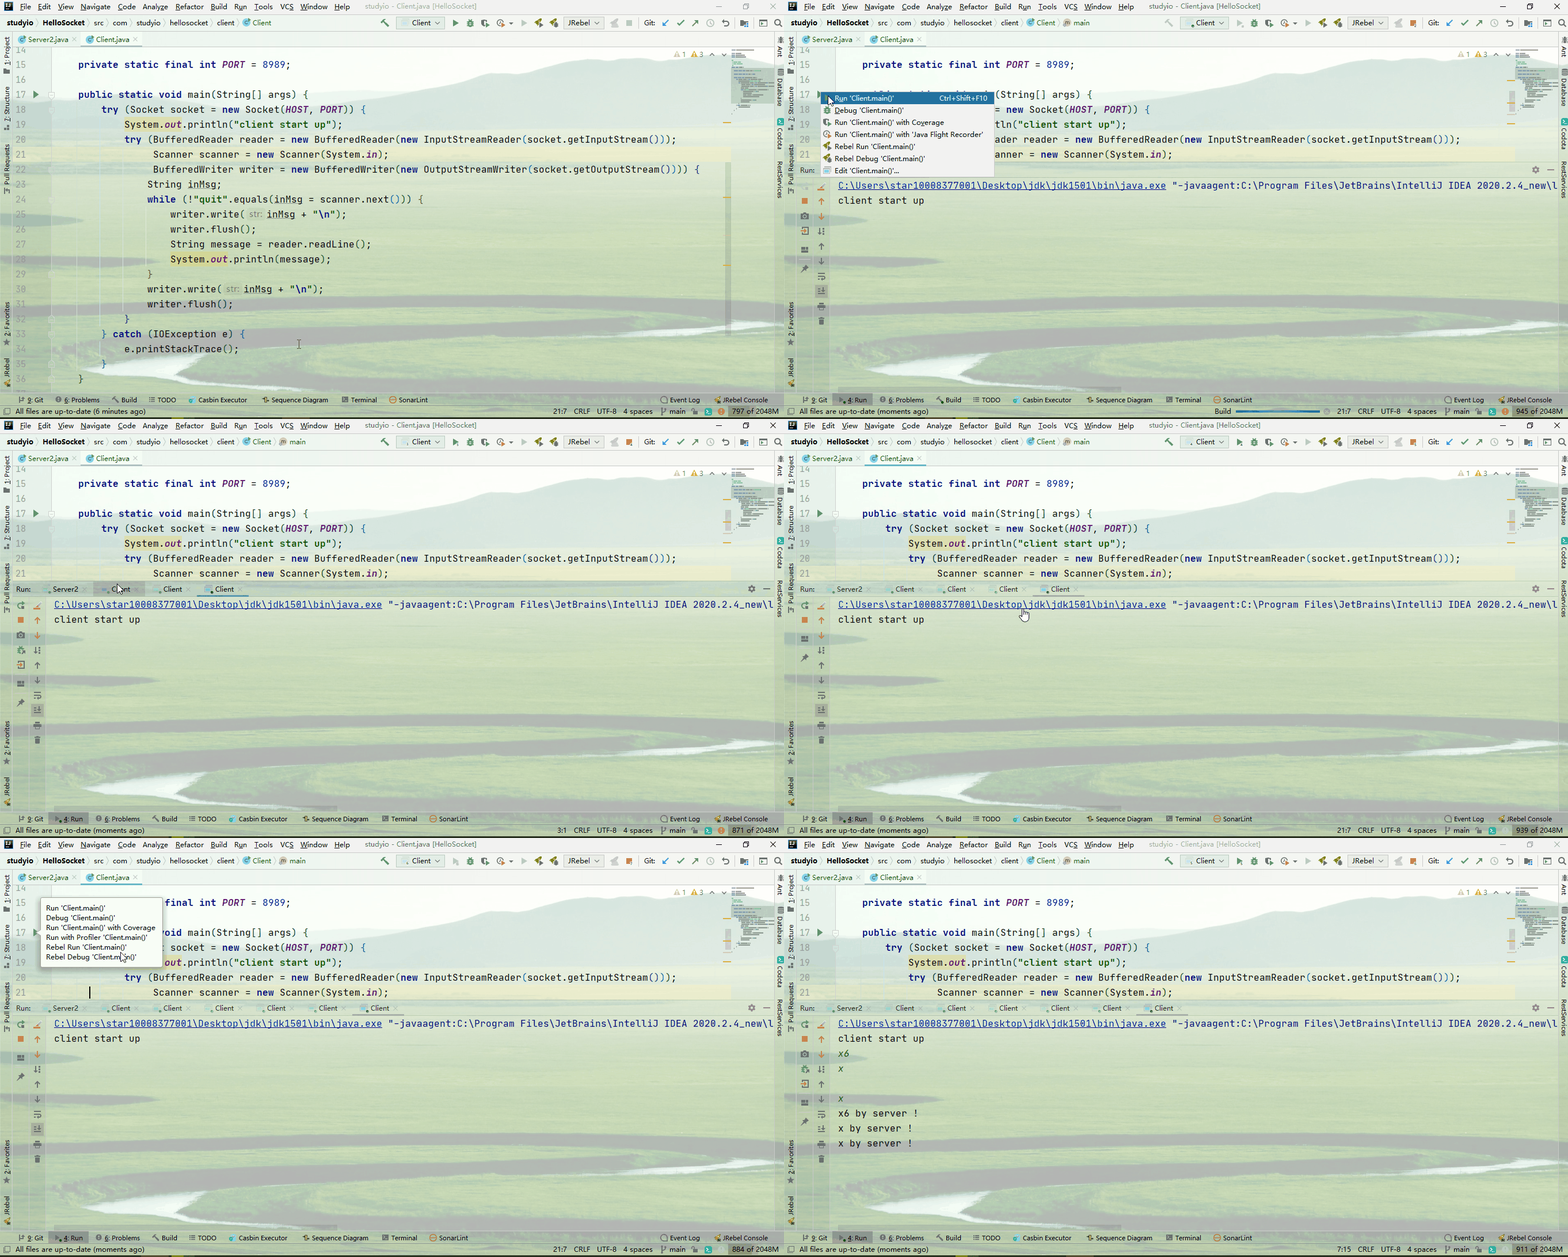
即使这样,我们从动态演示中也可以看出,对于有限个数的客户端,服务端还能提供链接,但是如果客户端的数量超出线程池的线程数量,超出的这部分就需要排队了。
客户端阻塞服务端复用线程并发
分析代码,出现上述问题的原因就是在于我们线程池的线程数量不足。
但是我们又无法无限提供线程数量。
线程数量是有限的,线程资源是宝贵的。
那么我们能不能复用线程呢?一个线程处理多个客户端。
我们用一个线程接收客户端的请求,一个线程用于广播服务端的请求。
别忘了,我们的初衷是实现一个多人聊天的程序。多人聊天就是1个人发言,所有人都可以看到。
所以,我开发出了第三版
1
2
3
4
5
6
7
8
9
10
11
12
13
14
15
16
17
18
19
20
21
22
23
24
25
26
27
28
29
30
31
32
33
34
35
36
37
38
39
40
41
42
43
44
45
46
47
48
49
50
51
52
53
54
55
56
57
58
59
60
61
62
63
64
65
66
67
68
69
70
71
72
73
74
75
76
77
78
79
80
81
82
83
84
85
86
87
88
89
90
91
92
93
94
95
96
97
98
99
100
101
102
103
104
105
106
107
public class Server3 {

    private static final int PORT = 8989;

    public static void main(String[] args) {
        try (ServerSocket serverSocket = new ServerSocket(PORT)) {
            System.out.println("start up , port : " + PORT);
            Map<Socket, BufferedReader> ins = new HashMap<>();
            Map<Socket, BufferedWriter> outs = new HashMap<>();
            final StringBuilder message = new StringBuilder();
            ReentrantLock lock = new ReentrantLock();
            Runnable readTask = () -> {
                while (true) {
                    for (Map.Entry<Socket, BufferedReader> entry : ins.entrySet()) {
                        try {
                            if (entry.getValue().ready() && message.isEmpty()) {
                                try {
                                    lock.lock();
                                    String msg = entry.getValue().readLine();
                                    if ("quit".equals(msg)) {
                                        ins.remove(entry.getKey()).close();
                                        outs.remove(entry.getKey()).close();
                                    }
                                    message.append(entry.getKey().getPort() + " : " + msg);
                                    System.out.println(message);
                                } catch (IOException e) {
                                    ins.remove(entry.getKey()).close();
                                    outs.remove(entry.getKey()).close();
                                } finally {
                                    lock.unlock();
                                }
                            }
                        } catch (IOException e) {
                            try {
                                lock.lock();
                                ins.remove(entry.getKey()).close();
                                outs.remove(entry.getKey()).close();
                            } catch (IOException ioException) {
                                ioException.printStackTrace();
                            } finally {
                                lock.unlock();
                            }
                        }
                    }
                    try {
                        TimeUnit.MILLISECONDS.sleep(100);
                    } catch (InterruptedException e) {
                    }
                }
            };
            Runnable writeTask = () -> {
                while (true) {
                    BufferedWriter remover = null;
                    try {
                        lock.lock();
                        if (!message.isEmpty()) {
                            for (BufferedWriter writer : outs.values()) {
                                remover = writer;
                                writer.write(message.toString() + "\n");
                                writer.flush();
                            }
                            message.delete(0, message.length());
                        }
                    } catch (IOException e) {
                        Socket socket = null;
                        for (Map.Entry<Socket, BufferedWriter> entry : outs.entrySet()) {
                            if (entry.getValue().equals(remover)) {
                                socket = entry.getKey();
                                break;
                            }
                        }
                        try {
                            outs.remove(socket).close();
                            ins.remove(socket).close();
                        } catch (IOException ioException) {
                        }
                    } finally {
                        lock.unlock();
                    }
                    try {
                        TimeUnit.MILLISECONDS.sleep(100);
                    } catch (InterruptedException e) {
                    }
                }
            };
            new Thread(readTask).start();
            new Thread(writeTask).start();
            while (true) {
                Socket socket = serverSocket.accept();
                String clientLog = "client [ " + socket.getInetAddress().getHostAddress() + ":" + socket.getPort() + " ] ";
                System.out.println(Thread.currentThread().getName() + clientLog);
                BufferedReader reader = new BufferedReader(new InputStreamReader(socket.getInputStream()));
                BufferedWriter writer = new BufferedWriter(new OutputStreamWriter(socket.getOutputStream()));
                try {
                    lock.lock();
                    ins.put(socket, reader);
                    outs.put(socket, writer);
                } finally {
                    lock.unlock();
                }
            }
        } catch (IOException e) {
            e.printStackTrace();
        }
    }

}
服务端分为三个线程,主线程用于创建和服务端的连接,然后将连接放到映射表中。
读线程用于将客户端发送的信息收到服务端。
写线程用于将服务端收到的信息广播出去。
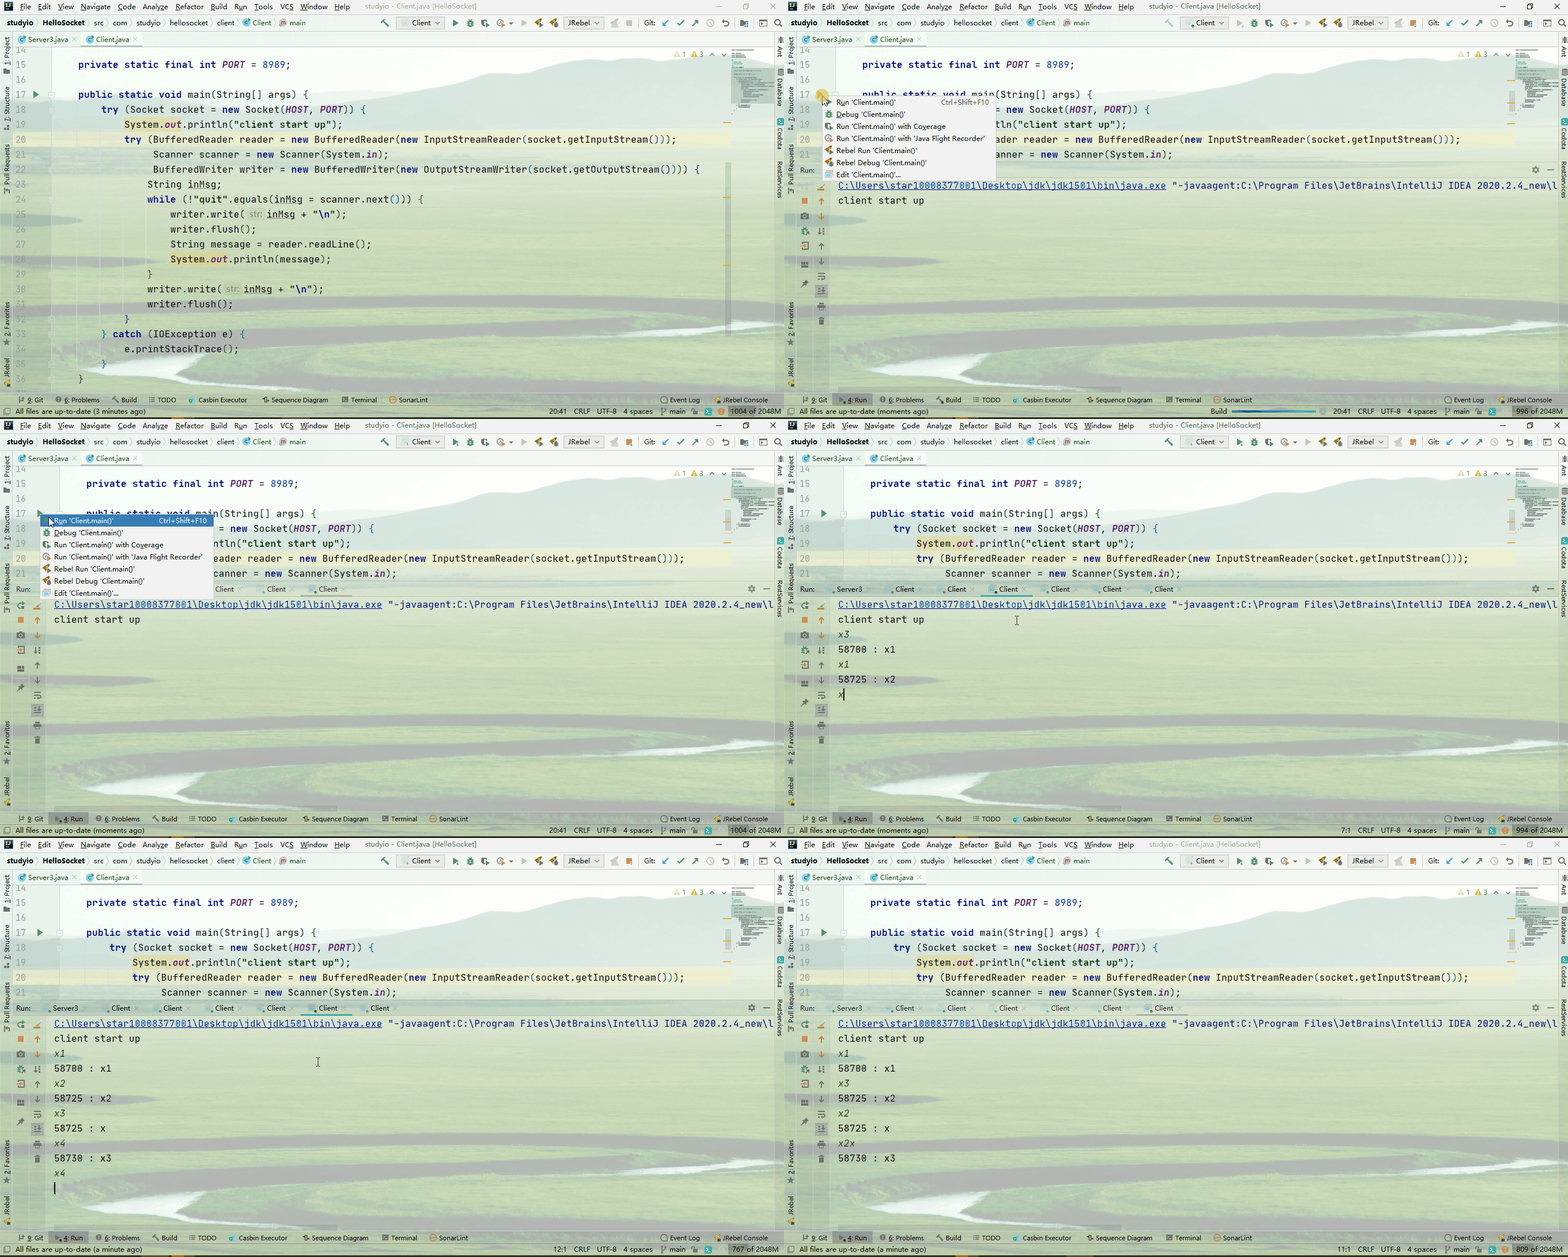
但是这样,对于服务端是OK的,可以并发了,但是客户端还是阻塞的。客户端在等待用户输入的时候,是无法接受服务端的消息的。
客户端并发服务端复用线程并发
因为我们已经将服务端进行修改,是服务端可以复用线程。在客户端可比服务端简单多了。客户端就只需要向服务端接收消息以及发送消息就够了。我们在客户端也使用两个线程处理:1个线程发送消息,1个线程接收消息。负责发送消息的线程,还需要处理用户输入。
1
2
3
4
5
6
7
8
9
10
11
12
13
14
15
16
17
18
19
20
21
22
23
24
25
26
27
28
29
30
31
32
33
34
35
36
37
38
39
40
41
42
43
44
45
46
47
48
49
50
51
52
53
54
public class Client1 {

    private static final String HOST = "127.0.0.1";

    private static final int PORT = 8989;

    public static void main(String[] args) {
        try (Socket socket = new Socket(HOST, PORT)) {
            System.out.println("client start up");
            try (BufferedReader reader = new BufferedReader(new InputStreamReader(socket.getInputStream()));
                 Scanner scanner = new Scanner(System.in);
                 BufferedWriter writer = new BufferedWriter(new OutputStreamWriter(socket.getOutputStream()))) {
                Runnable readTask = () -> {
                    while (true) {
                        try {
                            if (reader.ready()) {
                                System.out.println(reader.readLine());
                            }
                            TimeUnit.MILLISECONDS.sleep(100);
                        } catch (IOException e) {
                        } catch (InterruptedException e) {
                            break;
                        }
                    }
                };
                Thread read = new Thread(readTask);
                Runnable writeTask = () -> {
                    try {
                        String inMsg;
                        while (!"quit".equals(inMsg = scanner.next())) {
                            writer.write(inMsg + "\n");
                            writer.flush();
                            TimeUnit.MILLISECONDS.sleep(100);
                        }
                        writer.write(inMsg + "\n");
                        writer.flush();
                    } catch (IOException e) {
                        e.printStackTrace();
                    } catch (InterruptedException e) {
                    }
                };
                read.start();
                Thread write = new Thread(writeTask);
                write.start();
                write.join();
                read.interrupt();
                read.join();
            }
        } catch (IOException | InterruptedException e) {
            e.printStackTrace();
        }
    }

}
这样,客户端和服务端都是线程复用并发的了。
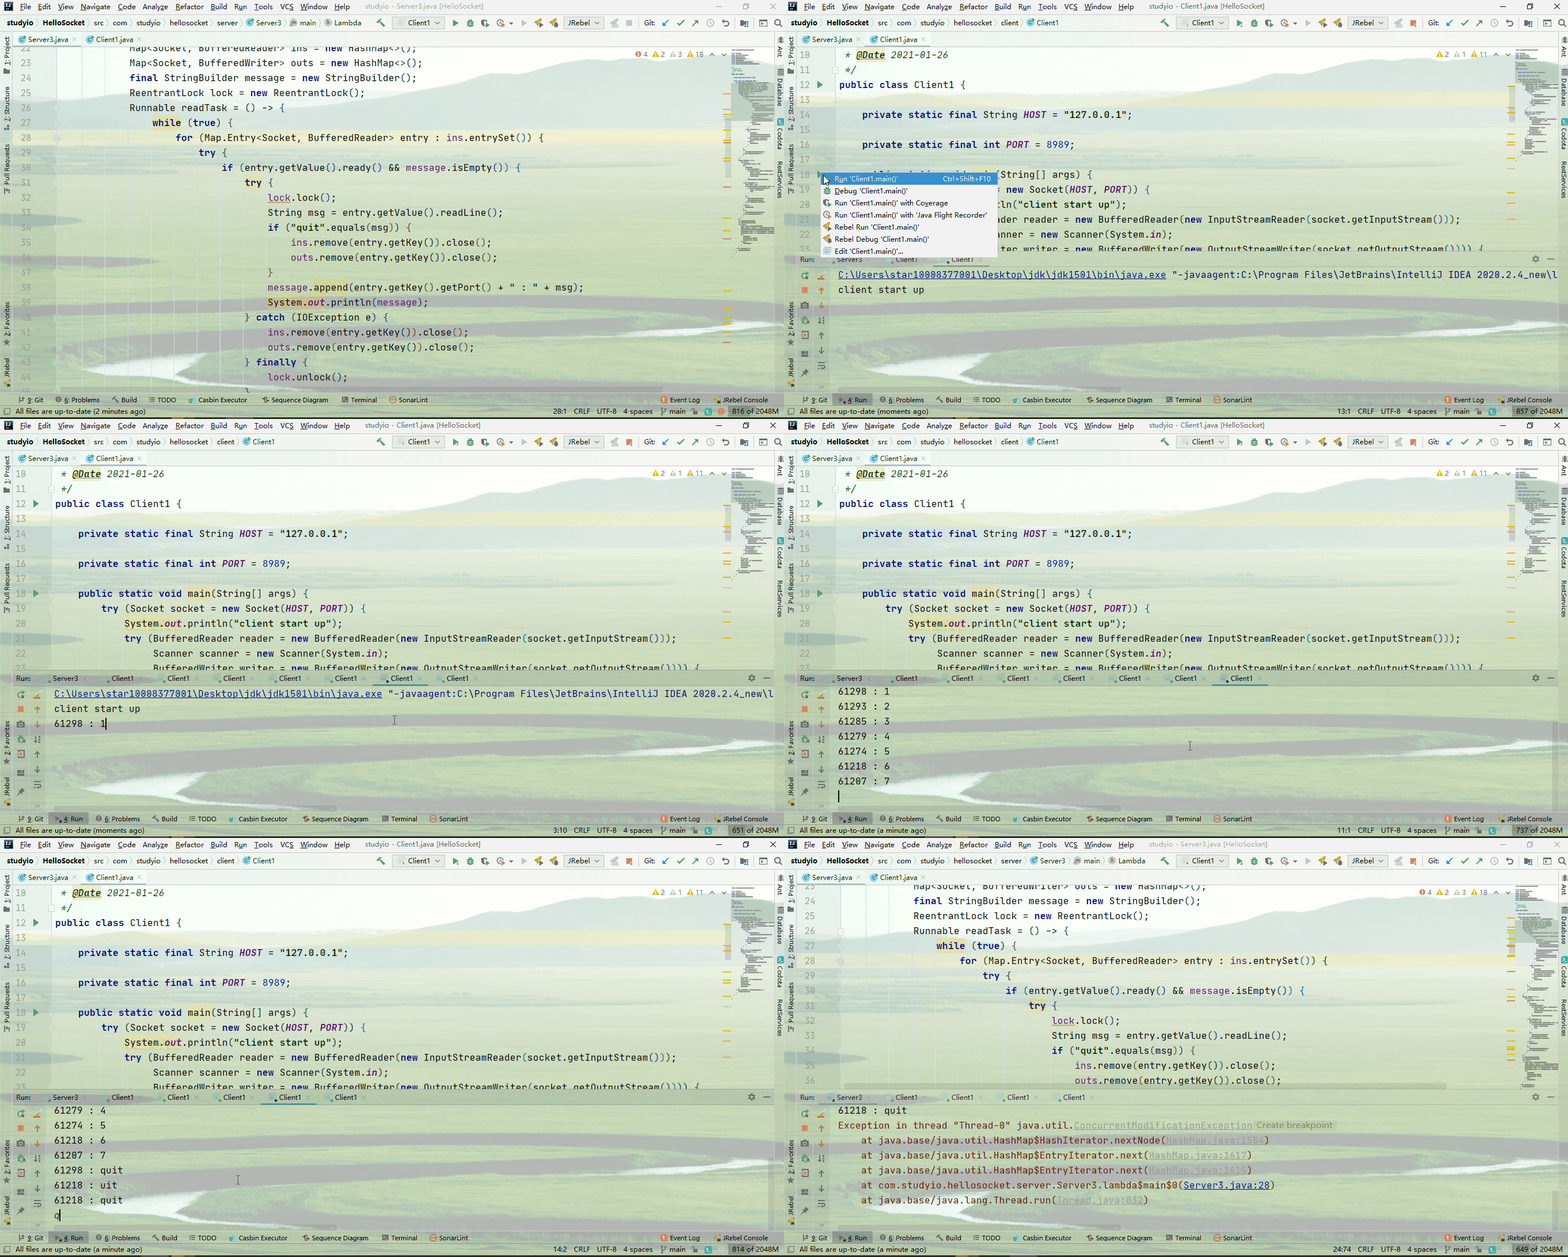
这里发现前面还是很完美的,但是退出却不太好,有异常。
如果你了解锁,那么一定可以看出原因。因为我的锁的范围太小了。
在我用for循环遍历时,是不加锁的,而其他线程获取到锁之后,会修改映射表。此时就无法遍历了。
要解决这个问题,最核心的是因为我们在for循环中使用了remove方法。
如果必须在for循环中使用remove方法,那么必须使用迭代器的remove方法。这样才不会抛出这个异常。
因此,我们将map的remove操作提取出来,作为一个函数
1
2
3
4
5
6
7
8
9
10
11
12
13
14
    private static final BiConsumer<Map<Socket, BufferedWriter>, Socket> removeWriter = (map, socket) -> {
        Iterator<Map.Entry<Socket, BufferedWriter>> outIter = map.entrySet().iterator();
        while (outIter.hasNext()) {
            Map.Entry<Socket, BufferedWriter> out = outIter.next();
            if (out.getKey().equals(socket)) {
                try {
                    out.getValue().flush();
                    out.getValue().close();
                } catch (IOException e) {
                }
                outIter.remove();
            }
        }
    };
这个函数传入两个参数,没有返回值。
然后将reader和writer也提取到main方法外面
1
2
3
4
5
6
7
8
9
10
11
12
13
14
15
16
17
18
19
20
21
22
23
24
25
26
27
28
29
30
31
32
33
34
35
36
37
38
39
40
41
42
43
44
45
46
47
48
49
50
51
52
53
54
55
56
57
58
59
60
61
62
63
64
65
66
67
68
69
70
71
72
73
74
75
76
77
78
79
80
81
82
83
84
85
86
87
88
89
90
91
92
93
94
95
96
97
98
99
100
101
102
103
104
105
106
107
108
109
110
111
112
113
114
115
116
117
118
119
120
121
122
123
124
125
126
127
128
129
130
131
132
133
134
135
136
137
138
139
140
141
142
143
144
145
146
147
148
149
150
151
152
153
154
155
156
157
158
159
160
161
162
163
164
165
166
167
168
169
170
public class Server3 {

    // 监听端口
    private static final int PORT = 8989;

    // 读取连接
    private static final Map<Socket, BufferedReader> ins = new HashMap<>();

    // 写入连接
    private static final Map<Socket, BufferedWriter> outs = new HashMap<>();

    // 广播信息变量
    private static final StringBuilder message = new StringBuilder();

    // 线程重入锁
    private static final ReentrantLock lock = new ReentrantLock();

    // 断开连接信息
    private static final String QUIT = "quit";

    // writer的移除器
    private static final BiConsumer<Map<Socket, BufferedWriter>, Socket> removeWriter = (map, socket) -> {
        Iterator<Map.Entry<Socket, BufferedWriter>> outIter = map.entrySet().iterator();
        while (outIter.hasNext()) {
            Map.Entry<Socket, BufferedWriter> out = outIter.next();
            if (out.getKey().equals(socket)) {
                try {
                    out.getValue().flush();
                    out.getValue().close();
                } catch (IOException e) {
                }
                outIter.remove();
            }
        }
    };

    // reader的移除器
    private static final BiConsumer<Map<Socket, BufferedReader>, Socket> removeReader = (map, socket) -> {
        Iterator<Map.Entry<Socket, BufferedReader>> inIter = map.entrySet().iterator();
        while (inIter.hasNext()) {
            Map.Entry<Socket, BufferedReader> in = inIter.next();
            if (in.getKey().equals(socket)) {
                try {
                    in.getValue().close();
                } catch (IOException e) {
                }
                inIter.remove();
            }
        }
    };

    // 通过reader获取socket
    private static final BiFunction<Map<Socket, BufferedReader>, BufferedReader, Socket> getSocketByReader = (map, value) -> {
        for (Map.Entry<Socket, BufferedReader> entry : map.entrySet()) {
            if (entry.getValue().equals(value)) {
                return entry.getKey();
            }
        }
        return null;
    };

    // 通过writer获取socket
    private static final BiFunction<Map<Socket, BufferedWriter>, BufferedWriter, Socket> getSocketByWriter = (map, value) -> {
        for (Map.Entry<Socket, BufferedWriter> entry : map.entrySet()) {
            if (entry.getValue().equals(value)) {
                return entry.getKey();
            }
        }
        return null;
    };

    // 睡眠指定的时间
    private static final Consumer<Integer> sleepSeconds = second -> {
        try {
            TimeUnit.MILLISECONDS.sleep(100);
        } catch (InterruptedException e) {
        }
    };

    // 读线程
    // 读线程的作用是接收客户端的信息,放到message中。
    // 如果信息是quit,那么将当前客户端的writer和reader移除。也就是断开连接
    private static final Runnable readTask = () -> {
        while (true) {
            try {
                lock.lock();
                Iterator<Map.Entry<Socket, BufferedReader>> iterator = ins.entrySet().iterator();
                while (iterator.hasNext()) {
                    Map.Entry<Socket, BufferedReader> entry = iterator.next();
                    try {
                        if (entry.getValue().ready() && message.isEmpty()) {
                            try {
                                String msg = entry.getValue().readLine();
                                message.append(entry.getKey().getPort() + " : " + msg);
                                if (QUIT.equals(msg)) {
                                    outs.get(entry.getKey()).write(message.toString());
                                    iterator.remove();
                                    removeWriter.accept(outs, entry.getKey());
                                }
                                System.out.println(message);
                            } catch (IOException e) {
                                iterator.remove();
                                removeWriter.accept(outs, entry.getKey());
                            }
                        }
                    } catch (IOException e) {
                        iterator.remove();
                        removeWriter.accept(outs, entry.getKey());
                    }
                }
            } finally {
                lock.unlock();
            }
            sleepSeconds.accept(100);
        }
    };

    // 写线程
    // 作为服务端的写线程的工作是将message变量中的信息广播给所有的客户端
    private static final Runnable writeTask = () -> {
        while (true) {
            BufferedWriter remover = null;
            try {
                lock.lock();
                if (!message.isEmpty()) {
                    for (BufferedWriter writer : outs.values()) {
                        remover = writer;
                        writer.write(message.toString() + "\n");
                        writer.flush();
                    }
                    message.delete(0, message.length());
                }
            } catch (IOException e) {
                Socket socket = getSocketByWriter.apply(outs, remover);
                removeReader.accept(ins, socket);
                removeWriter.accept(outs, socket);
            } finally {
                lock.unlock();
            }
            sleepSeconds.accept(100);
        }
    };

    // main方法
    // main线程主要的工作就是作为服务端,和客户端建立连接
    // 创建对应的reader和writer
    public static void main(String[] args) {
        try (ServerSocket serverSocket = new ServerSocket(PORT)) {
            System.out.println("start up , port : " + PORT);
            new Thread(readTask).start();
            new Thread(writeTask).start();
            while (true) {
                Socket socket = serverSocket.accept();
                String clientLog = "client [ " + socket.getInetAddress().getHostAddress() + ":" + socket.getPort() + " ] ";
                System.out.println(Thread.currentThread().getName() + clientLog);
                BufferedReader reader = new BufferedReader(new InputStreamReader(socket.getInputStream()));
                BufferedWriter writer = new BufferedWriter(new OutputStreamWriter(socket.getOutputStream()));
                try {
                    lock.lock();
                    ins.put(socket, reader);
                    outs.put(socket, writer);
                } finally {
                    lock.unlock();
                }
            }
        } catch (IOException e) {
        }
    }

}
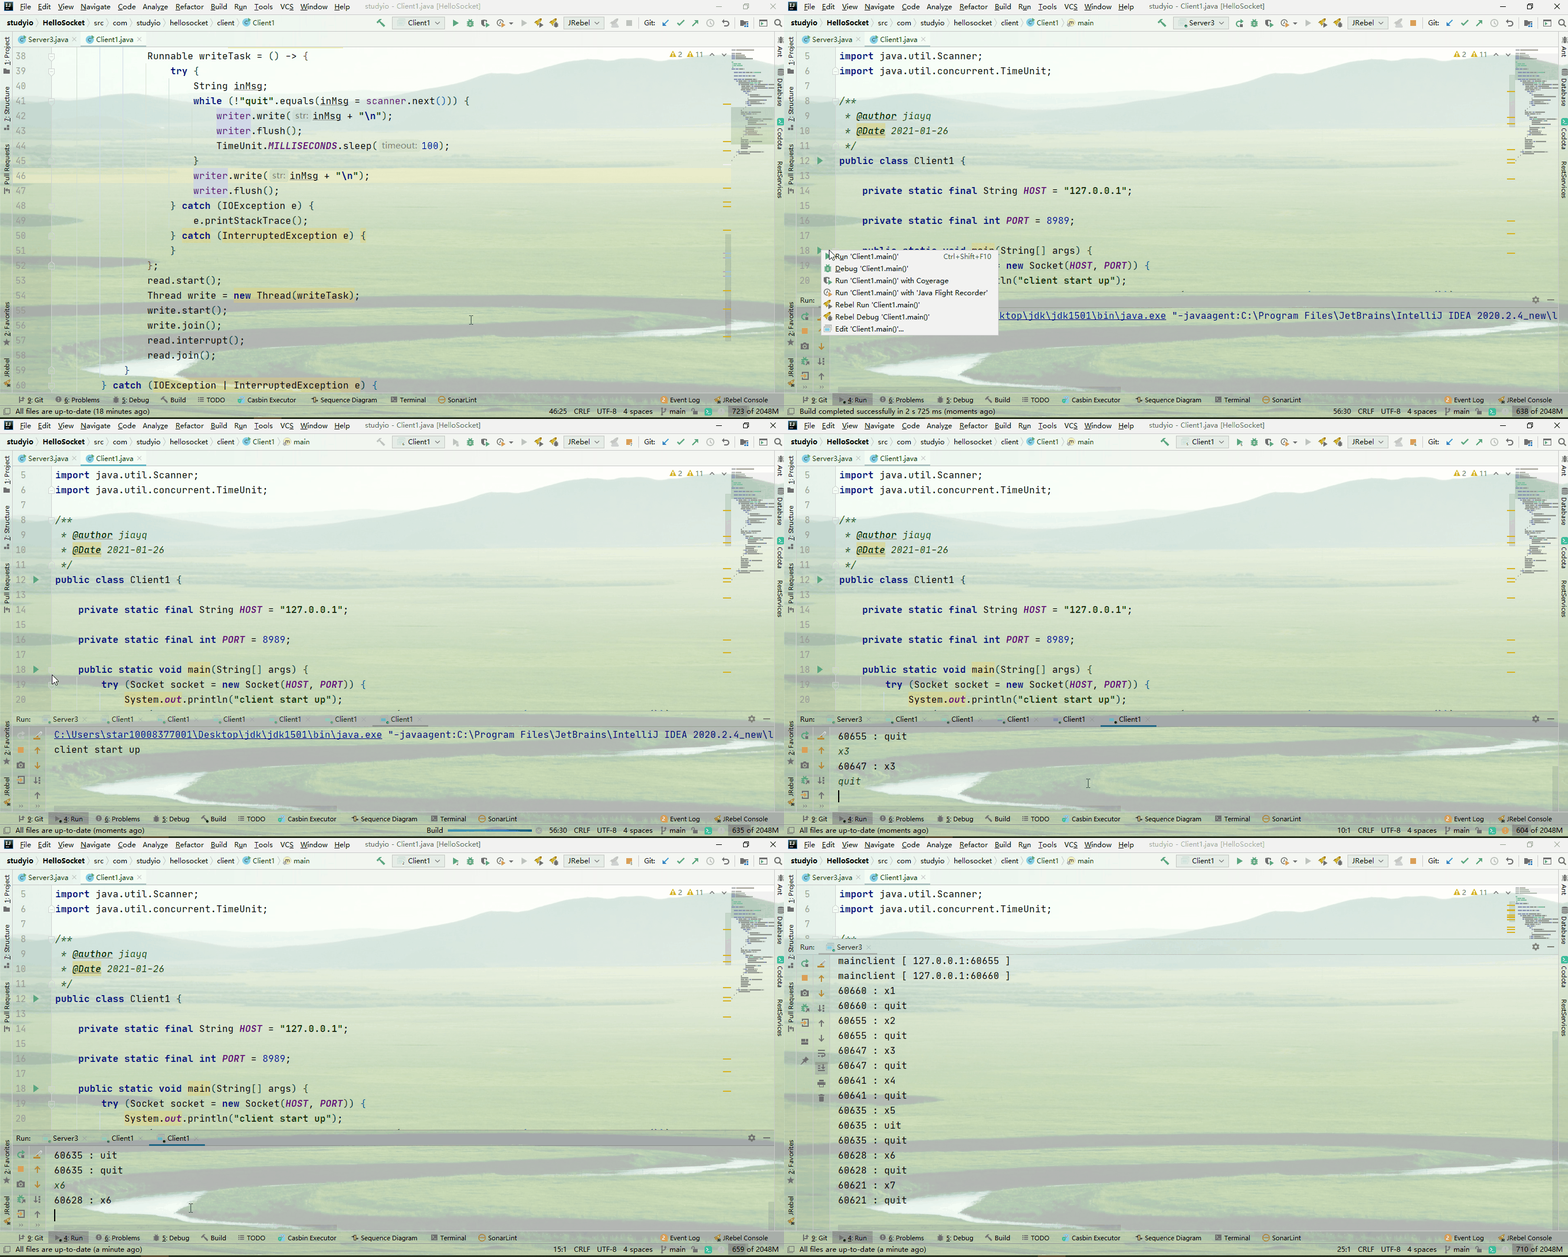
执行结果如下
总结我们最终的聊天室:
服务端只有3个线程:主线程、读线程、写线程。
客户端只有3个线程:主线程、读线程、写线程。
我们1个服务端,7个客户端,可以看到响应非常快,基本上感觉不到延迟。
如果你的客户端足够多,那么确实会有停断感。
但是别忘了,我们一些线程中每次循环完毕会进行睡眠。随着客户端的增加,我们调整睡眠时间,就可以减少停顿感。
个人预估:我认为,我们三个线程处理这样简单的工作,1个服务端对应上万的客户端不是问题。(需要取消睡眠)
为什么性能这么好?
首先是业务简单,其次是线程少,那么锁竞争也不会太多。
还能不能更好?
我认为能。在这里我们使用了锁,对于锁我们有很多的竞争和等待的。
而且,我们的服务端的入口有2个:客户端请求创建连接,此时会用到锁,其次是客户端发送信息,服务端需要加锁遍历,看看哪个客户端发送信息。
随着客户端的增加,我们遍历一遍锁的消耗是很高的。
- 我们可以将映射表,修改为环形列表。
修改为环形列表,那么我们可以缩小锁的粒度,只需要锁住一个对象即可,无需锁住整个环。
而且环的插入和删除,也是不需要加锁的。我们保证在业务完成之后,在从环上剥落节点。
- 多线程读,多线程写。
当映射环比较大的时候,单个线程遍历一次,需要的时间可能很长。
我们可以将环上增加多个指针对象,每个指针对象对应一个线程。
比如我们的环是30W,环上有10个线程。每个线程遍历一遍环需要10秒。现在10个环一起遍历一遍就只需要1秒。
- 环拆分
当环到达一定的数量的时候,为了保证遍历速度,保证服务端的响应速度,我们需要拆分环。
当然,上述都是在不修改大的架构的前提下进行优化。实际上我们有更好的解决方案,比如分布式,比如削峰限流保证响应速度等等。
NIO
BIO VS NIO
BIO中的阻塞:
- 服务端等待客户端简历连接的阻塞:ServerSocket.accept()阻塞
- 客户端或者服务端读取数据的阻塞:Reader.readLine()阻塞
- 客户端或者服务端写入数据的阻塞:Writer.write()阻塞
在BIO的实例中,对于IO的阻塞,可以通过调用Reader.ready在一个线程中处理多个客户端的读取。
但是,主线程中还是需要ServerSocket.accept().
而且,对于输入输出流的阻塞,我们依然无法解决,虽然从应用程序上无法感觉到。
NIO如何解决:
- 使用Channel代理Stream:复用Socket
- 使用Selector监控Channel:这里类似我们读线程调用Reader.ready方法。
- 在一个线程中处理多个Channel的IO:在BIO实例中的最后一个例子就实现了这个。
设计思想
BIO中最大的问题就是阻塞。
而NIO就是解决BIO中阻塞的几个点:建立连接的阻塞,IO的阻塞。
核心类
Buffer
Channel是一个双向通道,可读可写。Channel使用必须要一个Buffer。先将数据写入Buffer,然后Buffer在将数据写入或者读取到Channel.
Buffer就是缓冲区。
Buffer缓冲区有两个模式:写入模式,读取模式。
在写入模式中,结束指针就是缓存区的截止指针。初始指针跟随数据移动,直到缓存区写满。
在读取模式中,初始指针是缓存区开始,结束指针是数据填充位置,截止指针是缓存区的最大地址。初始指针根据读取的数据移动,直到结束指针。
在对Buffer中进行操作之前,需要将Buffer切换到对应的模式。
Buffer清除:当我们一次写,一次读之后,下次使用需要重置buffer指针状态。clear
Buffer部分读:当我们读取了Buffer中部分数据后,在切换为写模式,此时Buffer中还有部分未读取的数据,就需要将未读取的数据放到缓存区的前面。也就是需要清理已读数据。compact
向Buffer中写入数据,当缓存区被写满的时候,缓存区中的数据会被转移到目的对象中,然后清空缓冲区,等待下一次缓冲区满或者主动调用刷新。
Channel
Channel可以从Buffer中读取或者写入数据,同时Channel之间可以读取或者写入数据。
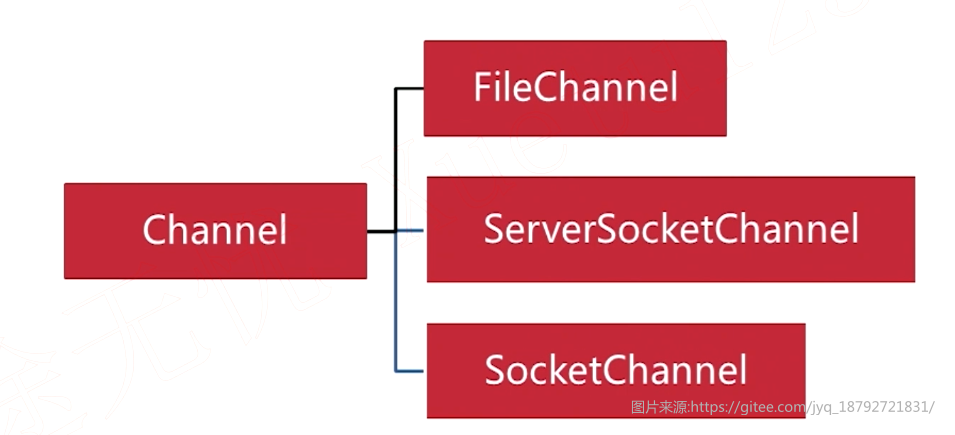
Channel的UML图
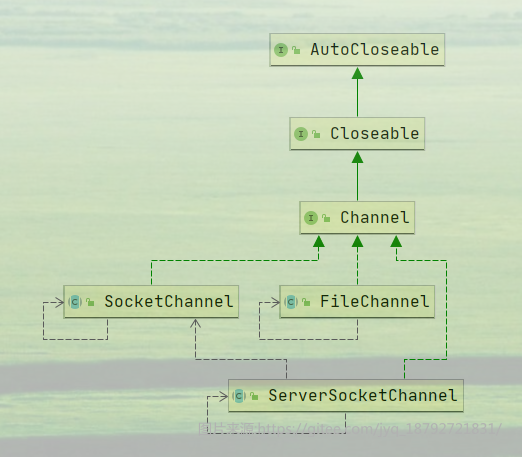
Selector
在操作Channel时,有时Channel中的数据还未准备好,或者Channel中还没有数据。此时我们要使用Channel读取其中的数据,就需要不停的询问Channel数据是否准备好。
这里就类似客户端并发中的读线程,我们需要一个专门的线程,这个线程会不断的轮询是否ready。
我们自己写需要进行很多的处理,而且还不能保证是否确实安全。
java里面有一个实现好的Selector。
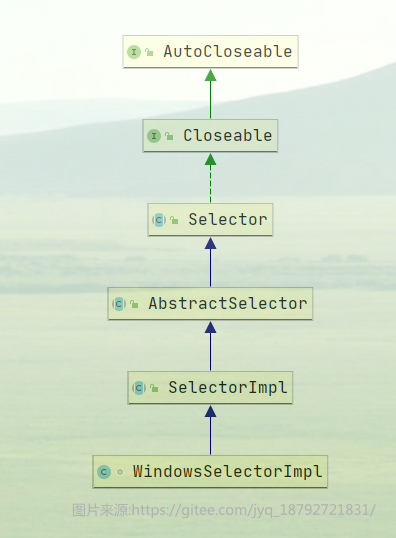
Channel的状态
- Connect: 客户端发起Channel连接请求,对于客户端的Channel就是Connect状态。
- Accept: 服务端接受客户端的Channel的连接请求,对于服务端的Channel就是Accept状态。
- Read:Channel可以读
- Write:Channel可以写
上述四个状态可以分为两类:可操作,不可操作。
只有Channel处于可操作性状态,我们才能操作Channel.
要使用实现好的Selector,就需要在使用前将Channel先注册到Selector上,然后Selector才能帮我们询问Channel是否ready.
当我们将Channel注册到Selector上,Selector会返回我们SelectionKey,我们可以根据SelectionKey找到对应的Channel然后进行操作。
Selector还有一个interestOps方法,这个方法会返回所有Channel的状态。
我们要求Selector监听Channel并不需要监听全部的Channel状态,我们只需要告诉Selector监听某一个状态就行了。
Selector监听Channel的状态可以不同。比如要Selector监听ChannelA是read状态,监听ChannelB是write状态。。。
readyOps返回可操作状态(满足监听要求)的Channel
channel返回channel
selector返回Selector自己
attachment附加对象
NIO 实例 – 本地文件拷贝 – 编程步骤
我们首先创建文件拷贝的接口
1
2
3
4
5
6
@FunctionalInterface
public interface FileCopyRunner {

    void copyFile(File source, File target);

}
因为我打算使用函数式编程实现,所以加了函数式编程的注解
接着进行4种实现:
不带缓冲区
1
2
3
4
5
6
7
8
9
10
11
12
13
14
15
16
17
// 不使用缓存区,使用输入流输出流之间的字节拷贝
        FileCopyRunner noBufferStreamCopy = (source, target) -> {
            try (InputStream inputStream = new FileInputStream(source);
                 OutputStream outputStream = new FileOutputStream(target)) {
                int data;
                LocalDateTime startTime = LocalDateTime.now();
                while ((data = inputStream.read()) != -1) {
                    outputStream.write(data);
                }
                Duration duration = Duration.between(startTime, LocalDateTime.now());
                System.out.println(" noBufferStreamCopy : start - end = " + duration.toMillis());
            } catch (FileNotFoundException e) {
                e.printStackTrace();
            } catch (IOException e) {
                e.printStackTrace();
            }
        };
有缓冲区
1
2
3
4
5
6
7
8
9
10
11
12
13
14
15
16
17
18
// 使用带有缓存区的输入流输出流的字节拷贝
        FileCopyRunner bufferedStreamCopy = (source, target) -> {
            try (BufferedInputStream inputStream = new BufferedInputStream(new FileInputStream(source));
                 BufferedOutputStream outputStream = new BufferedOutputStream(new FileOutputStream(target))) {
                byte[] datas = new byte[1024];
                int index;
                LocalDateTime startTime = LocalDateTime.now();
                while ((index = inputStream.read(datas)) != -1) {
                    outputStream.write(datas, 0, index);
                }
                Duration duration = Duration.between(startTime, LocalDateTime.now());
                System.out.println(" bufferedStreamCopy : start - end = " + duration.toMillis());
            } catch (FileNotFoundException e) {
                e.printStackTrace();
            } catch (IOException e) {
                e.printStackTrace();
            }
        };
使用Channel+缓冲区
1
2
3
4
5
6
7
8
9
10
11
12
13
14
15
16
17
18
19
20
21
// 使用channel的缓存区的拷贝
        FileCopyRunner nioBufferCopy = (source, target) -> {
            try (FileChannel inputChannel = new FileInputStream(source).getChannel();
                 FileChannel outputChannel = new FileOutputStream(target).getChannel()) {
                ByteBuffer byteBuffer = ByteBuffer.allocate(1024);
                LocalDateTime startTime = LocalDateTime.now();
                while (inputChannel.read(byteBuffer) != -1) {
                    byteBuffer.flip(); // 写模式 -> 读模式
                    while (byteBuffer.hasRemaining()) {
                        outputChannel.write(byteBuffer);
                    }
                    byteBuffer.clear(); // 读模式 -> 写模式
                }
                Duration duration = Duration.between(startTime, LocalDateTime.now());
                System.out.println(" nioBufferCopy : start - end = " + duration.toMillis());
            } catch (FileNotFoundException e) {
                e.printStackTrace();
            } catch (IOException e) {
                e.printStackTrace();
            }
        };
使用Channel间直接交换数据
1
2
3
4
5
6
7
8
9
10
11
12
13
14
15
16
17
18
// 使用channel之间数据交换的拷贝
        FileCopyRunner nioTransferCopy = (source, target) -> {
            try (FileChannel inputChannel = new FileInputStream(source).getChannel();
                 FileChannel outputChannel = new FileOutputStream(target).getChannel()) {
                LocalDateTime startTime = LocalDateTime.now();
                long sum = 0L;
                long size = inputChannel.size();
                while (sum < size) {
                    sum += inputChannel.transferTo(0, size, outputChannel);
                }
                Duration duration = Duration.between(startTime, LocalDateTime.now());
                System.out.println(" nioTransferCopy : start - end = " + duration.toMillis());
            } catch (FileNotFoundException e) {
                e.printStackTrace();
            } catch (IOException e) {
                e.printStackTrace();
            }
        };
接着我们定义测试接口
1
2
3
4
5
6
@FunctionalInterface
public interface FileCopyTest {

    void test(FileCopyRunner fileCopyRunner, File source, int times, String name);

}
我还是打算使用函数实现。
1
2
3
4
5
6
7
8
9
10
11
12
13
        // 测试
        FileCopyTest fileCopyTest = (CopyRunner, source, times, name) -> {
            File target = new File(source.getName() + "copy");
            long datetime = 0L;
            for (int i = 0; i < times; i++) {
                LocalDateTime startTime = LocalDateTime.now();
                CopyRunner.copyFile(source, target);
                Duration duration = Duration.between(startTime, LocalDateTime.now());
                datetime += duration.toMillis();
                target.delete();
            }
            System.out.println(name + " : start - end = " + datetime + " , avg = " + datetime / times);
        };
接着我准备了三份文件:6m,36m,396m的视频
因为不带缓冲区的拷贝方式是在是太慢,就不验证了。
完整实现代码:
1
2
3
4
5
6
7
8
9
10
11
12
13
14
15
16
17
18
19
20
21
22
23
24
25
26
27
28
29
30
31
32
33
34
35
36
37
38
39
40
41
42
43
44
45
46
47
48
49
50
51
52
53
54
55
56
57
58
59
60
61
62
63
64
65
66
67
68
69
70
71
72
73
74
75
76
77
78
79
80
81
82
83
84
85
86
87
88
89
90
91
92
93
94
95
96
97
98
99
100
101
102
103
104
105
106
107
108
109
110
111
112
113
114
115
116
117
118
119
public class FileCopyMain {

    public static void main(String[] args) {

        // 不使用缓存区,使用输入流输出流之间的字节拷贝
        FileCopyRunner noBufferStreamCopy = (source, target) -> {
            try (InputStream inputStream = new FileInputStream(source);
                 OutputStream outputStream = new FileOutputStream(target)) {
                int data;
                LocalDateTime startTime = LocalDateTime.now();
                while ((data = inputStream.read()) != -1) {
                    outputStream.write(data);
                }
                Duration duration = Duration.between(startTime, LocalDateTime.now());
                System.out.println(" noBufferStreamCopy : start - end = " + duration.toMillis());
            } catch (FileNotFoundException e) {
                e.printStackTrace();
            } catch (IOException e) {
                e.printStackTrace();
            }
        };

        // 使用带有缓存区的输入流输出流的字节拷贝
        FileCopyRunner bufferedStreamCopy = (source, target) -> {
            try (BufferedInputStream inputStream = new BufferedInputStream(new FileInputStream(source));
                 BufferedOutputStream outputStream = new BufferedOutputStream(new FileOutputStream(target))) {
                byte[] datas = new byte[1024];
                int index;
                LocalDateTime startTime = LocalDateTime.now();
                while ((index = inputStream.read(datas)) != -1) {
                    outputStream.write(datas, 0, index);
                }
                Duration duration = Duration.between(startTime, LocalDateTime.now());
                System.out.println(" bufferedStreamCopy : start - end = " + duration.toMillis());
            } catch (FileNotFoundException e) {
                e.printStackTrace();
            } catch (IOException e) {
                e.printStackTrace();
            }
        };

        // 使用channel的缓存区的拷贝
        FileCopyRunner nioBufferCopy = (source, target) -> {
            try (FileChannel inputChannel = new FileInputStream(source).getChannel();
                 FileChannel outputChannel = new FileOutputStream(target).getChannel()) {
                ByteBuffer byteBuffer = ByteBuffer.allocate(1024);
                LocalDateTime startTime = LocalDateTime.now();
                while (inputChannel.read(byteBuffer) != -1) {
                    byteBuffer.flip(); // 写模式 -> 读模式
                    while (byteBuffer.hasRemaining()) {
                        outputChannel.write(byteBuffer);
                    }
                    byteBuffer.clear(); // 读模式 -> 写模式
                }
                Duration duration = Duration.between(startTime, LocalDateTime.now());
                System.out.println(" nioBufferCopy : start - end = " + duration.toMillis());
            } catch (FileNotFoundException e) {
                e.printStackTrace();
            } catch (IOException e) {
                e.printStackTrace();
            }
        };

        // 使用channel之间数据交换的拷贝
        FileCopyRunner nioTransferCopy = (source, target) -> {
            try (FileChannel inputChannel = new FileInputStream(source).getChannel();
                 FileChannel outputChannel = new FileOutputStream(target).getChannel()) {
                LocalDateTime startTime = LocalDateTime.now();
                long sum = 0L;
                long size = inputChannel.size();
                while (sum < size) {
                    sum += inputChannel.transferTo(0, size, outputChannel);
                }
                Duration duration = Duration.between(startTime, LocalDateTime.now());
                System.out.println(" nioTransferCopy : start - end = " + duration.toMillis());
            } catch (FileNotFoundException e) {
                e.printStackTrace();
            } catch (IOException e) {
                e.printStackTrace();
            }
        };
        // 测试
        FileCopyTest fileCopyTest = (CopyRunner, source, times, name) -> {
            File target = new File(source.getName() + "copy");
            long datetime = 0L;
            for (int i = 0; i < times; i++) {
                LocalDateTime startTime = LocalDateTime.now();
                CopyRunner.copyFile(source, target);
                Duration duration = Duration.between(startTime, LocalDateTime.now());
                datetime += duration.toMillis();
                target.delete();
            }
            System.out.println(name + " : start - end = " + datetime + " , avg = " + datetime / times);
        };
        File smallFile = new File("K:/temp/6.mp4");
        File middleFile = new File("K:/temp/36.mp4");
        File bigFile = new File("K:/temp/396.mp4");
        int times = 10;
        System.out.println("small file : ");
        fileCopyTest.test(bufferedStreamCopy, smallFile, times, "bufferedStreamCopy");
        fileCopyTest.test(nioBufferCopy, smallFile, times, "nioBufferedCopy");
        fileCopyTest.test(nioTransferCopy, smallFile, times, "nioTransferCopy");

        System.out.println("\n");
        System.out.println("middile file : ");

        fileCopyTest.test(bufferedStreamCopy, middleFile, times, "bufferedStreamCopy");
        fileCopyTest.test(nioBufferCopy, middleFile, times, "nioBufferedCopy");
        fileCopyTest.test(nioTransferCopy, middleFile, times, "nioTransferCopy");

        System.out.println("\n");
        System.out.println("big file : ");

        fileCopyTest.test(bufferedStreamCopy, bigFile, times, "bufferedStreamCopy");
        fileCopyTest.test(nioBufferCopy, bigFile, times, "nioBufferedCopy");
        fileCopyTest.test(nioTransferCopy, bigFile, times, "nioTransferCopy");
    }

}
执行结果如下
1
2
3
4
5
6
7
8
9
10
11
12
13
14
small file :
bufferedStreamCopy : start - end = 239 , avg = 23
nioBufferedCopy : start - end = 776 , avg = 77
nioTransferCopy : start - end = 58 , avg = 5

middile file :
bufferedStreamCopy : start - end = 843 , avg = 84
nioBufferedCopy : start - end = 3410 , avg = 341
nioTransferCopy : start - end = 335 , avg = 33

big file :
bufferedStreamCopy : start - end = 12039 , avg = 1203
nioBufferedCopy : start - end = 38250 , avg = 3825
nioTransferCopy : start - end = 3760 , avg = 376
我们看到,因为nio的缓冲区和io的缓冲区不同,所以花费在缓冲区上的时间应该就是nioBufferedCopy和bufferedStreamCopy的性能差异的原因了。
最终的胜者是nioTransferCopy了。基本上比其他两个快一个数量级。
从网上找到的资料的解释大概如下:
bufferedStream属于用户态下的请求,操作系统需要将文件先读取到内核态,准备好了之后在拷贝到用户态下的内存中,然后执行拷贝。
内存中拷贝完成后,用户提交操作,操作系统收到请求后,先将用户态的内存拷贝到内核态的内存中,最终由操作系统内核实现写入。
nioBufferedCopy也是差不多的,都是需要先从内核态拷贝到用户态,然后在用户态内存下完成拷贝,最终在提交内核态写入。(需要至少三次拷贝:内核态->用户态,用户态->用户态,用户态->内核态)
nioTransferCopy直接在内核态进行拷贝,少了从内核态切换到用户态。所以性能很好。
而且内核态的内存读取速度会稍微比用户态内存的读写速度快点(CPU的内存缓冲技术,多级缓冲)
NIO 改写 BIO 项目 – 多人聊天室
改写聊天室没法一开始就直接改写成功,而且直接去上手改写的难度也很大。
所以,先从客户端开始,服务端还是用的BIO的的服务端。
1
2
3
4
5
6
7
8
9
10
11
12
13
14
15
16
17
18
19
20
21
22
23
24
25
26
27
28
29
30
31
32
33
34
35
36
37
38
39
40
41
42
43
44
45
46
47
48
49
50
51
52
53
54
55
56
57
58
59
60
61
62
63
64
65
66
67
68
69
70
71
72
73
74
75
76
77
78
79
80
81
82
83
84
85
86
87
88
89
90
91
92
93
94
95
96
97
98
99
100
101
102
103
104
105
106
107
108
109
110
111
112
113
114
115
116
117
118
119
120
121
122
123
124
125
126
127
128
129
130
131
132
133
134
135
136
137
138
139
140
141
142
143
144
145
146
147
148
149
150
151
152
153
package com.studyio.hellosocket.client;

import java.io.BufferedWriter;
import java.io.IOException;
import java.io.OutputStreamWriter;
import java.net.InetSocketAddress;
import java.net.Socket;
import java.nio.ByteBuffer;
import java.nio.channels.*;
import java.nio.charset.Charset;
import java.util.Optional;
import java.util.Scanner;
import java.util.Set;
import java.util.concurrent.LinkedBlockingQueue;
import java.util.stream.Collectors;

/**
 * @author jiayq
 * @Date 2021-03-04
 */
public class TestBuffer {

    // 服务端的地址
    private static final String HOST = "127.0.0.1";

    // 服务端的端口
    private static final int PORT = 8989;

    // 缓存区的大小
    private static final int BUFFER_SIZE = 2048;

    // 退出标志
    private static final String QUIT = "quit";

    // 消息编码
    private static final Charset CHARSET = Charset.forName("UTF-8");

    // 消息队列
    private static final LinkedBlockingQueue<String> msg = new LinkedBlockingQueue<>();

    public static void main(String[] args) {
        // 主方法一开始创建一个守护线程
        // 守护线程用于从控制台读取用户输入,并且将用户输入放到消息队列中
        // 守护线程的好处是不用专门管理这个线程的生命周期
        // 而且守护线程更符合需求
          Runnable runnable = () -> {
              try (Scanner scanner = new Scanner(System.in)) {
                  while (true) {
                      msg.offer(scanner.nextLine());
                  }
              }
          };
          Thread reader = new Thread(runnable);
          reader.setDaemon(true);
          reader.start();
        // 使用jdk 7 增加的closeable的新特性,自动关闭资源
        try (SocketChannel clientChannel = SocketChannel.open();
             Selector selector = Selector.open()) {
            // 设置非阻塞模式
            clientChannel.configureBlocking(false);
            // 将信道注册到selector中,关注的事件是connect
            clientChannel.register(selector, SelectionKey.OP_CONNECT);
            // 连接到服务端
            clientChannel.connect(new InetSocketAddress(HOST, PORT));
            // 创建变量,变量用于存储从selector中返回的监听的key
            Set<SelectionKey> selectionKeys;
            // 消息变量
            String message = null;
            // 缓存区变量
            ByteBuffer buffer = ByteBuffer.allocate(1);
            // 只要用户输入的消息不是 quit,就一直继续
            while (!QUIT.equals(message)) {
                // 阻塞调用
                // 其实这里一般情况下是快速返回的,因为服务端没问题的话,一直可写。
                selector.select();
                selectionKeys = selector.selectedKeys();
                // 遍历有效的key
                for (SelectionKey key : selectionKeys.stream().filter(SelectionKey::isValid).collect(Collectors.toSet())) {
                    // 如果是可读事件
                    if (key.isReadable()) {
                        // 通过key获取信道
                        SocketChannel channel = (SocketChannel) key.channel();
                        // 设置信道阻塞模式
                        channel.configureBlocking(false);
                        // 缓存区设置为写模式
                        buffer.clear();
                        // 将信道中的消息读取到缓存区中,一直去读,直到信道中没有消息为止
                        while (channel.read(buffer) > 0) {
                            // 缓存区设置为读模式
                            buffer.flip();
                            // 只要缓存区中有数据,那么就一直读,直到缓存区中的数据全部读取
                            while (buffer.hasRemaining()) {
                                // 将读取的字节码使用指定的字符集解码并输出
                                System.out.println(CHARSET.decode(buffer));
                            }
                            // 将缓存区设置为写模式。如果信道中的信息比较多,需要很多次才能读取,这里就是设置下一次循环读取消息的缓存区为写模式
                            buffer.clear();
                        }
                        // 可重复读
                        socketChannel.register(selector, SelectionKey.OP_READ);
                    }
                    // 如果是可写事件,并且消息队列中取出的消息不为空
                    // 换句话说,就是有消息需要发送,并且连接可写
                    if (key.isWritable() && !Optional.ofNullable(message).isEmpty()) {
                        // 获取信道
                        SocketChannel socketChannel = (SocketChannel) key.channel();
                        // 信道设置为非阻塞模式
                        socketChannel.configureBlocking(false);
                        // 缓存区设置为写模式
                        buffer.clear();
                        // 将消息设置到缓存区中
                        // 需要注意增加 \n 因为在服务端是使用 readLine读取的。
                        buffer.put((message+"\n").getBytes());
                        // 缓存区设置为读模式
                        buffer.flip();
                        // 只要缓存区有数据,就一直循环
                        while (buffer.hasRemaining()) {
                            // 将缓存区中的信息写入到信道中
                            socketChannel.write(buffer);
                        }
                        // 可重复写
                        socketChannel.register(selector, SelectionKey.OP_WRITE);
                    }
                    // 如果是可连接事件
                    if (key.isConnectable()) {
                        // 从key中获取信道
                        SocketChannel socketChannel = (SocketChannel) key.channel();
                        // 判断信道是否已经建立了连接,因为建立连接只需要建立一次即可
                        if (!socketChannel.isConnected()) {
                            // 死循环等待tcp握手建立连接
                            while (!socketChannel.isConnectionPending()) {
                                ;
                            }
                            // 如果已经建立了连接,那么连接完成
                            socketChannel.finishConnect();
                            // 设置为非阻塞模式
                            socketChannel.configureBlocking(false);
                            // 关注信道的读写事件
                            socketChannel.register(selector, SelectionKey.OP_WRITE | SelectionKey.OP_READ);
                            // 打印控制台信息
                            System.out.println("client start up");
                        }
                    }
                }
                // 从消息队列中获取需要发送的消息
                message = msg.poll();
            }
        } catch (IOException e) {
            e.printStackTrace();
        }
    }

}
这个修改方式,只是客户端的改写。
服务端和这个差不多。但是这样实现,实在是。太烂了,代码写的太烂了。需要进行重构。
最终版:
首先,我们发送消息,需要定义这个消息是从哪个客户端发出的。(不考虑到哪个客户端,因为是聊天室,一个人说话,所有人都需要能听见,所以需要知道是谁说的)
因此创建一个消息类(目前只考虑了一台机器)
1
2
3
4
5
6
7
8
9
10
11
12
13
14
15
16
17
18
19
20
21
22
23
24
25
26
27
28
29
30
31
32
33
34
35
36
37
38
package com.studyio.hellosocket.domain;

/**
 * @author jiayq
 * @Date 2021-03-06
 */
public class Messager {

    private Integer port;

    private String message;

    public Messager() {

    }

    public Messager(Integer port, String message) {
        this.port = port;
        this.message = message;
    }

    public Integer getPort() {
        return this.port;
    }

    public String getMessage() {
        return this.message;
    }

    @Override
    public String toString() {
        if (port != null) {
            return port + " : " + message;
        } else {
            return "";
        }
    }
}
考虑到消息的创建和控制台打印,因此写了全参构造和重写toString方法。
我们发现,建立连接,发送消息和接受消息,对于客户端和服务端来说,逻辑完全相同,因此,将建立连接,发送消息和接受消息封装为工具类。
1
2
3
4
5
6
7
8
9
10
11
12
13
14
15
16
17
18
19
20
21
22
23
24
25
26
27
28
29
30
31
32
33
34
35
36
37
38
39
40
41
42
43
44
45
46
47
48
49
50
51
52
53
54
55
56
57
58
59
60
61
62
63
64
65
66
67
68
69
70
71
72
73
74
75
76
77
78
79
80
81
82
83
84
85
86
87
88
89
90
91
92
93
94
95
96
97
98
99
100
101
102
103
104
105
106
107
108
109
110
111
112
113
114
115
116
117
118
119
120
121
122
123
124
125
126
127
128
129
130
131
132
133
134
135
136
137
138
139
140
141
142
143
144
145
146
147
package com.studyio.hellosocket.util;

import java.io.IOException;
import java.net.Socket;
import java.nio.ByteBuffer;
import java.nio.channels.SocketChannel;
import java.nio.charset.Charset;
import java.util.concurrent.ConcurrentHashMap;
import java.util.function.BiConsumer;
import java.util.function.Consumer;
import java.util.function.Function;

/**
 * @author jiayq
 * @Date 2021-03-06
 */
public class SocketUtils {

    // 发送消息或者接受消息的字符集
    private static final Charset CHARSET = Charset.forName("UTF-8");

    // 字节缓存区的大小
    private static final int BUFFER_SIZE = 2048;

    // 字节缓存区
    private static final ByteBuffer buffer = ByteBuffer.allocate(BUFFER_SIZE);

    // 异常统计表
    private static final ConcurrentHashMap<Socket, Integer> errors = new ConcurrentHashMap<>();

    // 最大异常数(在建立连接,读取,发送时,可能存在网络波动,当因网络波动引发的发送或者接受失败,允许进行重试)
    private static final int MAX_ERRORS = 100;

    // 发送消息或者接受消息出现异常时的处理
    private static final BiConsumer<SocketChannel, Exception> error = (socketChannel, e) -> {
        // 临时变量,记录错误次数
        int times;
        // 如果错误记录中已经有这个socket,那么表示这不是是第一次异常
        if (errors.containsKey(socketChannel.socket())) {
            // 不是第一次异常,需要先获取原来的异常次数,然后加1
            errors.put(socketChannel.socket(), (times = errors.get(socketChannel.socket())) + 1);
        } else {
            // 否则就是第一次异常,将异常次数设置为1即可
            errors.put(socketChannel.socket(), (times = 1));
        }
        // 如果异常次数已经超过了允许的最大次数
        if (times >= MAX_ERRORS) {
            // 那么将当前连接从错误记录中移除
            errors.remove(socketChannel.socket());
            // 抛出运行时异常
            // 因为函数不能抛出可检查的异常,所以只能抛出运行时异常
            throw new RuntimeException(e.getMessage());
        }
    };

    // 这是读取消息的函数。返回字符串
    private static final Function<SocketChannel, String> socketReader = socketChannel -> {
        // 创建临时变量,用于存储最终返回的解码后的消息
        StringBuilder stringBuilder = new StringBuilder();
        try {
            // 设置信道是非阻塞模式
            socketChannel.configureBlocking(false);
            // 缓存区设置为写模式
            buffer.clear();
            // 只要从信道中能读取出数据,那么就一直循环,直到无法从信道中读取出数据
            while (socketChannel.read(buffer) > 0) {
                // 缓存区设置为读模式
                buffer.flip();
                // 只要缓存区中有数据,那么就一直循环,直到无法从缓存区中读取数据
                while (buffer.hasRemaining()) {
                    // 使用直接的字符集解码字节缓存区中的字节
                    stringBuilder.append(CHARSET.decode(buffer));
                }
                // 将缓存区设置为写模式,为下一次循环做准备
                buffer.clear();
            }
        } catch (IOException e) {
            // 如果出现异常,使用异常处理
            error.accept(socketChannel, e);
            System.out.println("socket reader error , message [" + stringBuilder.toString() + "] , error info [" + e.getMessage() + "] !");
        }
        // 因为客户端在从控制台接受用户输入的时候会忽略空字符串,所以,客户端也就不会发送空字符串
        // 因此出现空字符串肯定是客户端离线了
        if (stringBuilder.isEmpty()) {
            // 抛出异常,告诉其他客户端,当前客户端离线了
            throw new RuntimeException(" message is null ");
        }
        // 返回读取的数据
        return stringBuilder.toString();
    };

    // 将函数返回
    public static Function<SocketChannel, String> getSocketReader() {
        return socketReader;
    }

    // 发送消息的函数,两个入参,一个是信道,一个是消息
    private static final BiConsumer<SocketChannel, String> socketWriter = (socketChannel, message) -> {
        try {
            // 设置信道为非阻塞模式
            socketChannel.configureBlocking(false);
            // 缓存区写模式
            buffer.clear();
            // 将消息写入缓存区
            buffer.put((message).getBytes());
            // 缓存区读模式
            buffer.flip();
            // 只要缓存区有数据,就一直循环写到信道中(如果缓存区设置的特别大,就需要多次写入才行)
            while (buffer.hasRemaining()) {
                // 将消息写入信道
                socketChannel.write(buffer);
            }
        } catch (IOException e) {
            // 发送消息时出现的异常处理
            error.accept(socketChannel, e);
            System.out.println("socket writer error , message [" + message + "] , error info [" + e.getMessage() + "] !");
        }
    };

    // 将发送消息的函数返回
    public static BiConsumer<SocketChannel, String> getSocketWriter() {
        return socketWriter;
    }

    // 建立连接的函数。主要是客户端使用(因为服务端accept创建连接)
    private static final Consumer<SocketChannel> socketConnecter = socketChannel -> {
        try {
            // 如果连接还未建立,就一直等待
            while (!socketChannel.isConnectionPending()) {
                ;
            }
            // 连接建立完成
            socketChannel.finishConnect();
            // 设置信道非阻塞模式
            socketChannel.configureBlocking(false);
        } catch (IOException e) {
            System.out.println("socket connection error , exists : 3 !");
            throw new RuntimeException(e.getMessage());
        }
    };

    // 返回建立连接的函数
    public static Consumer<SocketChannel> getSocketConnecter() {
        return socketConnecter;
    }

}
首先写客户端,因为客户端相对比较简单,实现起来的逻辑没有很复杂
1
2
3
4
5
6
7
8
9
10
11
12
13
14
15
16
17
18
19
20
21
22
23
24
25
26
27
28
29
30
31
32
33
34
35
36
37
38
39
40
41
42
43
44
45
46
47
48
49
50
51
52
53
54
55
56
57
58
59
60
61
62
63
64
65
66
67
68
69
70
71
72
73
74
75
76
77
78
79
80
81
82
83
84
85
86
87
88
89
90
91
92
93
94
95
96
97
98
99
100
101
102
103
104
105
106
107
108
109
110
111
112
113
package com.studyio.hellosocket.client;

import com.studyio.hellosocket.util.SocketUtils;

import java.io.IOException;
import java.net.InetSocketAddress;
import java.nio.channels.SelectionKey;
import java.nio.channels.Selector;
import java.nio.channels.SocketChannel;
import java.util.Optional;
import java.util.Scanner;
import java.util.Set;
import java.util.concurrent.LinkedBlockingQueue;
import java.util.stream.Collectors;

/**
 * @author jiayq
 * @Date 2021-03-04
 */
public class NioClient {

    // 服务端的地址
    private static final String HOST = "127.0.0.1";

    // 服务端的端口
    private static final int PORT = 8989;

    // 退出标志
    private static final String QUIT = "quit";

    // 消息队列(客户端两个线程,守护线程接收用户输入,放入消息队列,主线程与服务端通信,消费消息)
    private static final LinkedBlockingQueue<String> msg = new LinkedBlockingQueue<>();

    // 守护线程中接收用户输入的逻辑
    private static final Runnable consoleReader = () -> {
        // 使用Scanner接收用户输入
        try (Scanner scanner = new Scanner(System.in)) {
            String string;
            // 守护线程一直读取用户输入,直到主线程结束
            while (true) {
                // 从控制台获取输入
                string = scanner.nextLine();
                // 忽略空字符串输入
                if (!Optional.ofNullable(string).isEmpty()) {
                    // 将非空的字符串放入消息队列
                    msg.offer(string);
                }
            }
        }
    };

    // 主线程
    public static void main(String[] args) {
        // 首先启动守护线程
        Thread reader = new Thread(consoleReader);
        // 设置线程的运行模式是守护线程,也就是后台线程
        reader.setDaemon(true);
        reader.start();
        // 使用jdk 7 的自动关闭资源的写法
        try (SocketChannel clientChannel = SocketChannel.open();
             Selector selector = Selector.open()) {
            // 设置信道是非阻塞的
            clientChannel.configureBlocking(false);
            // 将信道注册到selector中
            clientChannel.register(selector, SelectionKey.OP_CONNECT);
            // 与服务端建立连接
            clientChannel.connect(new InetSocketAddress(HOST, PORT));
            // selector监听的key
            Set<SelectionKey> selectionKeys;
            // 消息变量
            String message;
            do {
                // 首先从消息队列中获取一个消息(消费一个消息,非阻塞调用,如果没有消息返回null)
                message = msg.poll();
                // 阻塞调用select,监听事件
                selector.select();
                // 遍历全部的有效的事件
                for (SelectionKey key : (selectionKeys = selector.selectedKeys()).stream().filter(SelectionKey::isValid).collect(Collectors.toSet())) {
                    // 如果是可读的
                    if (key.isReadable()) {
                        // 从信道中读取消息,并输出到控制台
                        System.out.println(SocketUtils.getSocketReader().apply((SocketChannel) key.channel()));
                        // 如果是可写的,而且需要发送的消息也不为空
                    } else if (key.isWritable() && !Optional.ofNullable(message).isEmpty()) {
                        // 发送消息
                        SocketUtils.getSocketWriter().accept((SocketChannel) key.channel(), message);
                        // 如果是可建立连接的
                    } else if (key.isConnectable()) {
                        // 首先获取信道
                        SocketChannel socketChannel = (SocketChannel) key.channel();
                        // 信道是否已经连接(建立连接只需要建立一次就行)
                        if (!socketChannel.isConnected()) {
                            // 建立连接
                            SocketUtils.getSocketConnecter().accept(socketChannel);
                            // 将连接注册到selector,关注读写事件
                            socketChannel.register(selector, SelectionKey.OP_WRITE | SelectionKey.OP_READ);
                            // 控制台输出提示信息
                            System.out.println("client start up");
                        }
                    }
                }
                // 每次遍历完selector返回的key后,将key进行清空。
                // 我使用的是for循环,所以每次处理完全部的key之后,统一清空。
                // 你也可以使用迭代器遍历,每遍历一个,就清空一个。
                selectionKeys.clear();
                // 如果消息是退出,那么就直接退出
            } while (!QUIT.equals(message)); // 这里最好用do-while,因为需要通知其他客户端,你已经下线了
        } catch (IOException e) {
            e.printStackTrace();
        }
    }

}
写完客户端,先不要急着写服务端,先用原来的服务端进行调试,客户端调试通过后,在开始着手写服务端。
1
2
3
4
5
6
7
8
9
10
11
12
13
14
15
16
17
18
19
20
21
22
23
24
25
26
27
28
29
30
31
32
33
34
35
36
37
38
39
40
41
42
43
44
45
46
47
48
49
50
51
52
53
54
55
56
57
58
59
60
61
62
63
64
65
66
67
68
69
70
71
72
73
74
75
76
77
78
79
80
81
82
83
84
85
86
87
88
89
90
91
92
93
94
95
96
97
98
99
100
101
102
103
104
105
106
107
108
109
110
111
112
package com.studyio.hellosocket.server;

import com.studyio.hellosocket.domain.Messager;
import com.studyio.hellosocket.util.SocketUtils;

import java.io.IOException;
import java.net.InetSocketAddress;
import java.nio.channels.*;
import java.util.Optional;
import java.util.Set;
import java.util.concurrent.LinkedBlockingQueue;
import java.util.stream.Collectors;

/**
 * @author jiayq
 * @Date 2021-02-01
 */
public class NioServer {

    // 服务端监听的端口
    private static final int PORT = 8989;

    // 退出的标志(因为客户端发送这个标志后,客户端会退出程序,此时服务端持有的连接是已关闭的连接(程序退出后,会自动调用关闭接口(jdk 7 的写法)),所以服务端也需要将这个已关闭的连接丢弃)
    private static final String QUIT = "quit";

    // 消息队列(其实对于服务端,只有一个线程,可以不使用这个队列,而是直接使用最简单的一个数组就行)(单线程,没有并发问题)
    private static final LinkedBlockingQueue<Messager> msg = new LinkedBlockingQueue<>();

    public static void main(String[] args) {
        // 使用jdk 7 的写法,创建资源
        try (ServerSocketChannel serverSocketChannel = ServerSocketChannel.open();
             Selector selector = Selector.open()) {
            // 设置信道模式为非阻塞
            serverSocketChannel.configureBlocking(false);
            // 绑定监听的端口
            serverSocketChannel.socket().bind(new InetSocketAddress(PORT));
            // 将信道注册到selector,关注的是可接受的事件
            serverSocketChannel.register(selector, SelectionKey.OP_ACCEPT);
            // 控制台输出提示信息
            System.out.println("server start up , port : " + PORT);
            // 变量,存储selector返回的事件
            Set<SelectionKey> selectionKeys;
            // 消息变量
            Messager message;
            // 服务端死循环
            while (true) {
                // 调用select方法(如果当前没有任意一个连接,那么这个是阻塞的。只要有一个连接,就是非阻塞的了)
                selector.select();
                // 从消息队列中获取一个消息(消费消息,这里使用普通队列,数组都可以)
                message = msg.poll();
                // 遍历全部的有效事件
                for (SelectionKey key : (selectionKeys = selector.selectedKeys()).stream().filter(SelectionKey::isValid).collect(Collectors.toSet())) {
                    // 如果是可接受的
                    if (key.isAcceptable()) {
                        // 使用ServerSocketChannel进行接受连接
                        SocketChannel socketChannel = serverSocketChannel.accept();
                        // 接受了连接之后,就完成了连接
                        socketChannel.finishConnect();
                        // 设置信道非阻塞模式
                        socketChannel.configureBlocking(false);
                        // 将刚刚建立连接的信道注册到selector中,关注读写事件
                        socketChannel.register(selector, SelectionKey.OP_READ | SelectionKey.OP_WRITE);
                        // 控制台打印提示信息,标明是哪个客户端加入了聊天室
                        System.out.println(socketChannel.socket().getPort() + " : login ! ");
                        // 如果是可读的
                    } else if (key.isReadable()) {
                        // 获取信道
                        SocketChannel socketChannel = (SocketChannel) key.channel();
                        // 创建消息临时变量
                        Messager logMessager;
                        try {
                            // 从信道中读取消息,并放到消息队列中
                            msg.offer(logMessager = new Messager(socketChannel.socket().getPort(), SocketUtils.getSocketReader().apply(socketChannel)));
                        } catch (RuntimeException e) {
                            // 如果出现异常(这里出现异常,表示这个连接的异常次数已经达到最大值了)
                            // 取消这个信道的注册
                            key.cancel();
                            // 打印日志
                            logMessager = new Messager(socketChannel.socket().getPort(), e.getMessage());
                        }
                        // 将获取的消息放入消息队列(某个客户端异常达到最大次数,也将会广播给全部的连接)
                        System.out.println(Optional.ofNullable(logMessager).orElse(new Messager()).toString());
                        // 如果是可写的,而且消息队列不为空
                    } else if (key.isWritable() && !Optional.ofNullable(message).isEmpty()) {
                        // 获取信道
                        SocketChannel socketChannel = (SocketChannel) key.channel();
                        try {
                            // 将消息发送给客户端(其实只要消息队列中需要发送的消息不为空,那么将会广播给全部的客户端(因为只要建立了连接,那么一般情况下都是可写的))
                            SocketUtils.getSocketWriter().accept(socketChannel, message.toString());
                        } catch (RuntimeException e) {
                            // 如果出现了异常(这个信道的读写出现的异常已将达到最大值了)
                            // 取消这个信道的注册(信道取消了注册,selector就不会在关注这个信道对应的全部连接了)
                            key.cancel();
                            // 将这个信道出现异常,且异常达到最大次数的消息发送给全部的其他的客户端,同时在控制台打印提示信息
                            System.out.println(new Messager(socketChannel.socket().getPort(), e.getMessage()));
                        }
                        // 如果需要发送的信息是当前信道对应的连接传入的(客户端的信道),那么将客户端的信道从selector中移除
                        // 在不考虑多机的情况下,在一台机器中,使用端口区分不同的客户端
                        if (QUIT.equals(message.getMessage()) && socketChannel.socket().getPort() == message.getPort()) {
                            // 取消客户端的信道连接(从selector中移除)
                            key.cancel();
                        }
                    }
                }
                // 全部的事件都遍历完成后,清空列表
                selectionKeys.clear();
            }
        } catch (IOException e) {
            e.printStackTrace();
        }
    }
}
写到这里,就全部完成了。
其实工具类用方法可能更好点,使用可检查的异常对外抛出是更好的处理方式。
验证
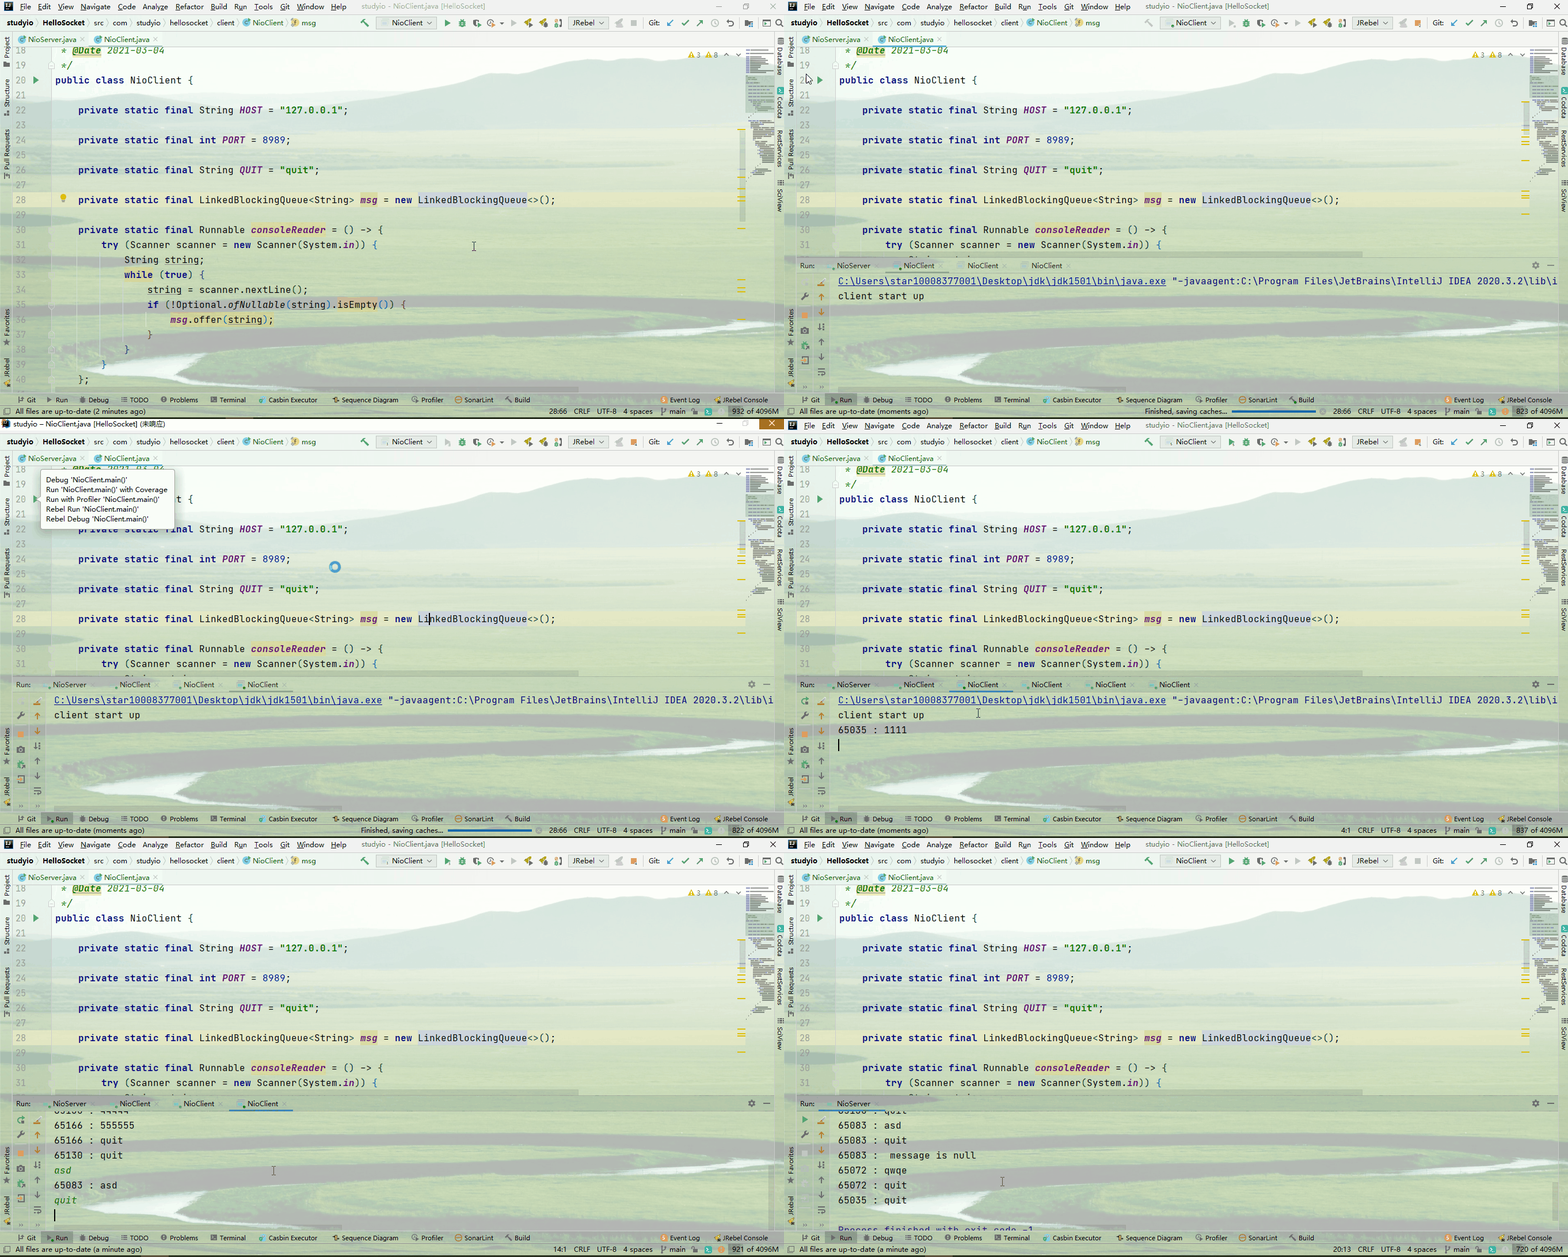
改写前 VS 改写后
改写前,一个客户端至少需要三个线程:主线程,读线程,写线程。
对于客户端来说,资源消耗其实还在接受的范围之内。
改写后,只需要两个线程就可以完成了。而且使用了守护线程,多线程处理更加简单。
对于服务端,原来至少需要三个线程:主线程建立连接,读线程读取消息,写线程写消息。
改写后我们只需要1个线程就可以搞定了。资源需要的数量上直接减少了三分之一。
当然,也有不足的地方。改写前是死循环,一直询问是否ready,这样其实很消耗cpu资源的。改写之后使用了selector,selector是基于事件的,操作系统对这个模型也有支持,因此,对于cpu资源的消耗就会降低。
改写后没有使用线程池,导致目前最多支持63个客户端(单线程的selector最大支持注册63个信道)。
如果多于63个,就需要其他线程处理了。
假设我们有一个50线程的线程池,那么我们可处理的并发连接是50*63=3150并发连接。
假设有200个线程,那么支持的并发是200*63=12600.
tomcat最大线程数是200(默认),tomcat的nio模式下支持的并发连接数是1W多,使用的就是nio编程。
所以,tomcat的nio模式下1W的并发是这么来的。
单纯看演示,可能会觉得使用selector更加慢了。实际上不是。bio演示的是idea2020.2.4版本,nio演示的是idea2020.3.2版本。可能和版本有关。
在idea2020.2.4中我只给idea2048内存就差不多够用了,idea2020.3.2我需要给4096才够用(工作的项目比较大,加载依赖的时候内存小了不够用)
AIO
BIO VS NIO VS AIO
BIO-阻塞:
物理网卡->操作系统内核缓存区->应用程序缓存区->应用程序。
操作系统内核支持的IO模型,应用程序才能使用。应用程序使用对应的IO模型,需要应用程序调用操作系统开放的API,将操作转交给操作系统,通过操作系统完成IO。
当操作系统得到了应用程序所需的数据后,会先将数据拷贝到应用程序缓存区,然后返回应用程序数据已经准备好,应用程序直接读取即可。
NIO-非阻塞:
应用程序询问操作系统,所需数据是否已经准备好。操作系统只能先询问,在得到确定的结果之后在读取数据,这样的数据才是应用程序预期的数据。如果不询问,直接读取,如果数据已经准备好,读取是ok的,否则读取的数据不是预期数据。
在数据还未准备好之前,应用程序需要不断的询问,直到数据准备好。
在数据准备方面,当操作系统得到了应用程序所需的数据后,会先将数据拷贝到应用程序缓存区,然后才会在应用程序询问的时候返回数据准备好,应用程序直接读取即可。
这里面不包含selector。
NIO-多路复用:
应用程序询问操作系统,所需数据是否已经准备好。如果数据状态发生变化,操作系统通知应用程序,数据有变化。应用程序看了之后发现不是自己想要的变化,于是继续等待,直到应用程序看了之后发现是自己预期的变化。
操作系统在得到应用程序所需的数据后,并不会先进行数据拷贝,而是通知应用程序,数据发生了变化,快看看是不是你想要的,但是还不能读取。应用程序调用操作系统的api让操作系统将数据拷贝到应用程序缓存区,然后操作系统告诉应用程序数据可读。接着应用程序才能读取到预期的数据。
在数据还未准备好时,应用程序不需要不断的询问操作系统,而是由操作系统监控数据是否产生变化,只要有变化就让应用程序看看,是不是应用程序预期的数据。这部分就是selector.
selector是多路复用选择器。
以上这些方法从内核层面看,都是同步的,在真正获取数据之前,都需要发起操作系统调用,操作系统在调用成功的时候,就已经准备好了数据。准备数据和调用成功是同步的。
而且,每次获取数据,都需要进行一次操作系统调用。即使是NIO或者是多路复用。
AIO-异步:
应用程序询问操作系统,所需的数据是否已经准备好。操作系统马上返回数据还未准备好,无数据。应用程序继续做其他的事情。操作系统记下来,这个应用程序问过我这块数据是否准备好。操作系统过一会看一下,发现数据准备好了后,将数据主动拷贝到应用程序缓存区,然后通知应用程序数据准备好了。
这里异步是指应用程序在询问操作系统之后,很长时间操作系统才会将数据进行拷贝。
操作系统拷贝数据和应用程序询问之间是异步关系。
设计思想
在NIO中,如果是普通的NIO,那么应用程序需要不断的询问操作系统,询问也是一笔不小的资源消耗。
在selector中,调用selector的时候,操作系统只要有数据变化,就会通知应用程序,应用程序判断是不是预期数据,也是资源消耗。
同时,不管是NIO还是多路复用,在真正获取到数据之前,还需要调用操作系统,让操作系统将数据从内核缓存区拷贝到程序缓存区。
在使用数据之前需要让操作系统准备数据。
而AIO则是异步的应用程序只需要调用一次,然后操作系统就会记住程序需要数据,当数据真正准备好后,才会通知应用程序。
这里的核心是异步。操作系统异步准备数据。
核心类
类:
服务端:
AsyncServerSocketChannel
客户端:
AsyncSocketChannel
操作:
建立连接:client — connect –> server,server — accept –> client.
read,writer.
具体异步如何实现?
- Future
Channel调用这四种操作,会立刻返回Future。
应用程序在得到Future后,可以进行一些操作。
- Callback
通过回调。当数据确实得到之后,通过回调完成后续操作。
AIO 实例 – 回音壁 – 编程步骤
回音壁,就是我们发送什么,服务端接受之后,加上端口,然后在返回。
还是和NIO改写BIO的方式相同,我们先从客户端开始入手。
服务端使用NIO的服务端。
客户端
1
2
3
4
5
6
7
8
9
10
11
12
13
14
15
16
17
18
19
20
21
22
23
24
25
26
27
28
29
30
31
32
33
34
35
36
37
38
39
40
41
42
43
44
45
46
47
48
49
50
51
52
53
54
55
56
57
58
59
60
61
62
63
64
65
66
67
68
69
70
71
72
73
74
75
76
77
78
79
80
81
82
83
84
85
86
87
88
89
90
91
92
93
94
95
96
97
98
99
100
101
102
103
104
105
106
107
108
109
110
111
112
113
114
115
116
117
118
119
120
121
122
123
124
125
126
127
128
129
130
131
132
133
134
135
136
137
138
139
import java.io.IOException;
import java.net.InetSocketAddress;
import java.nio.ByteBuffer;
import java.nio.channels.AsynchronousSocketChannel;
import java.nio.channels.CompletionHandler;
import java.nio.charset.Charset;
import java.util.Optional;
import java.util.Scanner;

/**
 * @author jiayq
 * @Date 2021-03-08
 */
public class AioClient {

    // 服务端的端口
    private static final String HOST = "127.0.0.1";

    // 服务端的端口
    private static final int PORT = 8989;

    // 编码方式
    private static final Charset CHARSET = Charset.forName("UTF-8");

    public static void main(String[] args) {
        // 使用异步的客户端
        try (AsynchronousSocketChannel clientChannel = AsynchronousSocketChannel.open();
             // 使用控制台输入
             Scanner scanner = new Scanner(System.in)) {
            // 与服务器进行连接
            // 使用到了connecterHandler
            clientChannel.connect(new InetSocketAddress(HOST, PORT), clientChannel, new ConnecterHandler());
            // 定义一个字符串变量,用于保存从控制台读入的信息
            String string;
            // 死循环
            while (true) {
                // 从控制台读入信息
                string = scanner.nextLine();
                // 读入的信息不为空
                if (!Optional.ofNullable(string.trim()).isEmpty()) {
                    // 创建写入回调
                    WriterHandler writerHandler = new WriterHandler();
                    // 清空写入回调的缓存区(这个缓存区是自己定义的)
                    writerHandler.getByteBuffer().clear();
                    // 将数据放入缓存区
                    writerHandler.getByteBuffer().put(string.getBytes());
                    // 重置缓存区,这一步主要的操作是将缓存区的指针放到缓存区的开始位置。数据并不会被删除
                    // 在write里面应该会调用缓存区的flip,并且,需要读取整个缓存区,即使缓存区中没满
                    writerHandler.getByteBuffer().clear();
                    clientChannel.write(writerHandler.getByteBuffer(), clientChannel, new WriterHandler());
                }
            }
        } catch (IOException e) {
            e.printStackTrace();
        }
    }

    // 这是连接回调,连接成功后,什么都不做
    private static class ConnecterHandler implements CompletionHandler<Void, AsynchronousSocketChannel> {

        @Override
        public void completed(Void result, AsynchronousSocketChannel socketChannel) {
            // 打印提示信息
            System.out.println("connection");
        }

        @Override
        public void failed(Throwable exc, AsynchronousSocketChannel attachment) {
            // 异常回调
        }
    }

    // 写入回调
    private static class WriterHandler implements CompletionHandler<Integer, AsynchronousSocketChannel> {

        // 写入回调的缓存,因为我们需要在写入回调中获取得到已经发出的缓存区的数据
        // 所以,真正发送的缓存区必须是这个缓存区
        // 每次对缓存区进行读取,都是读取全部的数据
        private ByteBuffer byteBuffer = ByteBuffer.allocate(2048);

        // 我们需要将缓存区暴露出去,因为需要其他的客户端设置发送的信息
        public ByteBuffer getByteBuffer() {
            return this.byteBuffer;
        }

        @Override
        public void completed(Integer result, AsynchronousSocketChannel socketChannel) {
            // 如果发送的数据大于0,表示有数据被发送
            // 如果发送的数据等于0,表示"空"数据。这里的"空"是指没有数据
            // 如果发送的数据小于0,表示连接已经被关闭了
            if (result > 0) {
                // 成功发送数据,而且连接还在
                if (socketChannel.isOpen()) {
                    // 创建读取回调
                    ReaderHandler readerHandler = new ReaderHandler();
                    // 充值读取回调的缓存区
                    readerHandler.getByteBuffer().clear();
                    // 进行数据读取
                    socketChannel.read(readerHandler.getByteBuffer(), socketChannel, readerHandler);
                }
            }
        }

        @Override
        public void failed(Throwable exc, AsynchronousSocketChannel attachment) {
            // 异常回调
            System.out.println(exc.getMessage());
        }
    }

    // 读取回调
    private static class ReaderHandler implements CompletionHandler<Integer, AsynchronousSocketChannel> {

        // 读取回调的缓存区,因为需要在回调中获取读取的数据,缓存区是共享的
        private ByteBuffer byteBuffer = ByteBuffer.allocate(2048);

        // 调用者需要清空缓存区
        public ByteBuffer getByteBuffer() {
            return this.byteBuffer;
        }

        @Override
        public void completed(Integer result, AsynchronousSocketChannel socketChannel) {
            // 有数据读取
            if (result > 0) {
                // 设置缓存区的模式为读模式
                byteBuffer.flip();
                // 读取全部的数据,并打印
                System.out.println(CHARSET.decode(byteBuffer));
            }
        }

        @Override
        public void failed(Throwable exc, AsynchronousSocketChannel socketChannel) {
            // 异常回调
            System.out.println(exc.getMessage());
        }
    }
}
客户端发现有信息从控制台输入,接着客户端就会将信息发送给服务端,服务端收到信息后,会将信息再次返回给客户端,客户端需要接受消息并打印到控制台上。
因此对于客户端来说,客户端主要做这几件事情:
- 监控控制台输入
- 发送信息
- 接受信息
所以,在发送完信息后,需要读取信息。
客户端代码可以和NIO的服务端进行通信的,客户端最好先通过测试。
服务端和客户端差不多,唯一的区别在于服务端没有交互。
服务端代码
1
2
3
4
5
6
7
8
9
10
11
12
13
14
15
16
17
18
19
20
21
22
23
24
25
26
27
28
29
30
31
32
33
34
35
36
37
38
39
40
import com.studyio.hellosocket.util.AsyncSocketUtils;

import java.io.IOException;
import java.net.InetSocketAddress;
import java.nio.channels.AsynchronousServerSocketChannel;

/**
 * @author jiayq
 * @Date 2021-03-08
 */
public class AioServer {

    // 服务端监听的端口
    private static final int PORT = 8989;

    // 本地的地址
    private static final String HOST_NAME = "127.0.0.1";

    public static void main(String[] args) {
        // 获取一个异步的服务端的连接
        try (AsynchronousServerSocketChannel serverSocketChannel = AsynchronousServerSocketChannel.open()) {
            // 服务端的连接绑定端口
            serverSocketChannel.bind(new InetSocketAddress(HOST_NAME, PORT));
            // 打印服务端启动成功信息
            System.out.println("server start up , host : " + HOST_NAME + " , port : " + PORT);
            // 调用一次回调,接受回调。
            // 如果接受成功,在接受回调中会再次调用接受
            serverSocketChannel.accept(serverSocketChannel, AsyncSocketUtils.getAcceptHandler());
            // 死循环,让程序能等到连接接入,回调代码被执行
            while (true) {
                // 让出cpu
                Thread.yield();
            }
        } catch (IOException e) {
            e.printStackTrace();
        }

    }

}
为了更加好看,我将服务端用到的回调,抽取出来了。
1
2
3
4
5
6
7
8
9
10
11
12
13
14
15
16
17
18
19
20
21
22
23
24
25
26
27
28
29
30
31
32
33
34
35
36
37
38
39
40
41
42
43
44
45
46
47
48
49
50
51
52
53
54
55
56
57
58
59
60
61
62
63
64
65
66
67
68
69
70
71
72
73
74
75
76
77
78
79
80
81
82
83
84
85
86
87
88
89
90
91
92
93
94
95
96
97
98
99
100
101
102
103
104
105
106
107
108
109
110
111
112
113
114
115
116
117
118
119
120
121
122
123
124
125
126
127
128
129
130
131
132
133
134
135
136
137
138
139
140
141
142
143
144
145
146
147
148
149
150
151
152
153
154
155
156
157
158
159
160
161
162
package com.studyio.hellosocket.util;

import com.studyio.hellosocket.domain.Messager;

import java.io.IOException;
import java.net.InetSocketAddress;
import java.nio.ByteBuffer;
import java.nio.channels.AsynchronousServerSocketChannel;
import java.nio.channels.AsynchronousSocketChannel;
import java.nio.channels.CompletionHandler;
import java.nio.charset.Charset;
import java.util.concurrent.LinkedBlockingQueue;

/**
 * @author jiayq
 * @Date 2021-03-13
 */
public class AsyncSocketUtils {

    // 消息的编码
    private static final Charset CHARSET = Charset.forName("UTF-8");

    // 信息的队列。主要是用于读取回调和写入回调之间通信
    private static final LinkedBlockingQueue<Messager> msg = new LinkedBlockingQueue<>();

    // 通过类方法返回读取的回调
    public static CompletionHandler getReaderHandler() {
        return new ReaderHandler();
    }

    // 通过类方法返回写入的回调
    public static CompletionHandler getWriterHandler() {
        return new WriterHandler();
    }

    // 通过类方法返回接受的回调
    public static CompletionHandler getAcceptHandler() {
        return new AcceptHandler();
    }

    // 为什么没有连接回调?
    // 连接回调是客户端使用的,服务端不会用连接回调。
    // 这里存储的都是服务端回调
    // 为什么不把客户端用的回调也放在这里?
    // 存在同名问题。
    // 客户端也有写入,读取回调,客户端和服务端的回调有什么区别?
    // 区别很大,主要是逻辑不相同,无法复用

    private static class ReaderHandler implements CompletionHandler<Integer, AsynchronousSocketChannel> {

        // 读取回调的缓存区
        private ByteBuffer byteBuffer = ByteBuffer.allocate(2048);

        // 将读取回调的缓存区暴露出去
        public ByteBuffer getByteBuffer() {
            return this.byteBuffer;
        }

        @Override
        public void completed(Integer result, AsynchronousSocketChannel socketChannel) {
            // 如果有数据被读取
            if (result > 0) {
                // 将读取回调的缓存区的模式设置为读模式
                byteBuffer.flip();
                // 创建一个Messager的对象
                Messager messager = new Messager();
                try {
                    // 将Messager的对象放到队列中
                    msg.offer(messager = new Messager(((InetSocketAddress) socketChannel.getRemoteAddress()).getPort(), String.valueOf(CHARSET.decode(byteBuffer))));
                } catch (IOException e) {
                    e.printStackTrace();
                }
                // 获取添加了端口的返回值信息
                String message = messager.toString().trim();
                // 创建写入回调
                WriterHandler writerHandler = new WriterHandler();
                // 清空写入回调的缓存区
                writerHandler.getByteBuffer().clear();
                // 将消息设置到写入回调的缓存区
                writerHandler.getByteBuffer().put(message.getBytes());
                // 将写入回调的缓存区的指针设置到开头
                writerHandler.getByteBuffer().clear();
                // 调用写入
                socketChannel.write(writerHandler.getByteBuffer(), socketChannel, writerHandler);
            }
        }

        @Override
        public void failed(Throwable exc, AsynchronousSocketChannel socketChannel) {
            // 读取异常回调
            System.out.println(exc.getMessage());
        }
    }

    // 写入回调
    private static class WriterHandler implements CompletionHandler<Integer, AsynchronousSocketChannel> {

        // 写入回调的缓存区
        private ByteBuffer byteBuffer = ByteBuffer.allocate(2048);

        public ByteBuffer getByteBuffer() {
            return this.byteBuffer;
        }

        @Override
        public void completed(Integer result, AsynchronousSocketChannel socketChannel) {
            Messager messager;
            // 写入成功
            // 其实不需要消息队列的。
            // 缓存区中的信息和消息队列中的信息是完全相同的
            if (result > 0 && (messager = msg.poll()) != null) {
                // 控制台打印消息日志
                System.out.println(messager);
                // 如果连接还存在
                if (socketChannel.isOpen()) {
                    // 创建读取回调
                    ReaderHandler readerHandler = new ReaderHandler();
                    // 设置读取回调的缓存区
                    readerHandler.getByteBuffer().clear();
                    // 读取
                    socketChannel.read(readerHandler.getByteBuffer(), socketChannel, readerHandler);
                }
            }
        }

        @Override
        public void failed(Throwable exc, AsynchronousSocketChannel attachment) {
            // 读取异常的回调
            System.out.println(exc.getMessage());
        }
    }

    // 接受回调
    private static class AcceptHandler implements CompletionHandler<AsynchronousSocketChannel, AsynchronousServerSocketChannel> {

        @Override
        public void completed(AsynchronousSocketChannel result, AsynchronousServerSocketChannel serverSocketChannel) {
            // 接受成功
            // 接受成功的回调会自动返回异步的SocketChannel
            // 连接成功的回调,自动传入回调的是空
            if (serverSocketChannel.isOpen()) {
                // 如果服务端的AsynchronousServerSocketChannel还在,那么再次调用接受
                serverSocketChannel.accept(serverSocketChannel, this);
            }
            // 如果传入的连接不为空,而且连接还在
            if (result != null && result.isOpen()) {
                // 创建读取回调
                ReaderHandler readerHandler = new ReaderHandler();
                // 设置读取回调
                readerHandler.getByteBuffer().clear();
                // 调用异步的读取
                result.read(readerHandler.getByteBuffer(), result, readerHandler);
            }
        }

        @Override
        public void failed(Throwable exc, AsynchronousServerSocketChannel attachment) {
            // 接受异常的回调
            System.out.println(exc.getMessage());
        }
    }
}
到此,就完成了回音壁
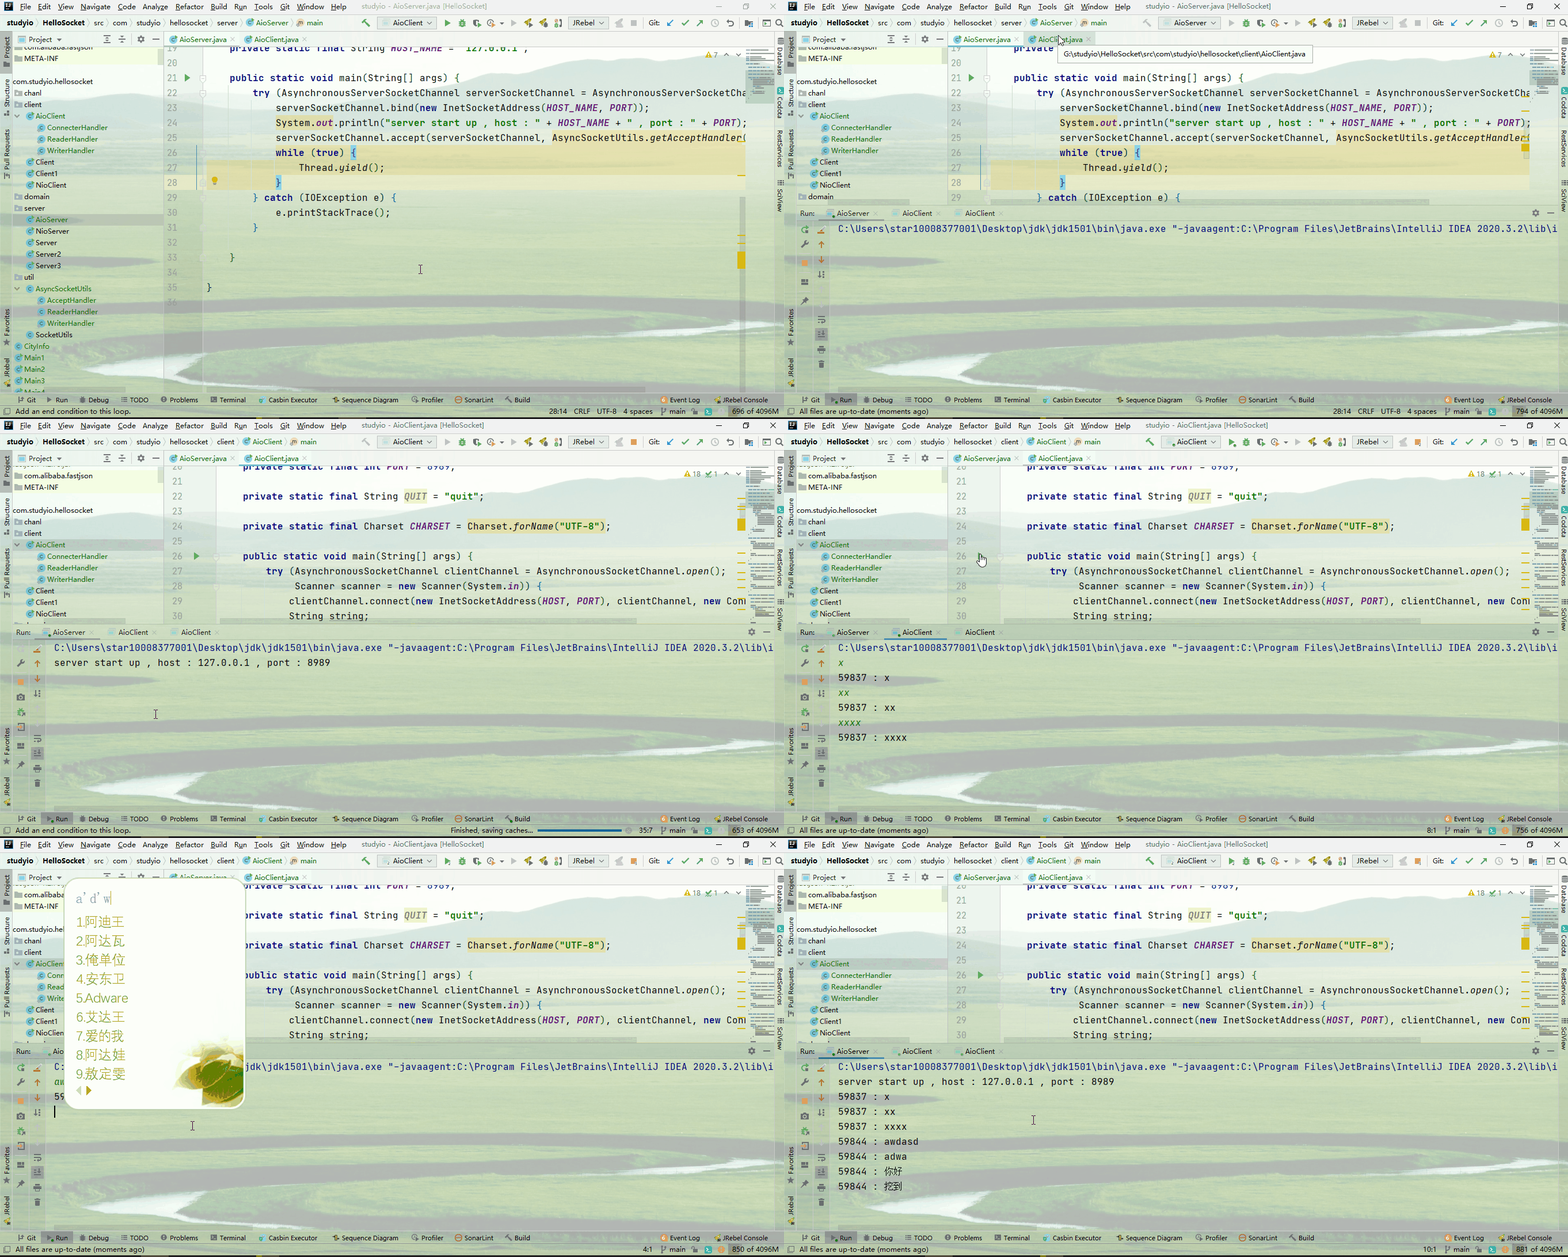
AIO 改写 NIO 项目 – 多人聊天室
通过前面的例子,我们在改写多人聊天室就比较简单了。
还是老套路,先写客户端。
1
2
3
4
5
6
7
8
9
10
11
12
13
14
15
16
17
18
19
20
21
22
23
24
25
26
27
28
29
30
31
32
33
34
35
36
37
38
39
40
41
42
43
44
45
46
47
48
49
50
51
52
53
54
55
56
57
58
59
60
61
62
63
64
65
66
67
68
69
70
71
72
73
74
75
76
77
78
79
80
81
82
83
84
85
86
87
88
89
90
91
92
93
94
95
96
97
98
99
100
101
102
103
104
105
106
107
108
109
110
111
112
113
114
115
116
117
118
119
120
121
122
123
124
125
126
127
128
129
130
131
132
133
134
135
136
137
138
139
140
141
142
143
144
145
146
147
148
149
150
151
152
153
154
155
156
157
158
159
160
161
162
163
164
165
166
167
168
169
170
171
172
173
174
175
176
177
178
179
180
181
182
183
184
185
186
187
188
189
190
191
192
193
package com.studyio.hellosocket.client;

import com.studyio.hellosocket.exce.QuitException;

import java.io.IOException;
import java.net.InetSocketAddress;
import java.nio.ByteBuffer;
import java.nio.channels.AsynchronousSocketChannel;
import java.nio.channels.CompletionHandler;
import java.nio.charset.Charset;
import java.util.Scanner;

/**
 * @author jiayq
 * @Date 2021-03-13
 */
public class AClient {

    // 服务器地址
    private static final String HOST = "127.0.0.1";

    // 服务端端口
    private static final int PORT = 8989;

    // 字节缓存大小
    private static final int SIZE = 2048;

    // 客户端退出关键词
    private static final String QUIT = "quit";

    // 信息传输编码
    private static final Charset CHARSET = Charset.forName("UTF-8");

    public static void main(String[] args) {
        // 使用jdk 7 的方式创建资源
        try (AsynchronousSocketChannel clientChannel = AsynchronousSocketChannel.open();
             Scanner scanner = new Scanner(System.in)) {
            // 建立连接
            clientChannel.connect(new InetSocketAddress(HOST, PORT), clientChannel, new ConnectHandler());
            String string;
            // 死循环
            while (true) {
                // 获取下一行输入
                string = scanner.nextLine();
                // 输入的信息不为空
                if (!string.trim().isEmpty()) {
                    // 创建客户端向服务端发送信息的处理器
                    WriteHandler writeHandler = new WriteHandler();
                    // 设置信息发送器的缓存为写模式
                    writeHandler.getByteBuffer().clear();
                    // 将控制台输入的信息写入信息发送器的缓存
                    writeHandler.getByteBuffer().put(string.getBytes());
                    // 将信息发送器的缓存的指针置为缓存开始地址
                    writeHandler.getByteBuffer().clear();
                    // 非阻塞调用信道发送信息
                    clientChannel.write(writeHandler.getByteBuffer(), clientChannel, writeHandler);
                }
                // 如果输入的是退出关键词
                if (QUIT.equals(string)) {
                    // 跳出死循环
                    break;
                }
            }
        } catch (IOException e) {
            // 发生io异常
            e.printStackTrace();
        } catch (QuitException e) {
            // 正常的退出异常
        }
    }

    // 连接器
    // 连接器有两个参数
    // 第一个是空的包装对象
    // 第二个是附加对象
    private static class ConnectHandler implements CompletionHandler<Void, AsynchronousSocketChannel> {

        @Override
        public void completed(Void result, AsynchronousSocketChannel attachment) {
            // 连接成功
            System.out.println("已经建立连接");
            // 创建信息接收器
            ReadHandler readHandler = new ReadHandler();
            // 初始化信息接收器的缓存
            readHandler.getByteBuffer().clear();
            // 使用信道接收信息
            attachment.read(readHandler.getByteBuffer(), attachment, readHandler);
        }

        @Override
        public void failed(Throwable exc, AsynchronousSocketChannel attachment) {
            // 连接过程中出现异常
            System.out.println("连接过程发生异常");
            // 抛出自定义异常
            throw new QuitException("发送信息异常");
        }
    }

    // 信息发送器
    // 信息发送器有两个参数
    // 第一个是发送器发送的字节数
    // 字节数小于0表示连接已断开
    // 字节数等于0表示空数据
    // 字节数大于0表示成功发送数据,发送的数据的字节数就是第一个参数
    // 第二个参数是附加对象
    private static class WriteHandler implements CompletionHandler<Integer, AsynchronousSocketChannel> {

        // 信息发送器的缓存
        private ByteBuffer byteBuffer = ByteBuffer.allocate(SIZE);

        // 提供其他对象访问信息发送器的缓存
        public ByteBuffer getByteBuffer() {
            return this.byteBuffer;
        }

        @Override
        public void completed(Integer result, AsynchronousSocketChannel attachment) {
            // 连接已经断开
            if (result < 0) {
                System.out.println("连接已断开");
                // 抛出自定义异常,结束程序
                throw new RuntimeException("连接已断开");
            } else if (result == 0) {
                // 发送了空数据
                System.out.println("传输了空数据");
            } else {
                // 成功发送了信息
                // 将信息发送器的缓存设置为读模式
                byteBuffer.position(result);
                byteBuffer.flip();
                // 读取发送的信息,并打印到控制台
                System.out.println("发送信息 : " + CHARSET.decode(byteBuffer).toString().trim());
            }
        }

        @Override
        public void failed(Throwable exc, AsynchronousSocketChannel attachment) {
            // 发送信息发生异常
            System.out.println("发送信息异常");
            // 抛出自定义异常,结束客户端
            throw new QuitException("发送信息异常");
        }
    }

    // 信息接收器
    // 信息接收器有两个参数
    // 第一个参数是接受的字节数
    // 字节数小于0表示连接已经断开
    // 字节数等于0表示接收到空数据
    // 字节数大于0表示接收到数据的字节数
    // 第二个参数是附加对象
    private static class ReadHandler implements CompletionHandler<Integer, AsynchronousSocketChannel> {

        // 信息接收器的缓存
        private ByteBuffer byteBuffer = ByteBuffer.allocate(SIZE);

        // 提供其他访问信息接收器的缓存
        public ByteBuffer getByteBuffer() {
            return this.byteBuffer;
        }

        @Override
        public void completed(Integer result, AsynchronousSocketChannel attachment) {
            // 连接已经断开
            if (result < 0) {
                System.out.println("连接已断开");
                // 抛出自定义异常,结束程序
                throw new QuitException("连接已断开");
            } else if (result == 0) {
                // 接收到了空数据
                System.out.println("收到了空数据");
            } else {
                // 将信息接收器的缓存设置为读模式
                // 读取指定的字节数
                byteBuffer.position(result);
                byteBuffer.flip();
                // 转码缓存中的数据,并输出到控制台
                System.out.println("收到信息 : " + CHARSET.decode(byteBuffer).toString().trim());
                // 初始化信息接收器的缓存
                byteBuffer.clear();
                // 调用信道的读取操作
                attachment.read(byteBuffer, attachment, this);
            }
        }

        @Override
        public void failed(Throwable exc, AsynchronousSocketChannel attachment) {
            // 接收信息异常
            System.out.println("接收信息异常");
        }
    }

}
对于客户端,客户端需要一直等待客户输入,在等待客户输入的同时,还要随时接收服务端的信息。
因此,对于客户端,可以简单的认为是两个线程,一个线程一直在读取,另一个线程等待用户输入,用户输入后,将信息发送到服务端。
所以,对于客户端来说,每次读取完成,就需要等待下一次读取。而写入信息,写入完成就结束了。
服务端
1
2
3
4
5
6
7
8
9
10
11
12
13
14
15
16
17
18
19
20
21
22
23
24
25
26
27
28
29
30
31
32
33
34
35
36
37
38
39
40
41
42
43
44
45
46
47
48
49
50
51
52
53
54
55
56
57
58
59
60
61
62
63
64
65
66
67
68
69
70
71
72
73
74
75
76
77
78
79
80
81
82
83
84
85
86
87
88
89
90
91
92
93
94
95
96
97
98
99
100
101
102
103
104
105
106
107
108
109
110
111
112
113
114
115
116
117
118
119
120
121
122
123
124
125
126
127
128
129
130
131
132
133
134
135
136
137
138
139
140
141
142
143
144
145
146
147
148
149
150
151
152
153
154
155
156
157
158
159
160
161
162
163
164
165
166
167
168
169
170
171
172
173
174
175
176
177
178
179
180
181
182
183
184
185
186
187
188
189
190
191
192
193
194
195
196
197
198
199
200
201
202
203
204
205
206
207
208
209
210
211
212
213
214
215
216
217
218
219
220
221
222
223
224
225
226
227
228
229
230
231
232
233
234
235
236
237
238
239
240
241
242
243
244
245
246
247
248
249
250
251
252
253
254
255
256
257
package com.studyio.hellosocket.server;

import java.io.IOException;
import java.net.InetSocketAddress;
import java.nio.ByteBuffer;
import java.nio.channels.AsynchronousServerSocketChannel;
import java.nio.channels.AsynchronousSocketChannel;
import java.nio.channels.CompletionHandler;
import java.nio.charset.Charset;
import java.nio.charset.StandardCharsets;
import java.util.ArrayList;
import java.util.Collections;
import java.util.Iterator;
import java.util.List;

/**
 * @author jiayq
 * @Date 2021-03-08
 */
public class AioServer {

    // 服务端监听的端口
    private static final int PORT = 8989;

    // 客户端退出的关键词
    private static final String QUIT = "quit";

    // 服务端的地址
    private static final String HOST_NAME = "127.0.0.1";

    // 信息读取器和发送器的缓存大小
    private static final int SIZE = 2048;

    // 信息传输的编码方式
    private static final Charset CHARSET = Charset.forName("UTF-8");

    // 已经连接到服务端的客户端信道
    private static List<AsynchronousSocketChannel> allChannels = Collections.synchronizedList(new ArrayList<>());

    public static void main(String[] args) {
        // 使用jdk 7 的方式,创建资源
        try (AsynchronousServerSocketChannel serverSocketChannel = AsynchronousServerSocketChannel.open()) {
            // 服务端连接绑定端口
            serverSocketChannel.bind(new InetSocketAddress(HOST_NAME, PORT));
            // 控制台输出提示信息
            System.out.println("server start up , host : " + HOST_NAME + " , port : " + PORT);
            // 服务端对象非阻塞调用接受
            // 使用的是接受的处理器
            serverSocketChannel.accept(serverSocketChannel, new AcceptHandler());
            // 主线程存活,等待处理器执行,直到主线程被关闭
            while (true) {
                // 主线程什么都不做,直接让出资源
                Thread.yield();
            }
        } catch (IOException e) {
            // io异常
            e.printStackTrace();
        }

    }

    // 接受处理器
    // 接受处理器有两个参数:
    // 第一个是接受后建立的连接对象
    // 第二个是附加对象
    // 附加对象是服务端等待接受的服务端连接对象
    private static class AcceptHandler implements CompletionHandler<AsynchronousSocketChannel, AsynchronousServerSocketChannel> {

        @Override
        public void completed(AsynchronousSocketChannel result, AsynchronousServerSocketChannel attachment) {
            // 接受成功后,如果建立的连接对象不为空,且连接对象还未关闭
            if (result != null && result.isOpen()) {
                try {
                    // 输出控制台提示信息
                    System.out.println("接受了连接 : " + result.getRemoteAddress().toString());
                } catch (IOException e) {
                    e.printStackTrace();
                }
                // 将建立的连接加入到建立连接的列表中
                allChannels.add(result);
                // 创建信息读取器
                ReadHandler readHandler = new ReadHandler();
                // 初始化信息读取器
                readHandler.getByteBuffer().clear();
                // 信道调用异步读取
                result.read(readHandler.getByteBuffer(), result, readHandler);
            }
            // 如果服务端连接对象不为空而且服务端连接对象还未关闭
            if (attachment != null && attachment.isOpen()) {
                // 服务端连接对象调用非阻塞接受
                // 等待其他客户端连接
                attachment.accept(attachment, this);
            }
        }

        @Override
        public void failed(Throwable exc, AsynchronousServerSocketChannel attachment) {
            // 连接出现异常
            System.out.println("接受连接异常");
        }
    }

    // 服务端信息接收器
    // 信息接收器有两个参数
    // 第一个参数是字节数
    // 字节数是接收器接受的数据的字节数量
    // 第二个是附加对象,一般是服务端和客户端建立的连接对象
    private static class ReadHandler implements CompletionHandler<Integer, AsynchronousSocketChannel> {

        // 信息接收器的缓存
        private ByteBuffer byteBuffer = ByteBuffer.allocate(SIZE);

        // 提供其他程序访问信息接收器的缓存
        public ByteBuffer getByteBuffer() {
            return this.byteBuffer;
        }

        @Override
        public void completed(Integer result, AsynchronousSocketChannel attachment) {
            // 信息接收成功
            // 如果字节数小于0,表示连接已经关闭
            if (result < 0) {
                System.out.println("连接已经关闭");
                // 将当前连接从全部的连接对象中移除
                Iterator<AsynchronousSocketChannel> iterator = allChannels.iterator();
                while (iterator.hasNext()) {
                    if (iterator.next().equals(attachment)) {
                        iterator.remove();
                    }
                }
            } else if (result == 0) {
                // 接收到了空数据
                System.out.println("接收到了空信息");
            } else {
                // 否则接收到信息,接收的字节数就是
                // 转换为读模式
                // 读取指定的字节数
                byteBuffer.position(result);
                byteBuffer.flip();
                try {
                    System.out.println(attachment.getRemoteAddress().toString() + " : " + CHARSET.decode(byteBuffer).toString().trim());
                } catch (IOException e) {
                    e.printStackTrace();
                }
                // 重复读取
                byteBuffer.position(result);
                byteBuffer.flip();
                // 判断是否是退出关键词
                // 如果是退出关键词,那么将当前连接从全部的连接中去除
                // 因为当服务端收到退出的关键词时,客户端程序可能已经结束了
                // 此时在给连接中写消息,会发生异常
                if (QUIT.equals(CHARSET.decode(byteBuffer).toString().trim())) {
                    Iterator<AsynchronousSocketChannel> iterator = allChannels.iterator();
                    while (iterator.hasNext()) {
                        if (iterator.next().equals(attachment)) {
                            iterator.remove();
                        }
                    }
                }
                // 遍历全部有效的连接,将收到的信息广播出去
                allChannels.stream().forEach(x -> {
                    // 创建信息发送器
                    WriteHandler writeHandler = new WriteHandler();
                    // 初始化信息发送器的缓存区
                    writeHandler.getByteBuffer().clear();
                    // 重复读取
                    // 将待发送的信息取出
                    byteBuffer.position(result);
                	byteBuffer.flip();
                    try {
                        // 设置信息发送器的缓存区中的信息
                        // 这里可能会有问题
                        // 我们的信息缓存区是2048,假设信息读取器接收到了2048个字节的数据,这里在往入写就会出现缓存区溢出的异常
                        // 因为接收到的信息需要加上发送者的信息进行广播的
                        writeHandler.getByteBuffer().put((attachment.getRemoteAddress().toString() + " : " + CHARSET.decode(byteBuffer).toString().trim()).getBytes(StandardCharsets.UTF_8));
                    } catch (IOException e) {
                        e.printStackTrace();
                    }
                    // 初始化信息发送器的缓存区
                    writeHandler.getByteBuffer().clear();
                    // 连接信道非阻塞调用信息发送
                    x.write(writeHandler.getByteBuffer(), attachment, writeHandler);
                });
                // 当信息广播完毕后,初始化信息读取器的缓存区
                byteBuffer.clear();
                // 调用连接信道的非阻塞读
                attachment.read(byteBuffer, attachment, this);
            }
        }

        @Override
        public void failed(Throwable exc, AsynchronousSocketChannel attachment) {
            System.out.println("接收信息发生异常");
            // 如果当前连接在读取信息的时候发生了异常,那么将当前连接从全部的连接中取出
            Iterator<AsynchronousSocketChannel> iterator = allChannels.iterator();
            while (iterator.hasNext()) {
                if (iterator.next().equals(attachment)) {
                    iterator.remove();
                }
            }
        }
    }

    // 服务端信息发送器
    // 两个参数
    // 第一个是成功发送的字节数
    // 和读取器相同,字节数小于0表示连接已经关闭,字节数等于0表示发送了空数据,字节数大于0表示成功发送的字节数
    // 第二个是附加对象,一般附加对象是连接本身,用于重复发送
    // 但是在本例中,附加对象可以不要,因为服务端是由读触发写的
    private static class WriteHandler implements CompletionHandler<Integer, AsynchronousSocketChannel> {

        // 信息发送器的缓存区
        private ByteBuffer byteBuffer = ByteBuffer.allocate(SIZE);

        // 提供其他对象访问缓存的方法
        public ByteBuffer getByteBuffer() {
            return this.byteBuffer;
        }

        @Override
        public void completed(Integer result, AsynchronousSocketChannel attachment) {
            // 信息发送成功
            // 字节数小于0表示连接已经关闭
            if (result < 0) {
                System.out.println("连接已经关闭");
                // 连接已经关闭,那么将当前连接从全部连接列表中移除
				Iterator<AsynchronousSocketChannel> iterator = allChannels.iterator();
            	while (iterator.hasNext()) {
                	if (iterator.next().equals(attachment)) {
                    	iterator.remove();
                	}
            	}
            } else if (result == 0) {
                // 字节数等于0表示发送了空数据
                System.out.println("发送了空信息");
            } else {
                // 字节数大于0表示成功发送的字节数
                byteBuffer.position(result);
                byteBuffer.flip();
                System.out.println("发送信息 : " + CHARSET.decode(byteBuffer).toString().trim());
            }
        }

        @Override
        public void failed(Throwable exc, AsynchronousSocketChannel attachment) {
            System.out.println("发送信息发生异常");
            // 信息发送异常,及时清理列表中不可用的连接
            Iterator<AsynchronousSocketChannel> iterator = allChannels.iterator();
            while (iterator.hasNext()) {
                if (iterator.next().equals(attachment)) {
                    iterator.remove();
                }
            }
        }
    }

}
不管是客户端还是服务端,都具有接受信息的功能,但是客户端和服务端都无法预知何时需要接受信息,因此,对于服务端和客户端,接受信息必须是随机的,也就是重复读取。当信息读取完成后,必须马上准备下一次读取。
因此,ReadHandler中,附加信息是连接信道本身,当本次信息读取成功后,必须立刻调用信道的非阻塞读,为下一次读取做准备。
在客户端,信息的发送是由用户决定的,用户输入信息,客户端就需要发送。所以,信息的发送时由主线程控制的。
在服务端,信息的发送是由信息的接收决定的,当接收到信息后,就需要将信息附加发送者,然后广播出去,而且也不需要重复写。
整个程序的运行比NIO流畅多了
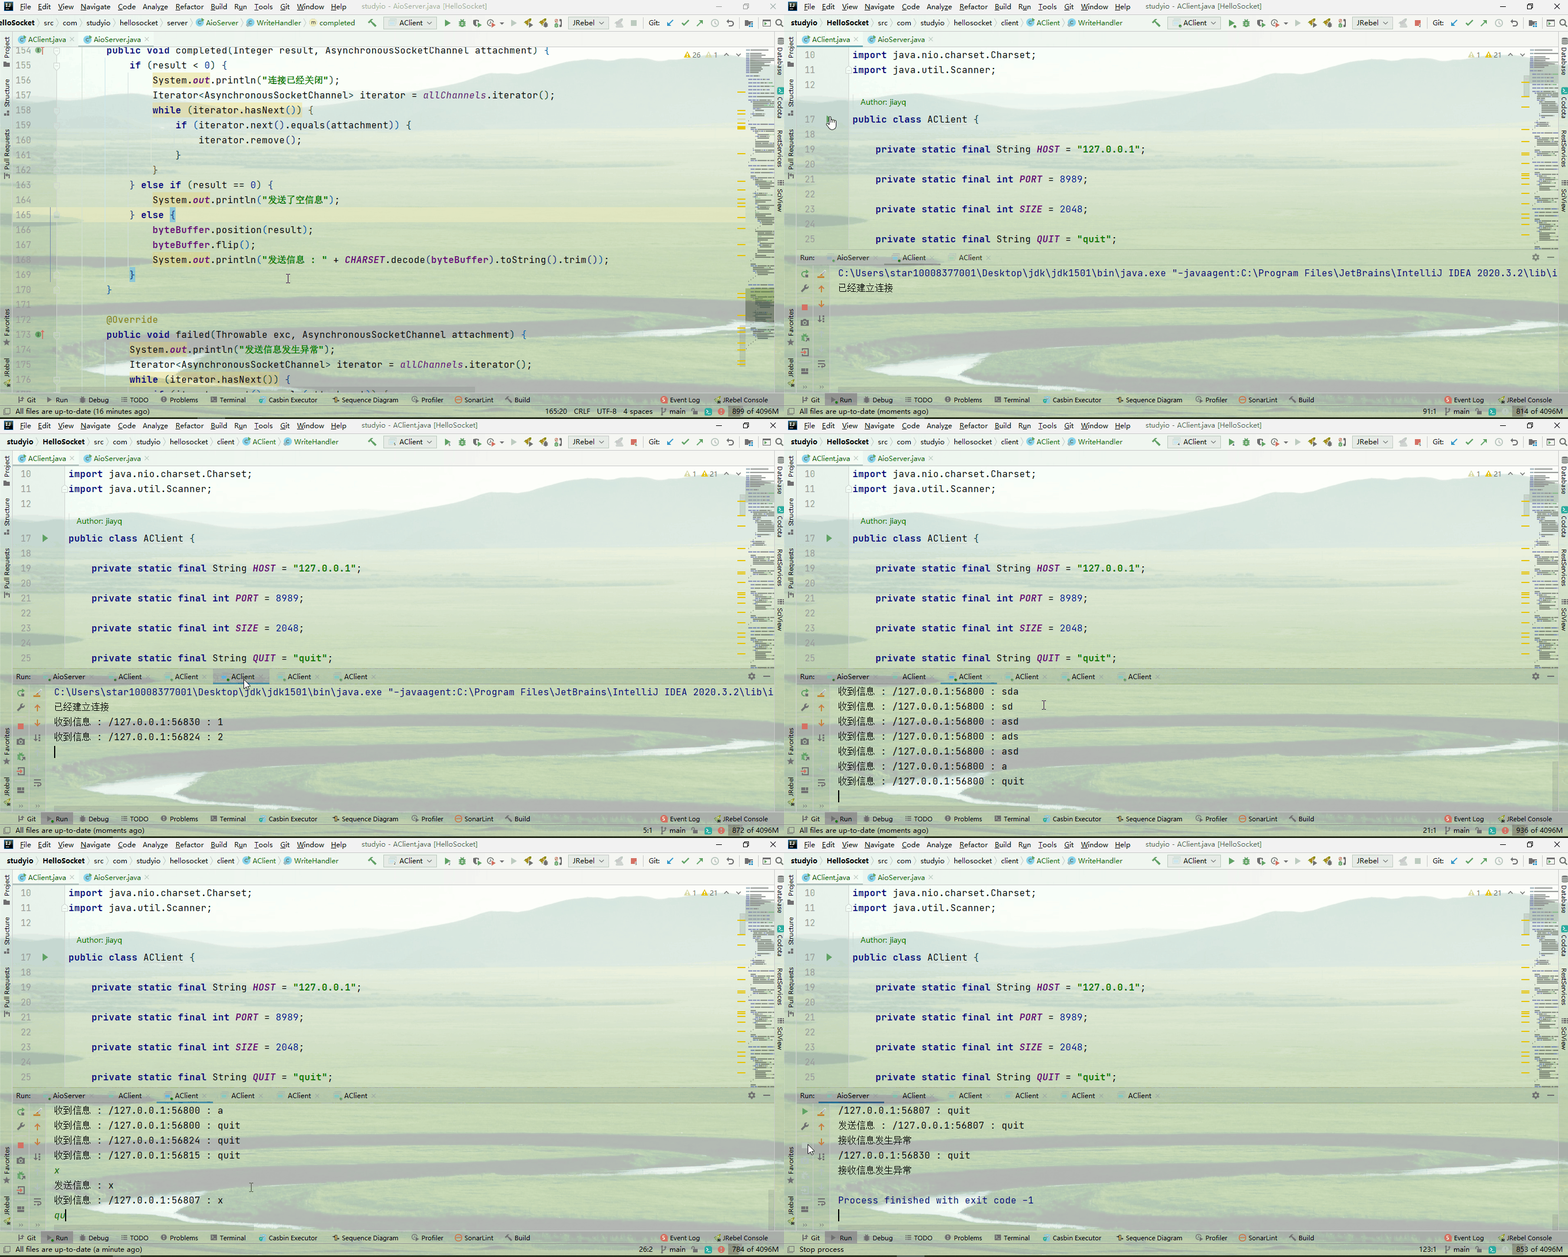
改写前 VS 改写后
说实话,AIO比NIO较难操作,因为在AIO中需要定位缓存区的位置,正确的决定读取的时机,这一点比较难。也是之前不知道设计的巧妙,缓存区的位置就是读取写入的第一个返回值。
第二个难点就是AIO中,因为都是异步调用的,因此,你在异步调用的时候,不知道上次调用是否完成,这也是为什么我们要把调用写在调用成功的回调方法中,只有上次调用成功了,才能再次发起调用。
第三个难点就是程序的顺序性,和平时能遇到的同步的方法调用不同,因为异步的,所以在设计程序的顺序上,就需要格外注意,一不小心,就会出现重复调用的异常。
第四个难点就是调试,因为不管是信息的发送还是读取,都有自己的缓存区,而当我们在调试窗口中查看一次信息,就会修改缓存区中的内容,想让程序再次接着执行,就需要将缓存区进行恢复,这一点,说实话,比较别扭。
OK,说了这么多的缺点,有没有优点呢。有,性能好,速度快。这是最核心的优点,不是吗。
扩展
在AIO中,我尽可能的不去提多线程编程,但是实际上,异步编程中每一个Socket就会属于一个异步通道组AsyncChannelGroup。
在同一个组中,资源是共享的,包括通道组中的线程池。
在创建异步Socket时,可以指定一个通道组,也可以使用默认的通道组。
通道组是系统级别的,操作系统有附加的支持,包括操作系统通知调用Handle。
我们将我们的程序打个断点,然后进行调试
这是服务端的:
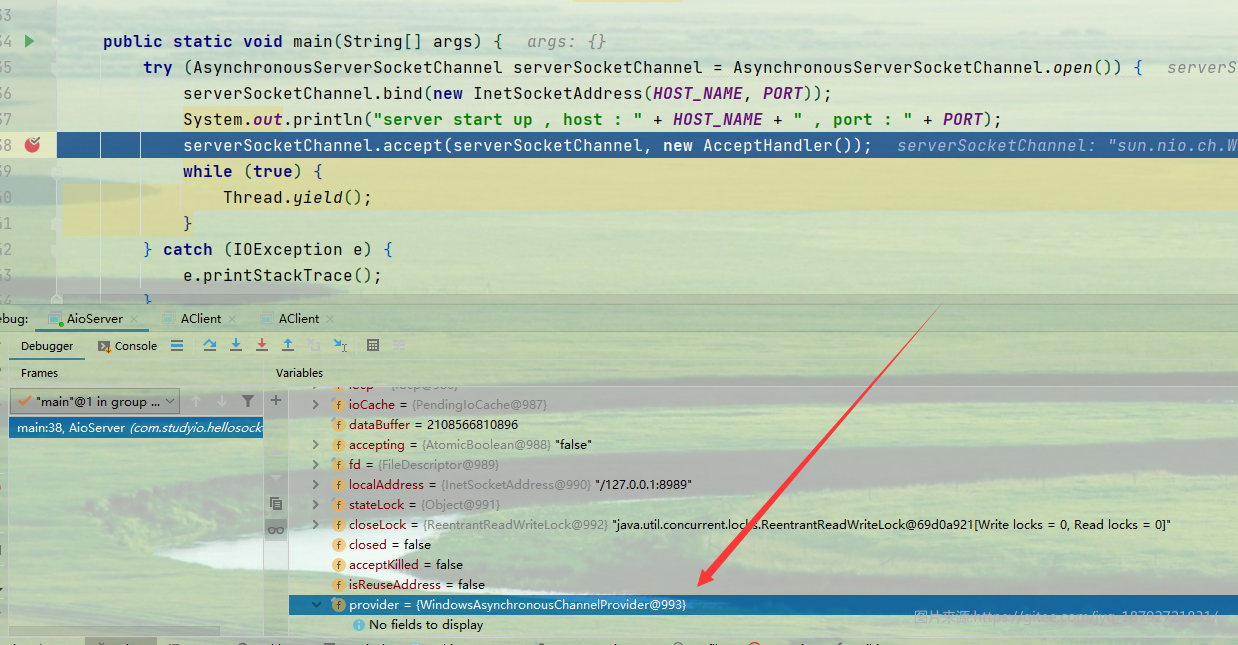
这是客户端的
[图片]
我们只要像这样就能使用自定义的通道组了
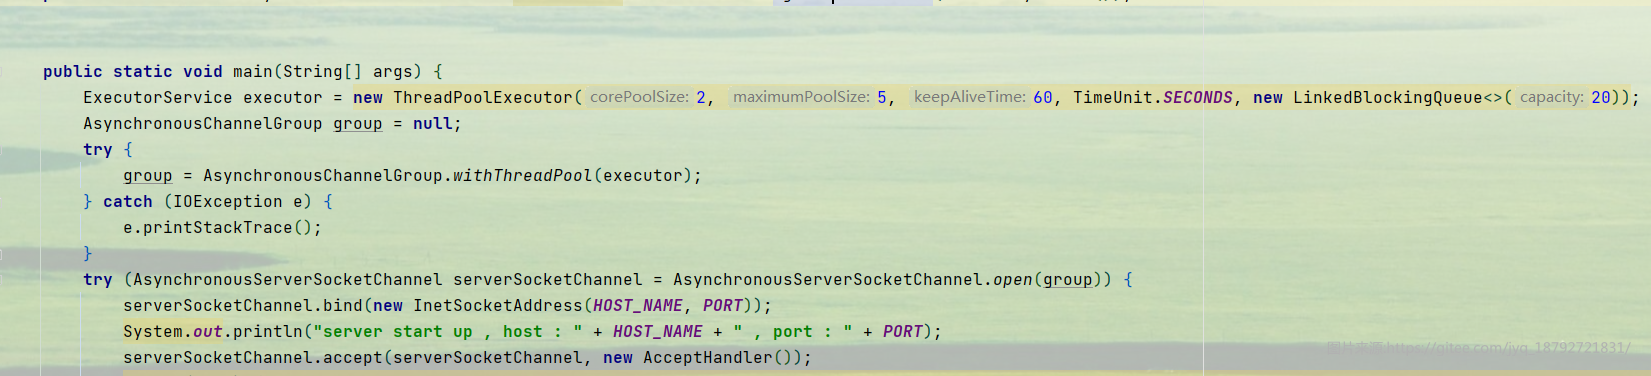
在里面我们创建了一个初始2个线程,最大5个线程,每个线程被使用之后会等待60秒,如果超过60秒没有新的任务,那么超出2个线程的其他线程就会被销毁,我们创建的等待队列是20个,也就是说,我们创建了一个25并发的线程池。
然后使用创建的线程池创建通道组,最后在使用open方法的时候,将自定义的通道组传入即可。
其他的和使用默认的通道组是一样的。
默认的通道组是这样定义的
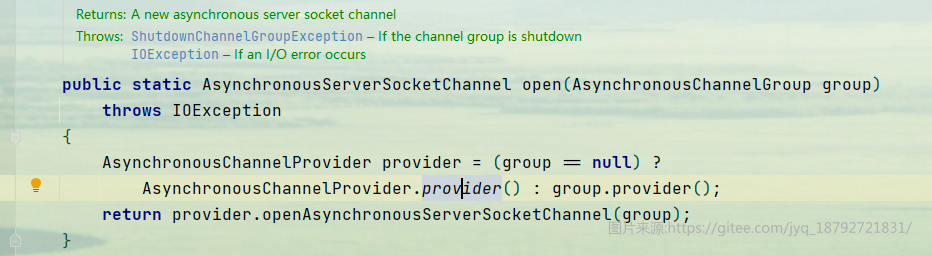
最终调用的是
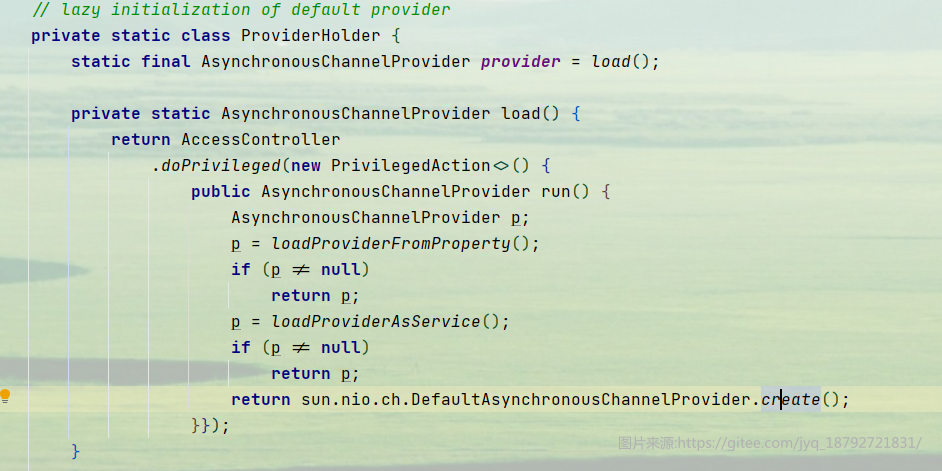
嗯,说实话,看不懂,这个不深究了。
总结
到了这里,这个IO总算是完成了。
说实话,IO的部分还是很多的,而且为了兼容不同的需求,有很多的类。
总体上分为文件IO和网络IO。为了适配各种各样的文件IO和网络IO,衍生出了很多和IO有关的类:InputStream,OutputStream…
不管是网络IO还是文件IO都涉及到了编码这个问题,编码是一个棘手的问题,编码和解码不一致,就会造成信息失真。
网络IO中有BIO,NIO,NIO+selector,AIO,涉及到了多线程编程和异步编程。
对于一直使用同步调用方法的人来说,刚接触异步编程,可能会有些不适应。但是当你了解了异步编程的工作原理之后,就会发现和同步编程没有什么区别,只是思维方式的不同。
在学习IO中,贯穿整个文章的例子是聊天室,从一开始的单线程,单客户端,到多线程多客户端,到单线程多客户端,到selector多路复用,到异步编程。
聊天室还是聊天室,但是实现的方式却很不相同。
我想,这就是编程吧。